> For the complete documentation index, see [llms.txt](https://docs.shoppego.my/tutorials/llms.txt). Markdown versions of documentation pages are available by appending `.md` to page URLs; this page is available as [Markdown](https://docs.shoppego.my/tutorials/en/products/physical-product.md).

# Physical Product

A physical product is a product that has a physical form such as clothes, gadgets, and others.

To add your product to the Shoppego system, you can enter your product first.

## Part 1 : Upload Product <a href="#masukkan-produk" id="masukkan-produk"></a>

1\. Log in to your Shoppego account -> Click on **Products** -> **Add product**

![](https://3359028955-files.gitbook.io/~/files/v0/b/gitbook-x-prod.appspot.com/o/spaces%2F-Lh09fNwqqta5Vj6Wr8p%2Fuploads%2Fgit-blob-53461071ff48a4029ba2b740c26af24770f2b49a%2FJVCockxjBTFJq4UGqL3z.png?alt=media)

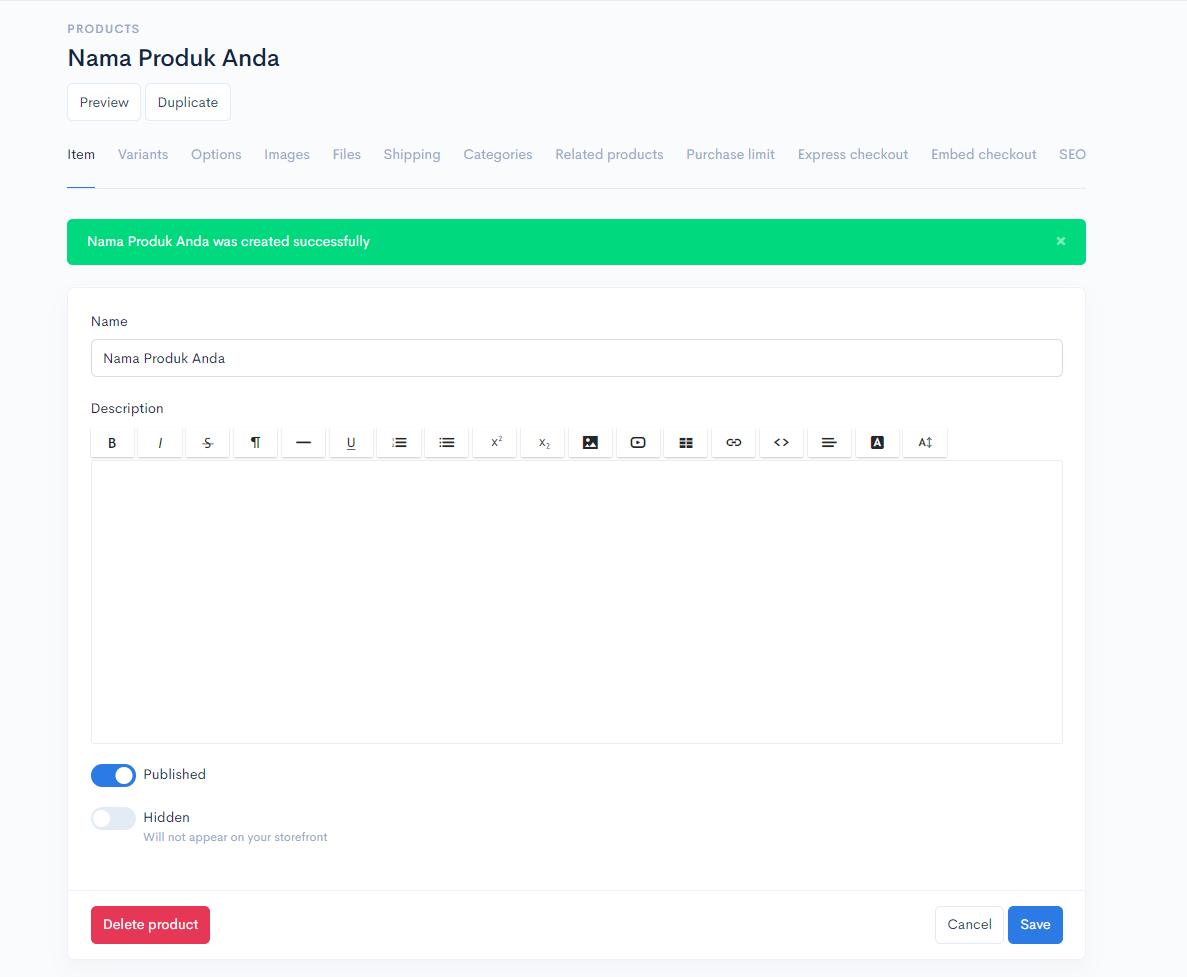
2\. You will be taken to the product pages. Here you need to enter your product details such as:

### 1 : Product Information

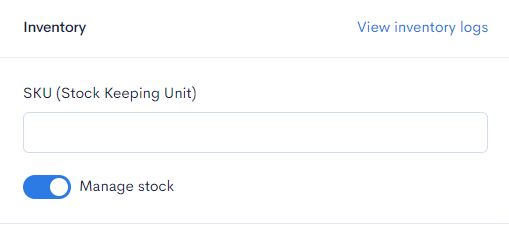
<table><thead><tr><th width="207">Field</th><th>Explanation</th></tr></thead><tbody><tr><td><strong>Name</strong></td><td><strong>Your product name</strong></td></tr><tr><td><strong>Description</strong></td><td><strong>Description of your product (Such as size, color, etc.)</strong></td></tr><tr><td><strong>Categories</strong></td><td><strong>Categories for the product (By default our system will select a featured category for each new product you create)</strong></td></tr><tr><td><strong>Price</strong></td><td><strong>The promo price of your product or the price that your customer will play during checkout</strong></td></tr><tr><td><strong>Compare at price</strong></td><td><strong>The original price of your product</strong></td></tr><tr><td><strong>Manage stock</strong></td><td><strong>You need to enable this function if your product has a certain quantity.</strong></td></tr><tr><td><strong>SKU (Stock Keeping Unit)</strong></td><td><strong>You can use this function if you want to monitor the performance of your product using SKUs instead of variants names</strong></td></tr><tr><td><strong>Stock</strong></td><td><strong>Enter the quantity of your product at your Default store location (If you enable the Manage stock function)</strong></td></tr><tr><td><strong>Edit locations</strong></td><td><strong>You can click on this text if you want to turn off this stock at certain locations</strong></td></tr><tr><td><strong>Published</strong></td><td><strong>Make sure you enable this function so that your product will be visible on your website.</strong></td></tr><tr><td><strong>Require Shipping or Pickup</strong></td><td><strong>Enable this function if the product you are selling requires shipping.</strong></td></tr><tr><td><strong>Hidden</strong></td><td><strong>If you want to hide your product from customers and only share the product with certain people you can enable this function.</strong></td></tr></tbody></table>

When done you can click the **Save** button.

<figure><img src="https://3359028955-files.gitbook.io/~/files/v0/b/gitbook-x-prod.appspot.com/o/spaces%2F-Lh09fNwqqta5Vj6Wr8p%2Fuploads%2Fgit-blob-dd6185ae1081e6d57383c3a3a64b78608f75ecb7%2FV7sxg1fqwsaZers6uefX.png?alt=media" alt=""><figcaption></figcaption></figure>

## Part 2 : Inventory

### 1. View Inventory Logs

{% hint style="info" %}
\*\*<mark style="color:red;">**Note**</mark>: The **SKU section** is for **monitoring data for your product** and <mark style="color:red;">**not**</mark>**&#x20;for updating stock.**
{% endhint %}

In this section, you can view changes or track the quantity made in the product stock section.

1. Click on **view inventory logs**.

<figure><img src="https://3359028955-files.gitbook.io/~/files/v0/b/gitbook-x-prod.appspot.com/o/spaces%2F-Lh09fNwqqta5Vj6Wr8p%2Fuploads%2Fgit-blob-9ab491cf66176dc1ce2c863265e87a987c14fd7f%2FZhWoo5AbRIo4a8qW30Kx.png?alt=media" alt=""><figcaption></figcaption></figure>

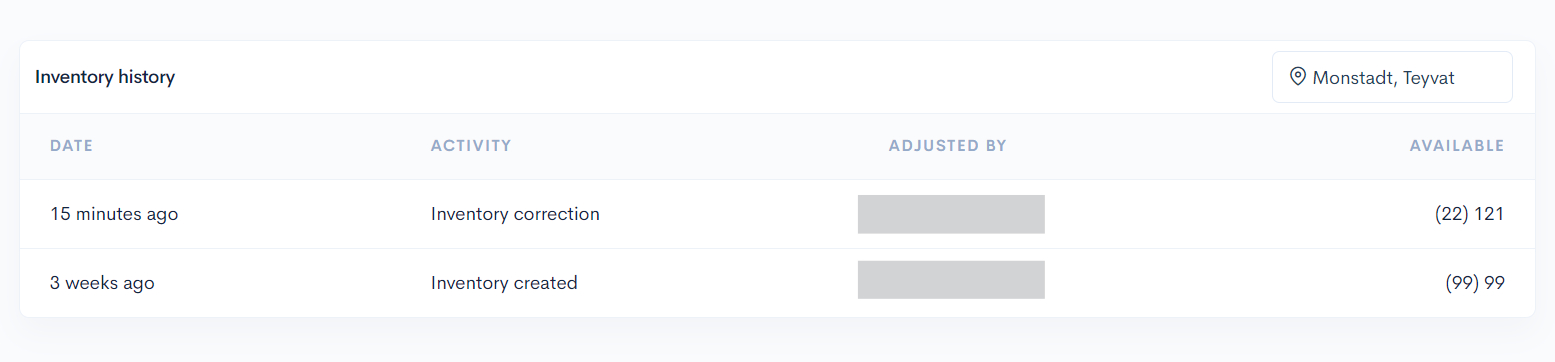
2. In this section, all changes made to the product stock quantity will be recorded.

<figure><img src="https://3359028955-files.gitbook.io/~/files/v0/b/gitbook-x-prod.appspot.com/o/spaces%2F-Lh09fNwqqta5Vj6Wr8p%2Fuploads%2Fgit-blob-6066b6ecd3188e201905fdbb278951be8d64b167%2F6BbhvSW3EFgyg9090m10.png?alt=media" alt=""><figcaption></figcaption></figure>

<table><thead><tr><th width="143">Field</th><th>Description</th></tr></thead><tbody><tr><td><strong>Address</strong></td><td><strong>You can change the address in this section to view the logs based on location.</strong></td></tr><tr><td><strong>Date</strong></td><td><strong>Each change made will have a date recorded.</strong></td></tr><tr><td><strong>Activity</strong></td><td><strong>Refers to the thing you did when changing stock quantity.</strong></td></tr><tr><td><strong>Adjusted by</strong></td><td><strong>Refers to the person who made the change to the stock.</strong></td></tr><tr><td><strong>Available</strong></td><td><strong>Referring to the latest stock value.</strong></td></tr></tbody></table>

### 2. Product Stock

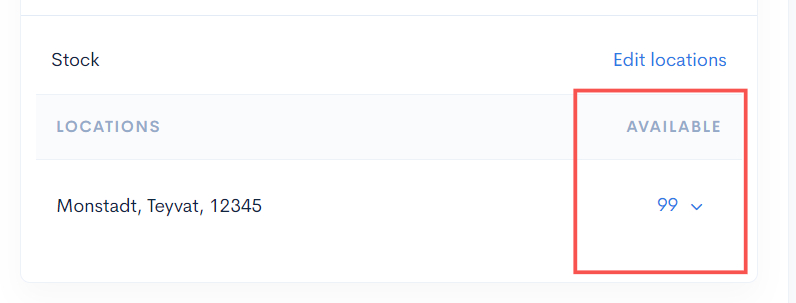
1. To **add product stock**, you need to enter it in the space provided. You only need to **click on the dropdown.**

<figure><img src="https://3359028955-files.gitbook.io/~/files/v0/b/gitbook-x-prod.appspot.com/o/spaces%2F-Lh09fNwqqta5Vj6Wr8p%2Fuploads%2Fgit-blob-1fad8b291a03018374043ed7b05876b698e2f220%2FwdOygixkmnD7w13SxKh8.jpg?alt=media" alt=""><figcaption></figcaption></figure>

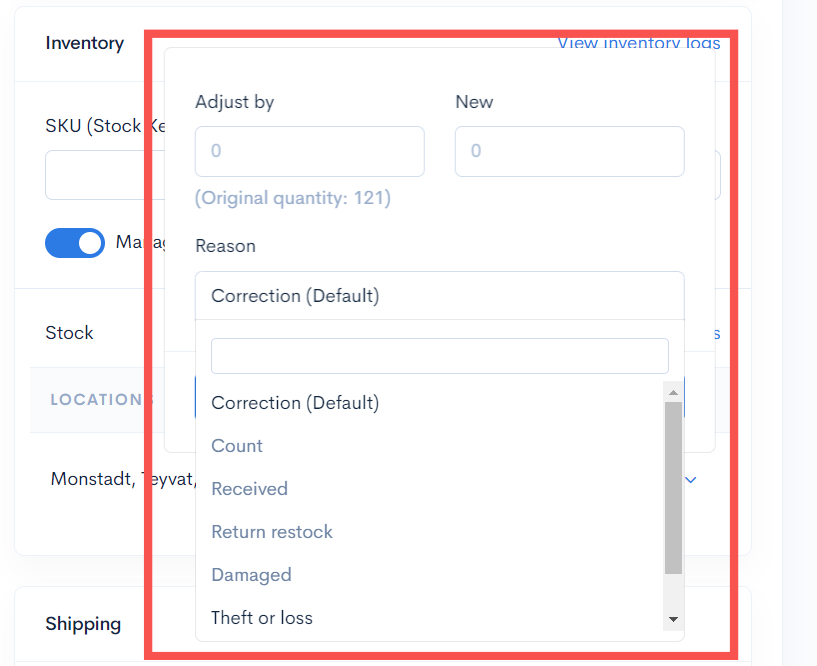
2. After that, you can **select the reason or information** related to the change in your product stock.

<figure><img src="https://3359028955-files.gitbook.io/~/files/v0/b/gitbook-x-prod.appspot.com/o/spaces%2F-Lh09fNwqqta5Vj6Wr8p%2Fuploads%2Fgit-blob-60bafad6dbdd3c3b81384ebb3c4a0ec8d1ab840e%2FYu8F9hTI0aZtbWbDX3aQ.jpg?alt=media" alt=""><figcaption></figcaption></figure>

3. You will see the latest updated value for your product stock.

{% hint style="info" %}
If the Manage Stock button is not turned on, your product will be considered to have unlimited stock.
{% endhint %}

<figure><img src="https://3359028955-files.gitbook.io/~/files/v0/b/gitbook-x-prod.appspot.com/o/spaces%2F-Lh09fNwqqta5Vj6Wr8p%2Fuploads%2Fgit-blob-2e35f22571913bd16ca4d9eaa40e03756875a778%2FFCPnWMw1Hexr5r6teGsR.png?alt=media" alt=""><figcaption></figcaption></figure>

4. If you press the **View Inventory Logs button**, you will see a list of information regarding the changes to your product stock.

<figure><img src="https://3359028955-files.gitbook.io/~/files/v0/b/gitbook-x-prod.appspot.com/o/spaces%2F-Lh09fNwqqta5Vj6Wr8p%2Fuploads%2Fgit-blob-e198d78eeb2e8610786834220d9ef4fa50947f41%2FU4SfKlNeluUWCmDESHTU.jpg?alt=media" alt=""><figcaption></figcaption></figure>

## Part 3 : Product Image

Once you have entered your product details, you can upload a picture for that product.

{% hint style="success" %}
The **supported image file extensions** are **jpg, jpeg, png, gif,** and **webp** only.
{% endhint %}

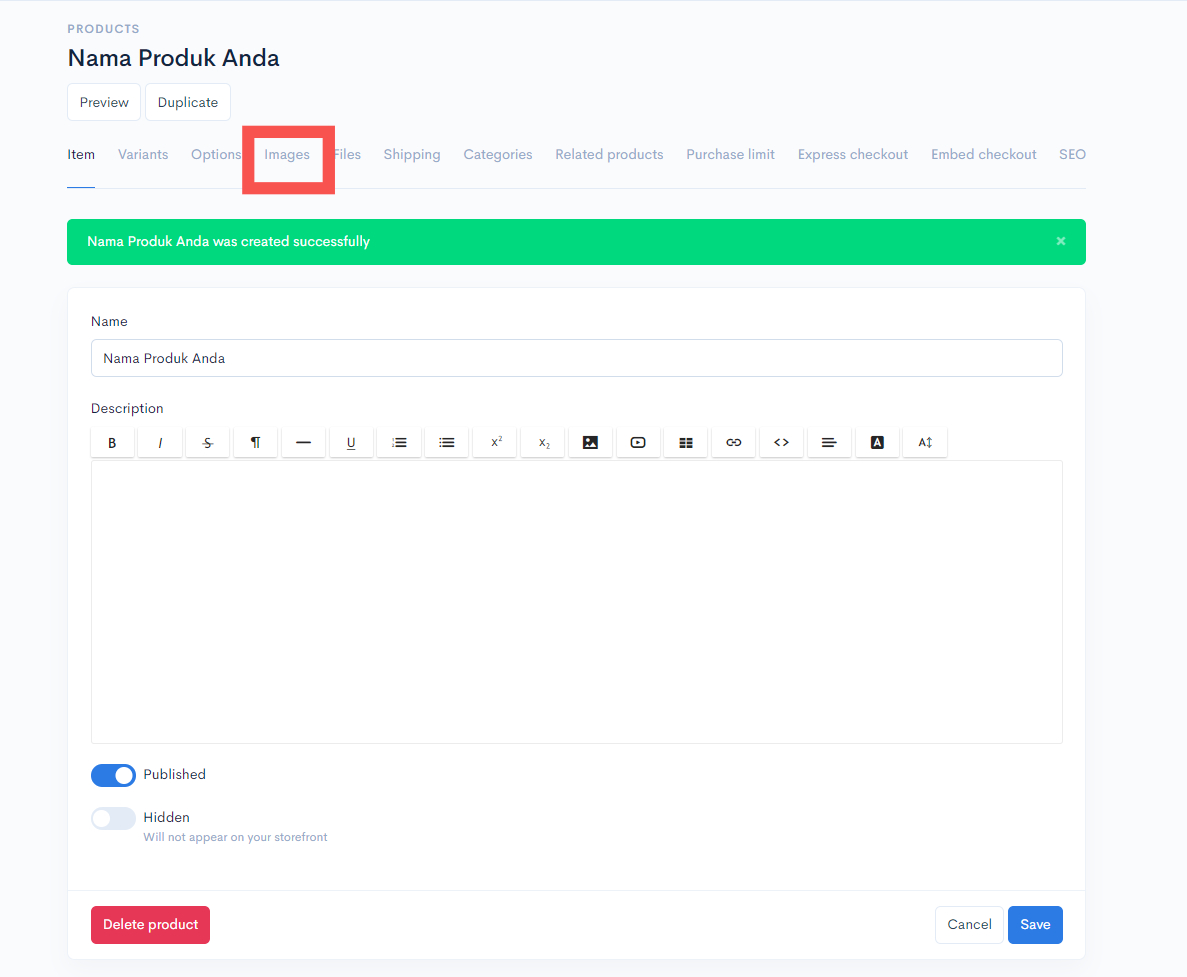
1\. To insert a picture you can click on **Images.**

<figure><img src="https://3359028955-files.gitbook.io/~/files/v0/b/gitbook-x-prod.appspot.com/o/spaces%2F-Lh09fNwqqta5Vj6Wr8p%2Fuploads%2Fgit-blob-3a258959911311827e06c3ec338f251cc023f9ec%2FLskFmnVlJWeWlPCOYuHa.jpg?alt=media" alt=""><figcaption></figcaption></figure>

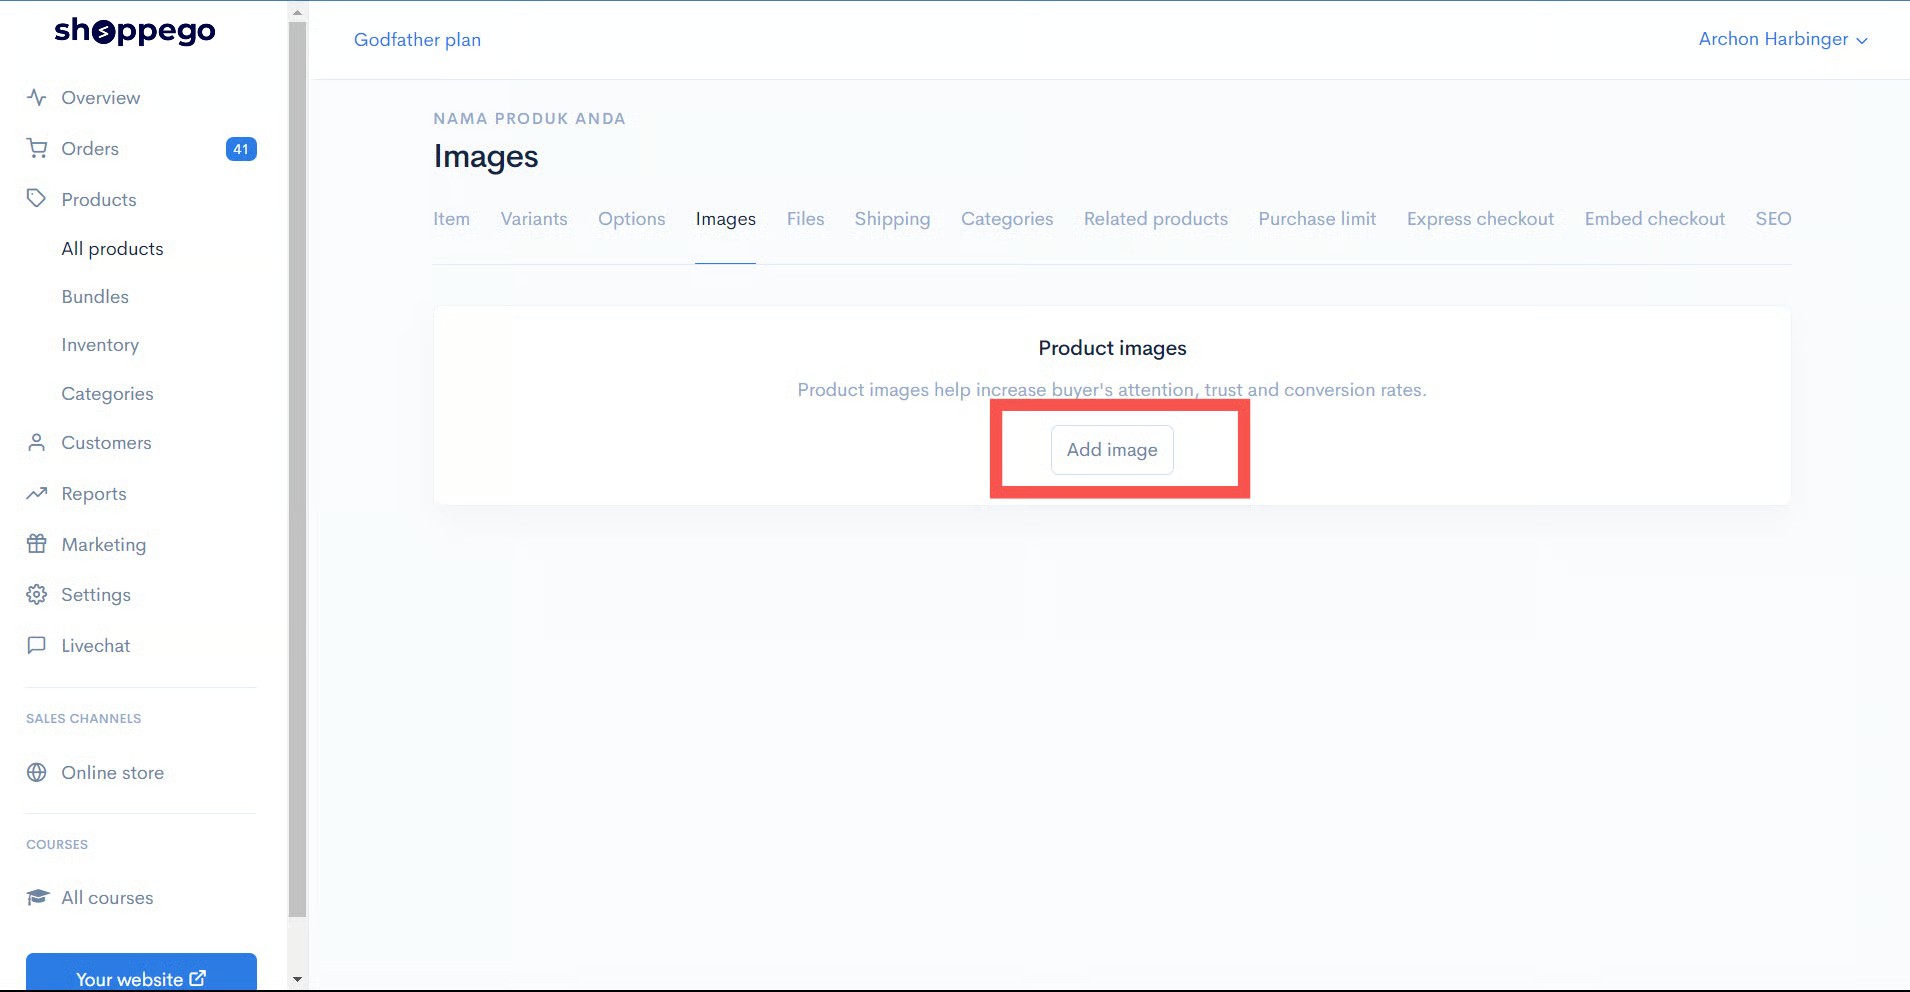
2\. Next, click on **Add image** and upload the image you want. You can upload as many pictures as you want.

{% hint style="info" %}
(**Best size for product:** 1000px X 1000px | **Best image size**: Under 200kb)
{% endhint %}

<figure><img src="https://3359028955-files.gitbook.io/~/files/v0/b/gitbook-x-prod.appspot.com/o/spaces%2F-Lh09fNwqqta5Vj6Wr8p%2Fuploads%2Fgit-blob-1f3b90a33140ccb32fe40901431dc5cbc75f9a29%2Fq2HKmMqjJx8LegeL7ObV.jpg?alt=media" alt=""><figcaption></figcaption></figure>

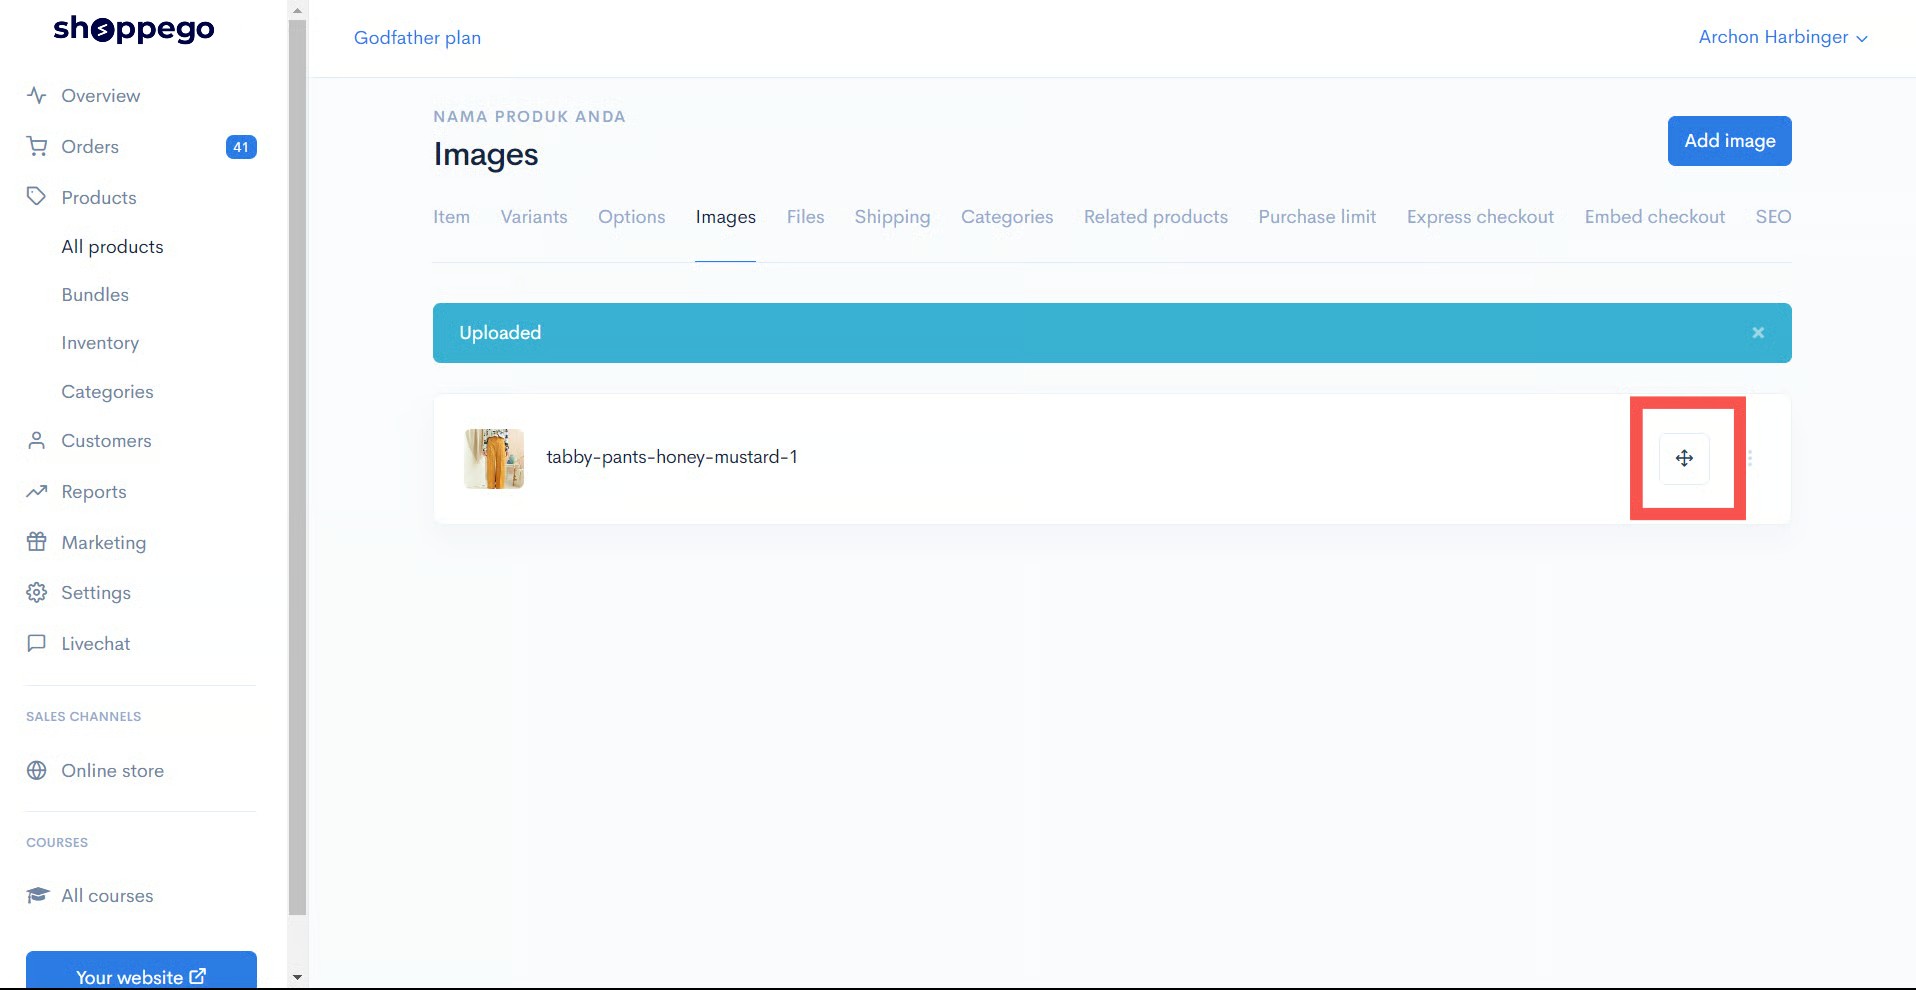
3\. Once you have successfully uploaded your product image, the Uploaded popup will appear on the screen.

{% hint style="info" %}
If you want **to arrange the product picture you can drag the arrow button** and arrange the position of your product picture.
{% endhint %}

<figure><img src="https://3359028955-files.gitbook.io/~/files/v0/b/gitbook-x-prod.appspot.com/o/spaces%2F-Lh09fNwqqta5Vj6Wr8p%2Fuploads%2Fgit-blob-1bb0fcdb953c52fd76b871e968aca1c05e9d2107%2FacNkocpuZCX72Rg2HCUV.jpg?alt=media" alt=""><figcaption></figcaption></figure>

## Part 4 : Product Label

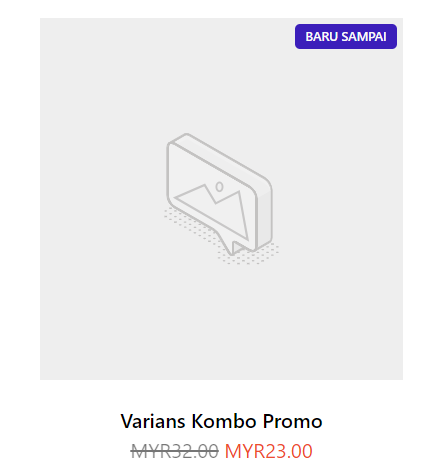
If you want to have a **label on your product** (refer to the image below), you can refer to the tutorial below:

{% content-ref url="/pages/HOsKMf7kvU6hUoZ6SQr8" %}
[Product Metafield](/tutorials/en/online-store/metafields/product-metafield.md)
{% endcontent-ref %}

<figure><img src="https://3359028955-files.gitbook.io/~/files/v0/b/gitbook-x-prod.appspot.com/o/spaces%2F-Lh09fNwqqta5Vj6Wr8p%2Fuploads%2Fgit-blob-e27264858730f3f9eb15f67f0bca7fcf2c831540%2Fu6f7fBSui5HBnJzcQ8se.png?alt=media" alt=""><figcaption></figcaption></figure>