> For the complete documentation index, see [llms.txt](https://docs.shoppego.my/tutorials/llms.txt). Markdown versions of documentation pages are available by appending `.md` to page URLs; this page is available as [Markdown](https://docs.shoppego.my/tutorials/en/settings/custom-domain/domain-troubleshoot.md).

# Domain Troubleshoot

If your domain has any issues or displays Error 1014, CNAME Cross-User Banned or others, you need to re-check your domain settings. There are 3 things you need to check:

## You need to make sure you have re-added the Custom domain to the Custom domain settings in your store.

For this, you can go to:

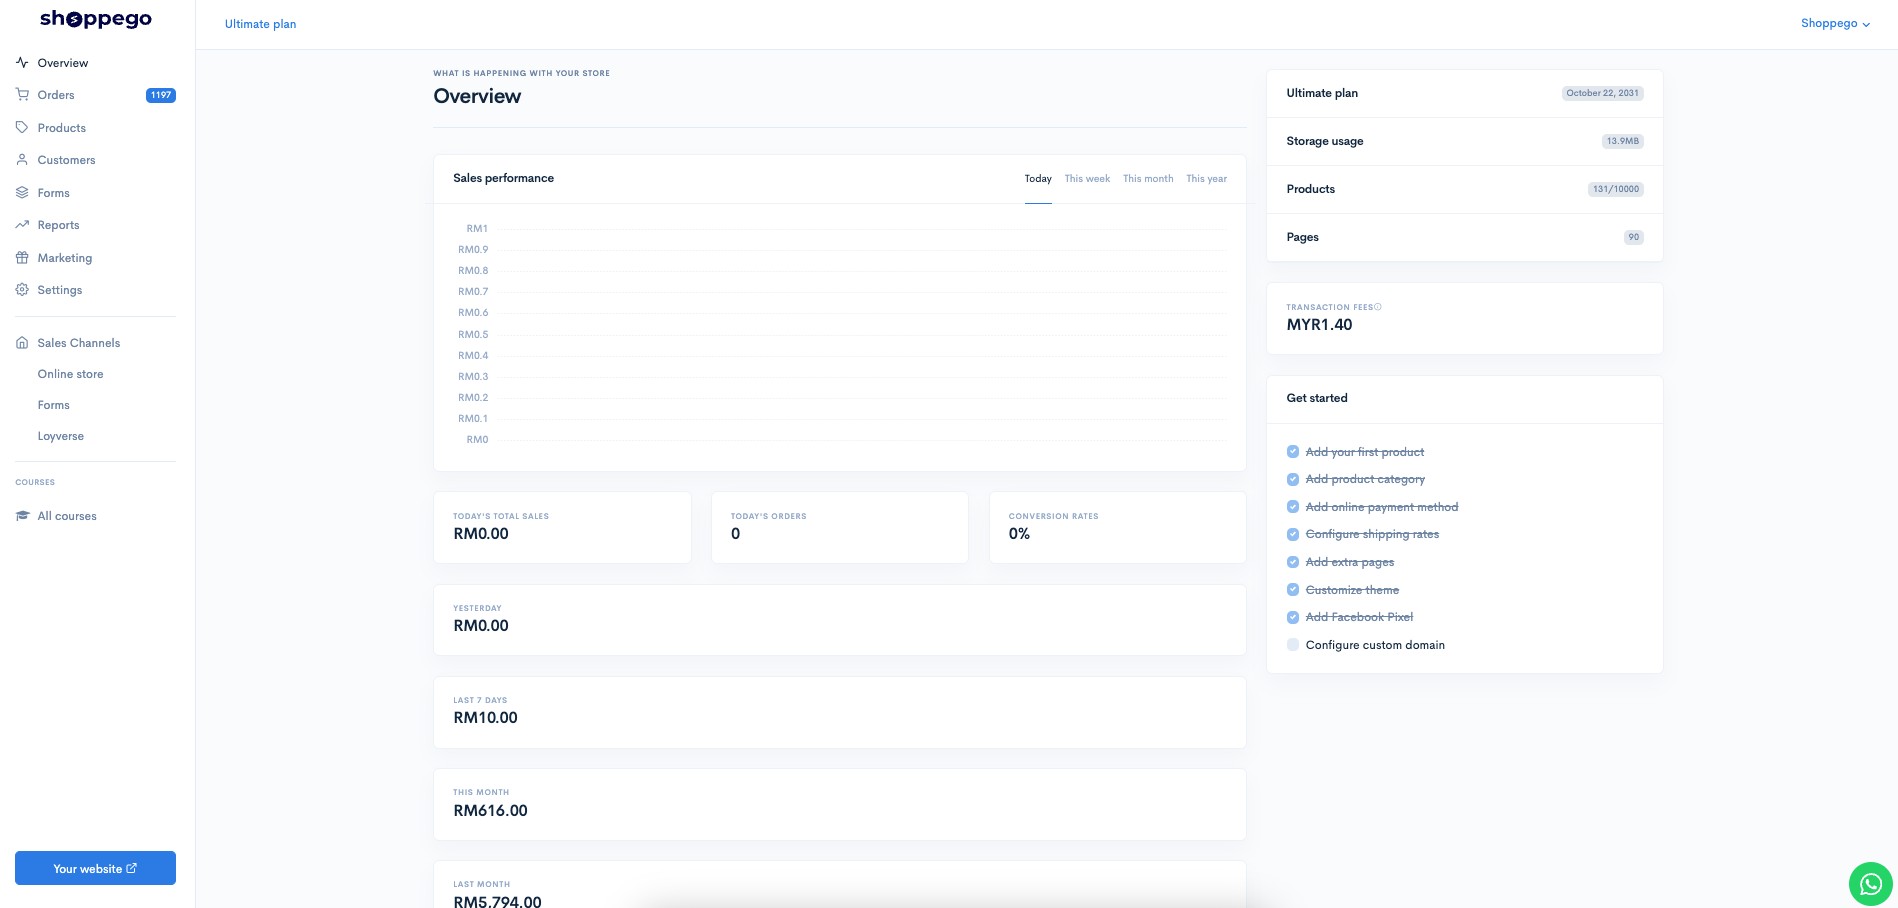
1. Log in to your Shoppego account

<figure><img src="https://3359028955-files.gitbook.io/~/files/v0/b/gitbook-x-prod.appspot.com/o/spaces%2F-Lh09fNwqqta5Vj6Wr8p%2Fuploads%2Fgit-blob-b853fc0189b34fb1d3990f5b1f53fa71deb9d384%2FlCN7aw3FznaFFoOAyya2.jpg?alt=media" alt=""><figcaption></figcaption></figure>

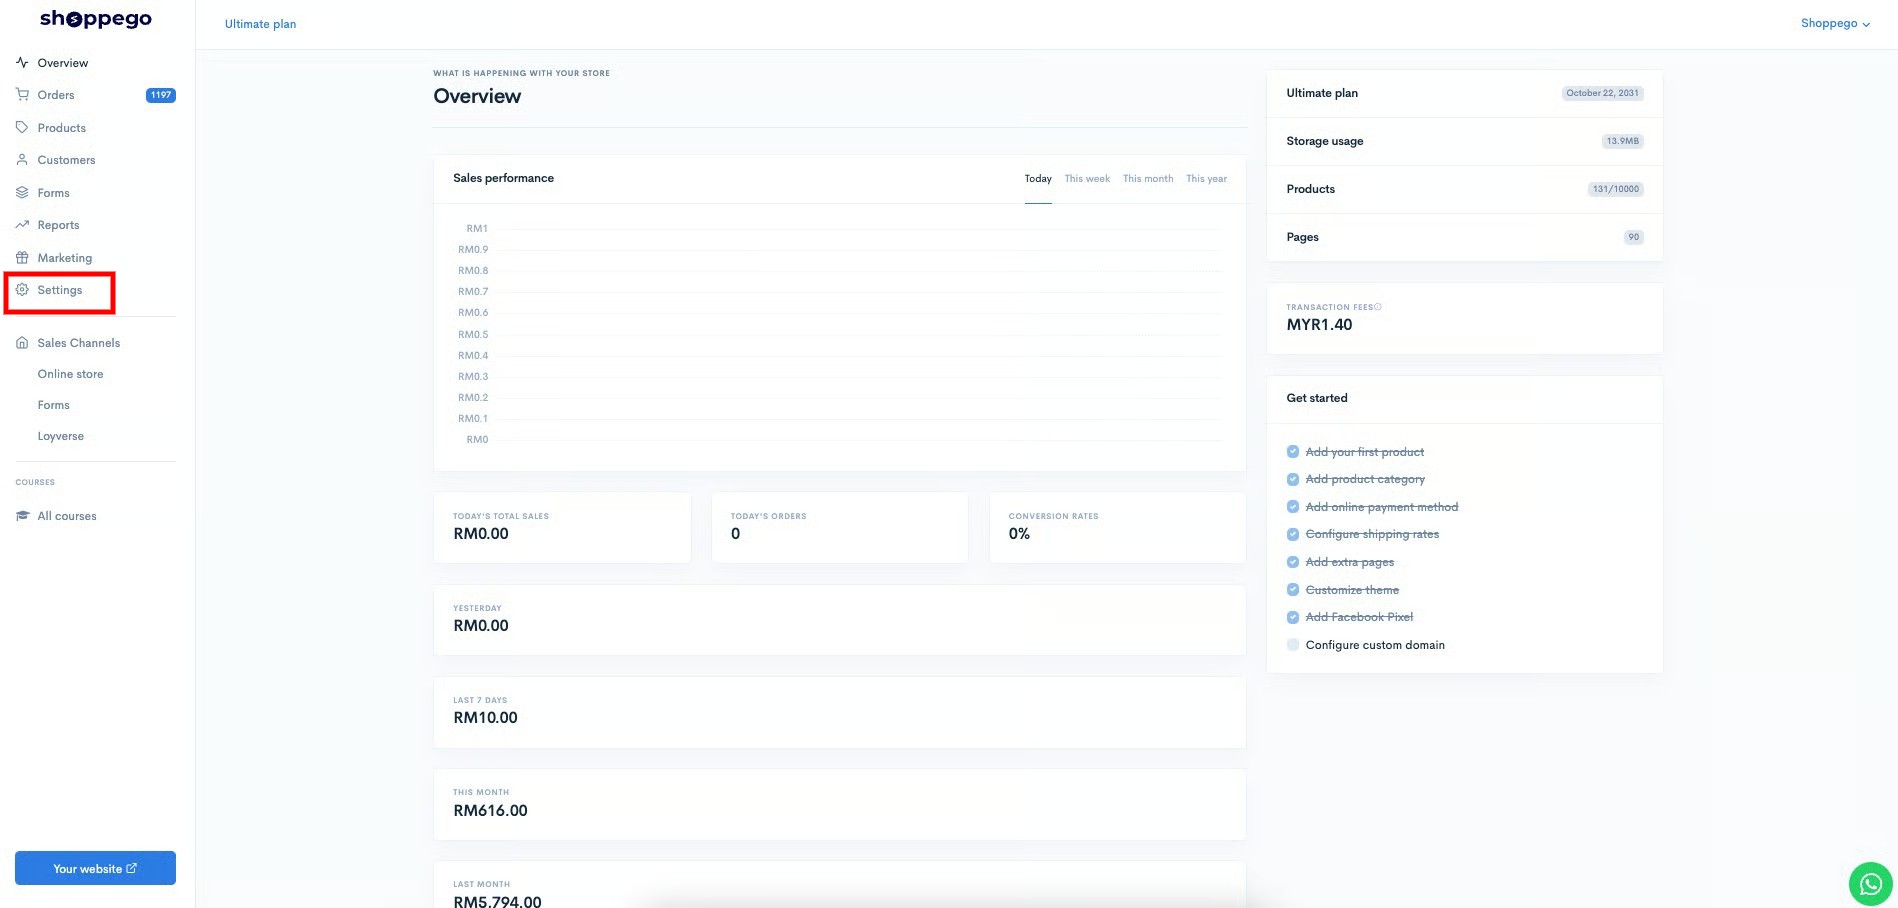
2. Click on **Settings**

<figure><img src="https://3359028955-files.gitbook.io/~/files/v0/b/gitbook-x-prod.appspot.com/o/spaces%2F-Lh09fNwqqta5Vj6Wr8p%2Fuploads%2Fgit-blob-9ae8b66b366958146673b78216b78ff0e8f12b90%2FVsK9zs6aZtUfKK1hcCiM.jpg?alt=media" alt=""><figcaption></figcaption></figure>

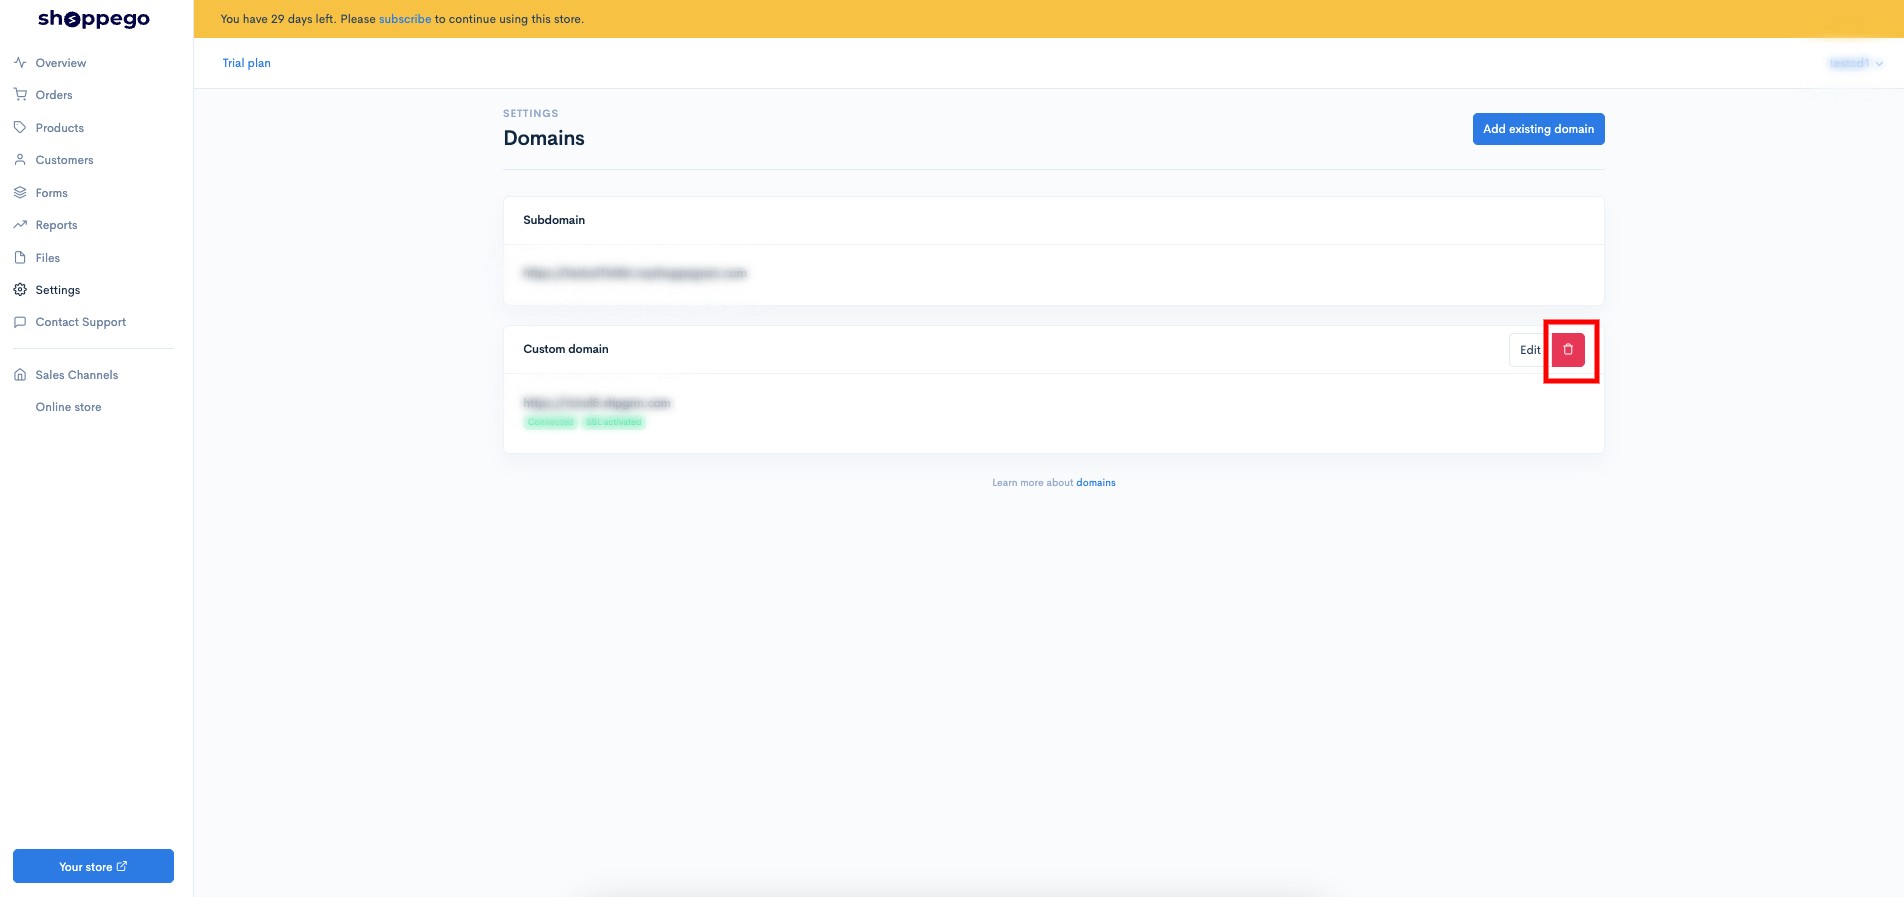
3. Click on **Custom domain**

<figure><img src="https://3359028955-files.gitbook.io/~/files/v0/b/gitbook-x-prod.appspot.com/o/spaces%2F-Lh09fNwqqta5Vj6Wr8p%2Fuploads%2Fgit-blob-9a93f15314b28eeac102dc1b4033f33c0001de0f%2F77sXwFM14M7Ek2MZcs6h.jpg?alt=media" alt=""><figcaption></figcaption></figure>

4. Click on the **trash can icon** to delete your domain settings.

<figure><img src="https://3359028955-files.gitbook.io/~/files/v0/b/gitbook-x-prod.appspot.com/o/spaces%2F-Lh09fNwqqta5Vj6Wr8p%2Fuploads%2Fgit-blob-07272694b824b9d0d062a1bb0eb6b0053a8fb64e%2FgDQMrIKRVU4IYihtwgrP.jpg?alt=media" alt=""><figcaption></figcaption></figure>

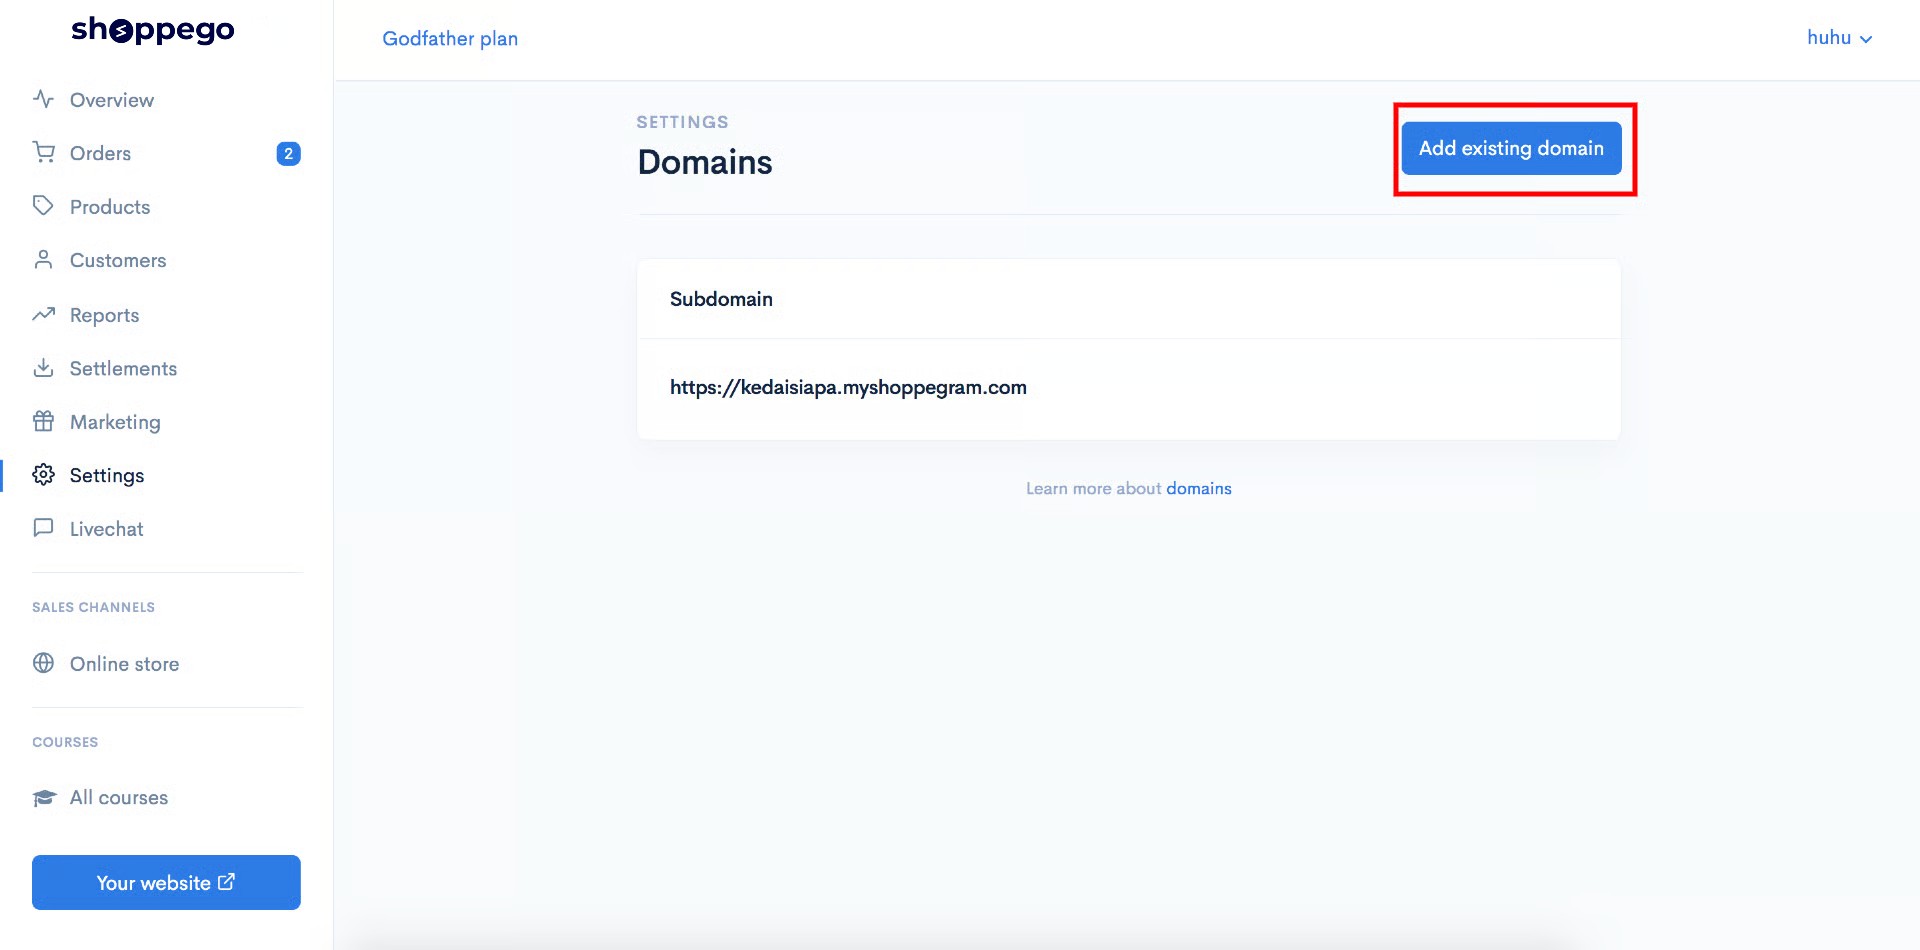
5. Once you have deleted the domain designation, you can click on the **Add existing domain** button.

<figure><img src="https://3359028955-files.gitbook.io/~/files/v0/b/gitbook-x-prod.appspot.com/o/spaces%2F-Lh09fNwqqta5Vj6Wr8p%2Fuploads%2Fgit-blob-678c329f6ecb362a0128329e11faa5bf81e365a8%2F0825t9R6BEsAXRrv5UZn.jpg?alt=media" alt=""><figcaption></figcaption></figure>

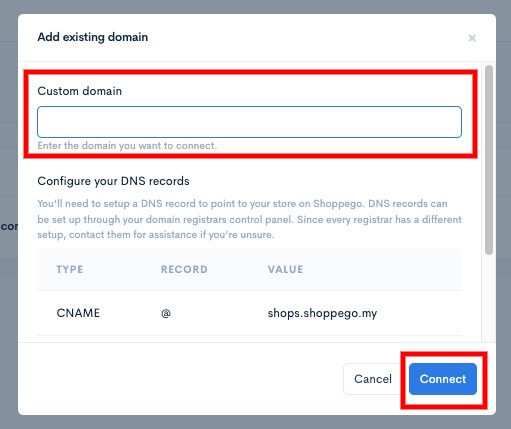
6. Then, you can **re-enter your domain name** and click **Connect**

<figure><img src="https://3359028955-files.gitbook.io/~/files/v0/b/gitbook-x-prod.appspot.com/o/spaces%2F-Lh09fNwqqta5Vj6Wr8p%2Fuploads%2Fgit-blob-14a5a994854415ec3cfab3630481598c004d27e7%2FZCtFRdcw1oog2Y893cKW.jpg?alt=media" alt=""><figcaption></figcaption></figure>

## If you manage your DNS on the Cloudflare platform, you need to make sure your Proxy status setting is set to DNS Only.

For this, you can check the section:

1. Log in to your Cloudflare account

<figure><img src="https://3359028955-files.gitbook.io/~/files/v0/b/gitbook-x-prod.appspot.com/o/spaces%2F-Lh09fNwqqta5Vj6Wr8p%2Fuploads%2Fgit-blob-53a34297cbec3a84f6f3d08282fdabe6f627ecb3%2FAsU7Yh7Q530lkakw0ZxL.jpg?alt=media" alt=""><figcaption></figcaption></figure>

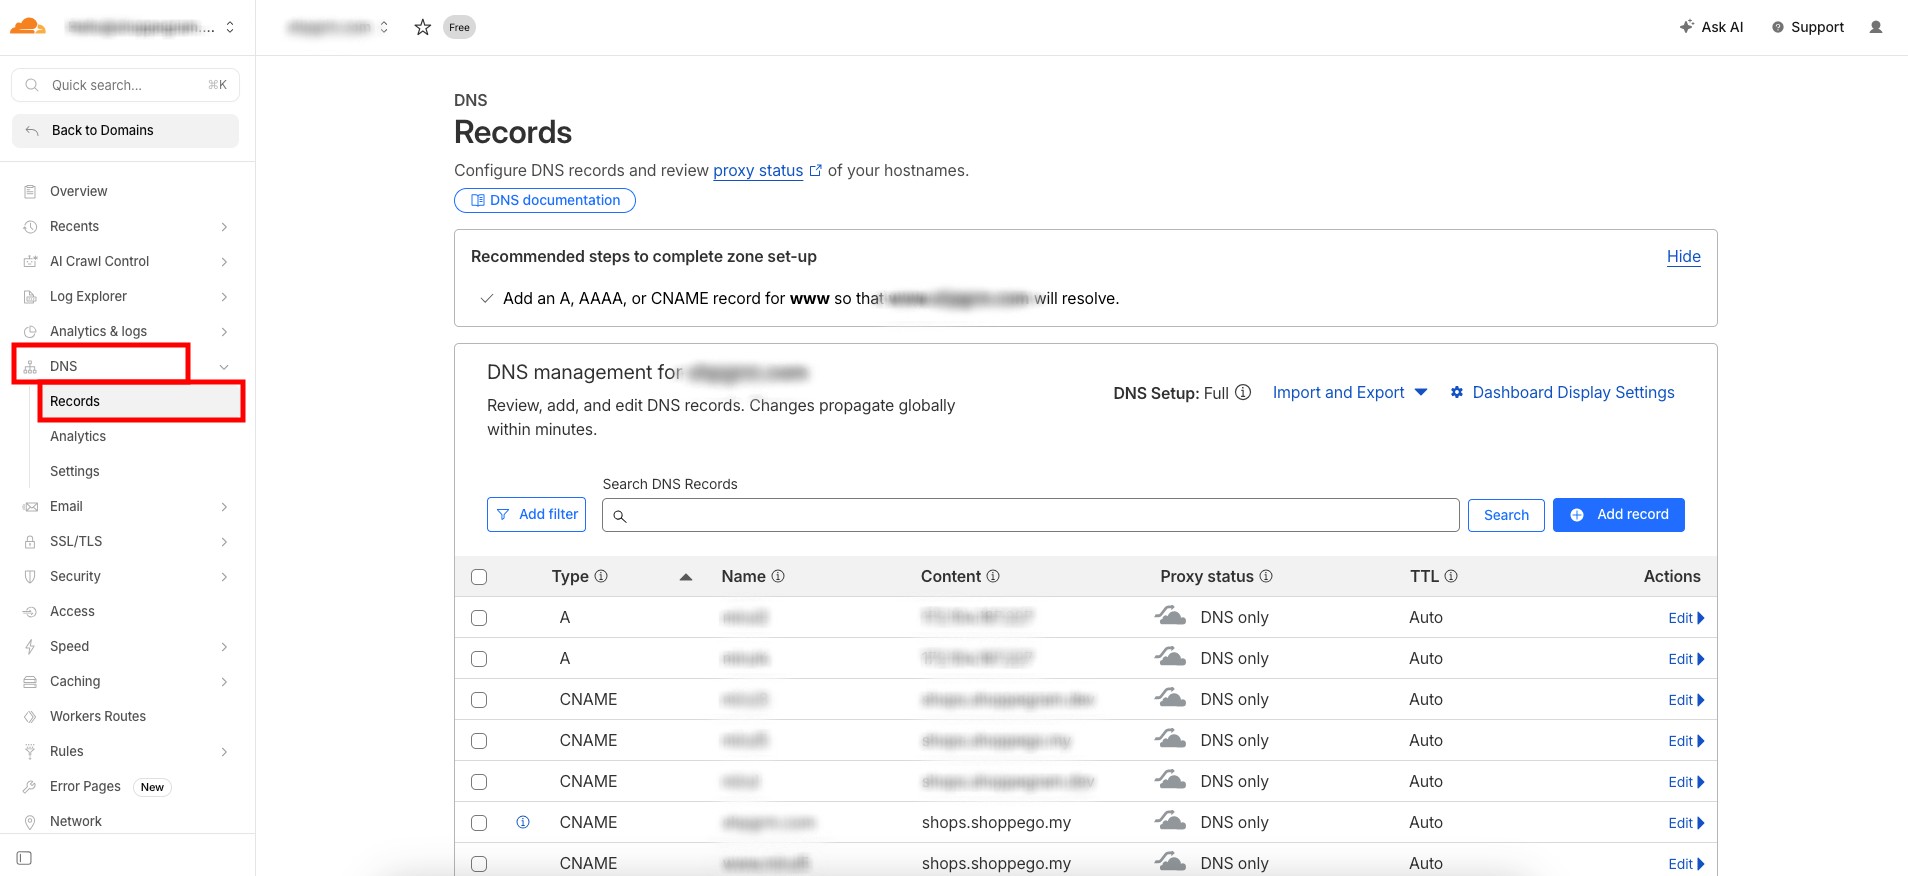
2. Click on your domain and access your domain's DNS record settings again.

<figure><img src="https://3359028955-files.gitbook.io/~/files/v0/b/gitbook-x-prod.appspot.com/o/spaces%2F-Lh09fNwqqta5Vj6Wr8p%2Fuploads%2Fgit-blob-56cd50b02c3aabcd75e543d3b969f6774ed8eaa3%2FGibT8z87j0ASxllfjR0o.jpg?alt=media" alt=""><figcaption></figcaption></figure>

3. Make sure the Proxy setting of your CNAME record status is set to `DNS Only` and not `Proxied`

<figure><img src="https://3359028955-files.gitbook.io/~/files/v0/b/gitbook-x-prod.appspot.com/o/spaces%2F-Lh09fNwqqta5Vj6Wr8p%2Fuploads%2Fgit-blob-a01bd4c9e2c6d3bee1c3af06b1ac98ae200dacf1%2FURCP8K53vV96aUfd8zZf.jpg?alt=media" alt=""><figcaption></figcaption></figure>

## If your setting has just been made, you need to wait until it fully propagates.

In this situation, the domain setting will usually take 24-48 hours to fully propagate. If your settings has just been done, you will need to wait for the period notified.