> For the complete documentation index, see [llms.txt](https://docs.shoppego.my/tutorials/llms.txt). Markdown versions of documentation pages are available by appending `.md` to page URLs; this page is available as [Markdown](https://docs.shoppego.my/tutorials/en/settings/email-marketing-providers/sender.net.md).

# Sender.net

To set up **Sender.net**, you need to get an **API Access Token** from **Sender** and **enter the key** you have obtained into the Shoppego system.

## Log in Sender account

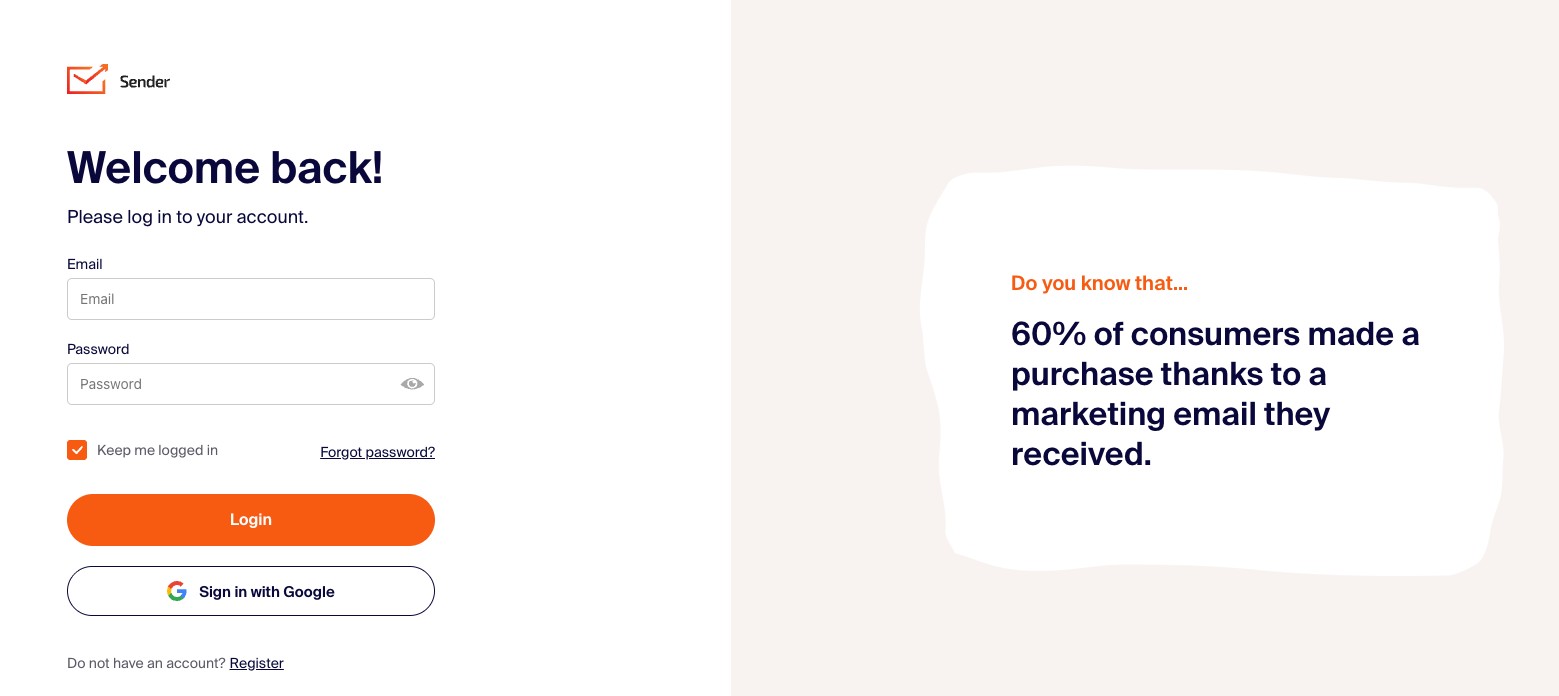
1. You can log in to your Sender account [here ](https://auth.sender.net/oauth/login?scope=scope\&client_id=21\&response_type=code\&redirect_uri=https%3A%2F%2Fapp.sender.net%2F)or at this link: [https://auth.sender.net/oauth/login](https://auth.sender.net/oauth/login?scope=scope\&client_id=21\&response_type=code\&redirect_uri=https%3A%2F%2Fapp.sender.net%2F)

<figure><img src="https://3359028955-files.gitbook.io/~/files/v0/b/gitbook-x-prod.appspot.com/o/spaces%2F-Lh09fNwqqta5Vj6Wr8p%2Fuploads%2Fgit-blob-5e90858dc396e1d86851e21ac09e805adc04a928%2FLJ4BMZqNVGjR3aspmbgB.jpg?alt=media" alt=""><figcaption></figcaption></figure>

## Get the API Access Token Sender

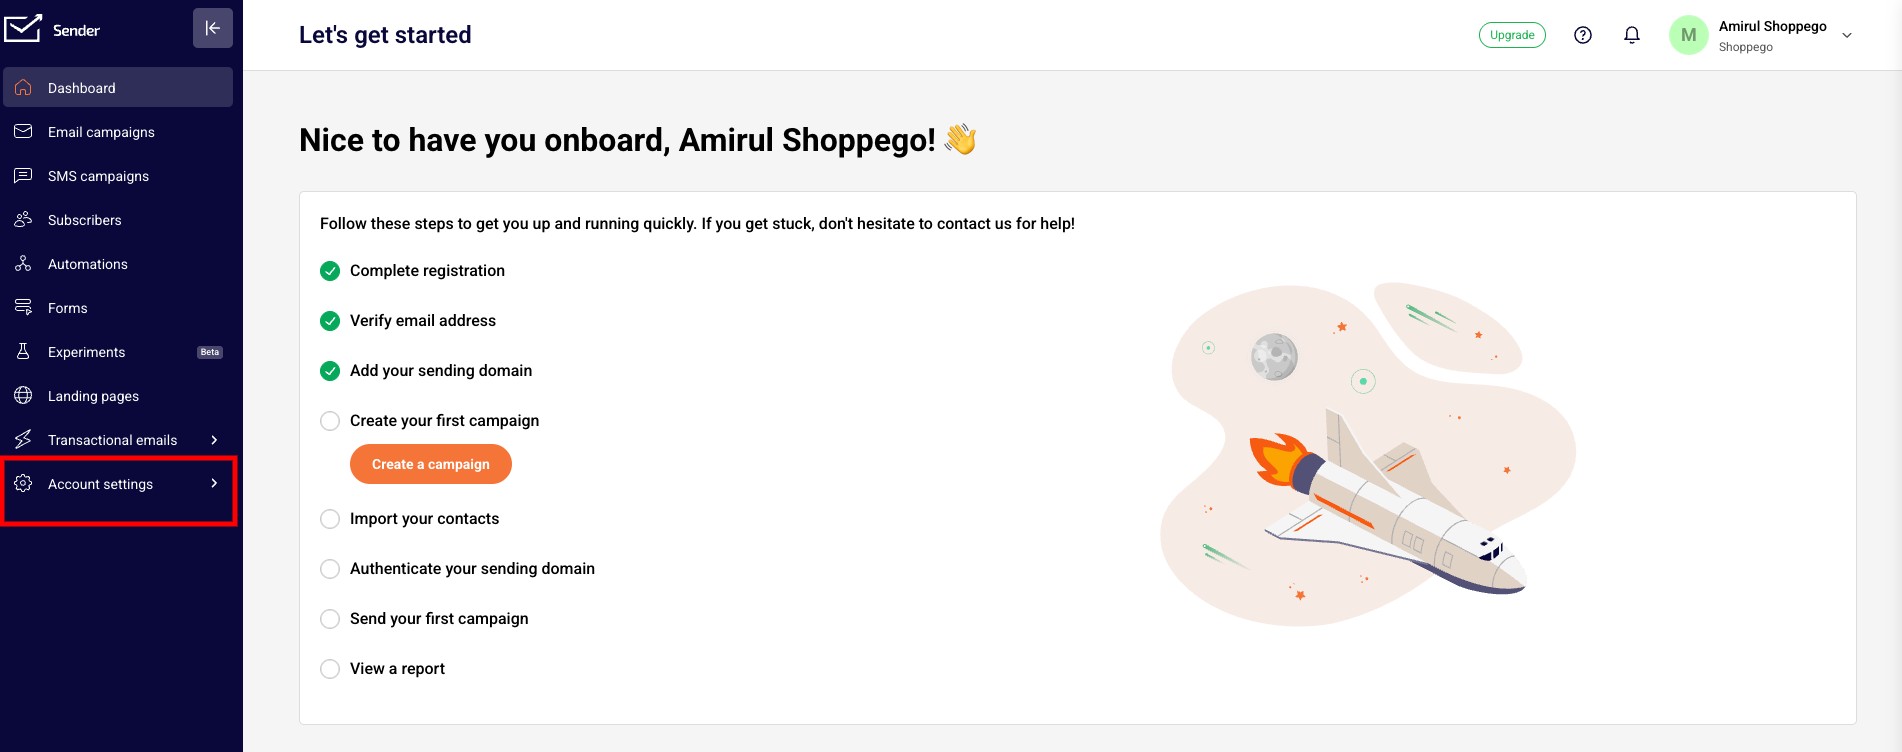
1. You will be taken to the **Sender Dashboard** page, you need to click on **Account settings**

<figure><img src="https://3359028955-files.gitbook.io/~/files/v0/b/gitbook-x-prod.appspot.com/o/spaces%2F-Lh09fNwqqta5Vj6Wr8p%2Fuploads%2Fgit-blob-069106523a4d7146ac6b767c11260feef0effdbb%2FH4JiWVazm3IWOVyZWbkq.jpg?alt=media" alt=""><figcaption></figcaption></figure>

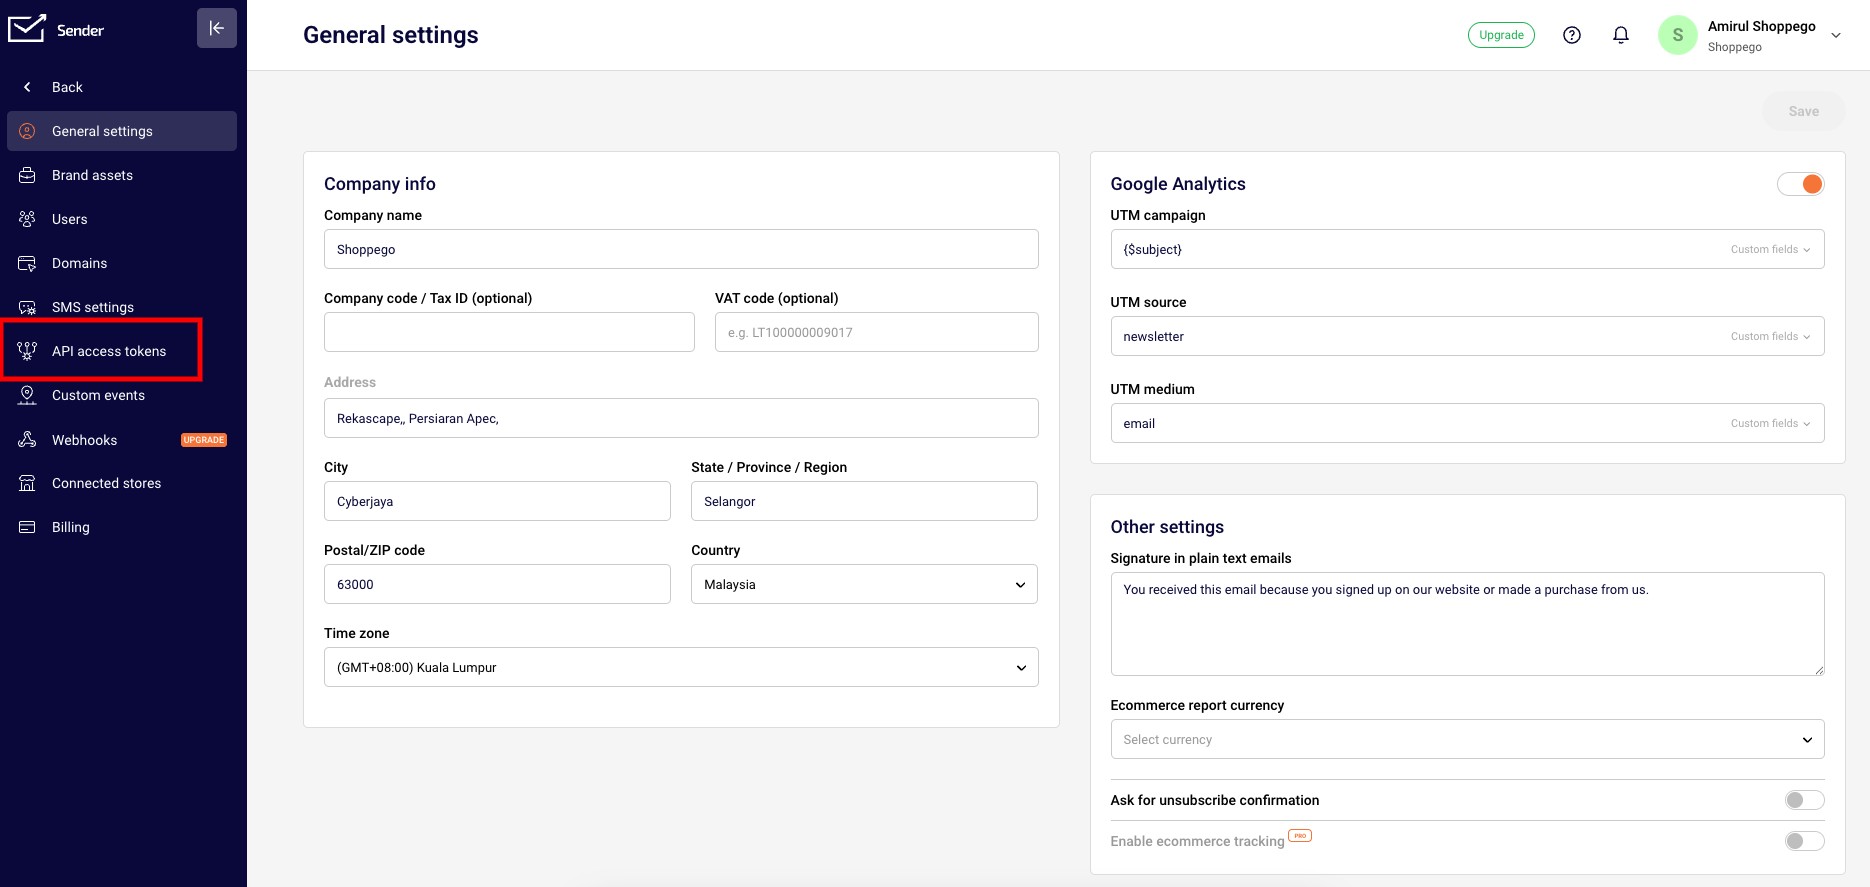
2. You can click on **API access tokens**

<figure><img src="https://3359028955-files.gitbook.io/~/files/v0/b/gitbook-x-prod.appspot.com/o/spaces%2F-Lh09fNwqqta5Vj6Wr8p%2Fuploads%2Fgit-blob-02398c1ef825cc66b897de89ad8392391f371a78%2FfisMGtvL6sfdwGGUP9MH.jpg?alt=media" alt=""><figcaption></figcaption></figure>

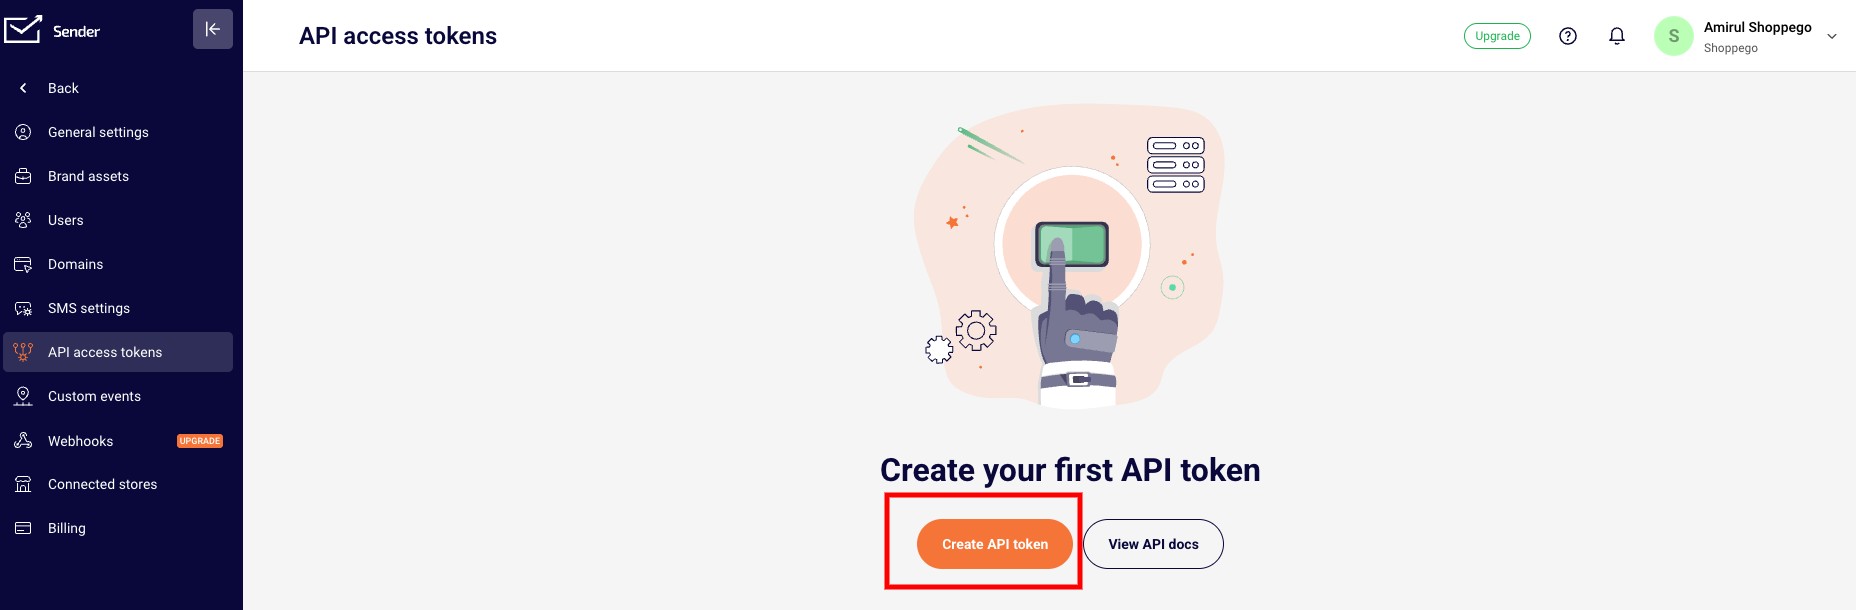
2. After that, you can **click** on **Create API token**

<figure><img src="https://3359028955-files.gitbook.io/~/files/v0/b/gitbook-x-prod.appspot.com/o/spaces%2F-Lh09fNwqqta5Vj6Wr8p%2Fuploads%2Fgit-blob-d34eea3bff51da237c7c58f9870c386a6c0fa4ae%2FhSrErdJnieNru8tYvLPD.jpg?alt=media" alt=""><figcaption></figcaption></figure>

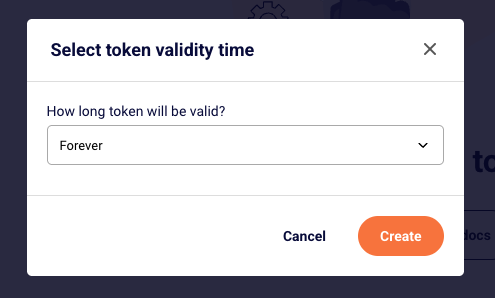
4. Next, you can select **Forever** and click **Create**

<figure><img src="https://3359028955-files.gitbook.io/~/files/v0/b/gitbook-x-prod.appspot.com/o/spaces%2F-Lh09fNwqqta5Vj6Wr8p%2Fuploads%2Fgit-blob-ae67a3f661b39659a34d8ac57a3dd04f9fdc0280%2FyD4FTowxtOz3sjHyl9Ea.png?alt=media" alt=""><figcaption></figcaption></figure>

5. After that, you can click on **Copy token** to be used for the integration process on the Shoppego platform later.

<figure><img src="https://3359028955-files.gitbook.io/~/files/v0/b/gitbook-x-prod.appspot.com/o/spaces%2F-Lh09fNwqqta5Vj6Wr8p%2Fuploads%2Fgit-blob-d2f9a6658524a00f58f60dd5e308c6dc742e8920%2FIvM7FOzoYWQBqUrEkjNh.jpg?alt=media" alt=""><figcaption></figcaption></figure>

## Get Group ID (Optional)

If you do not make this setting, your customer information that will be imported will not be in any list.

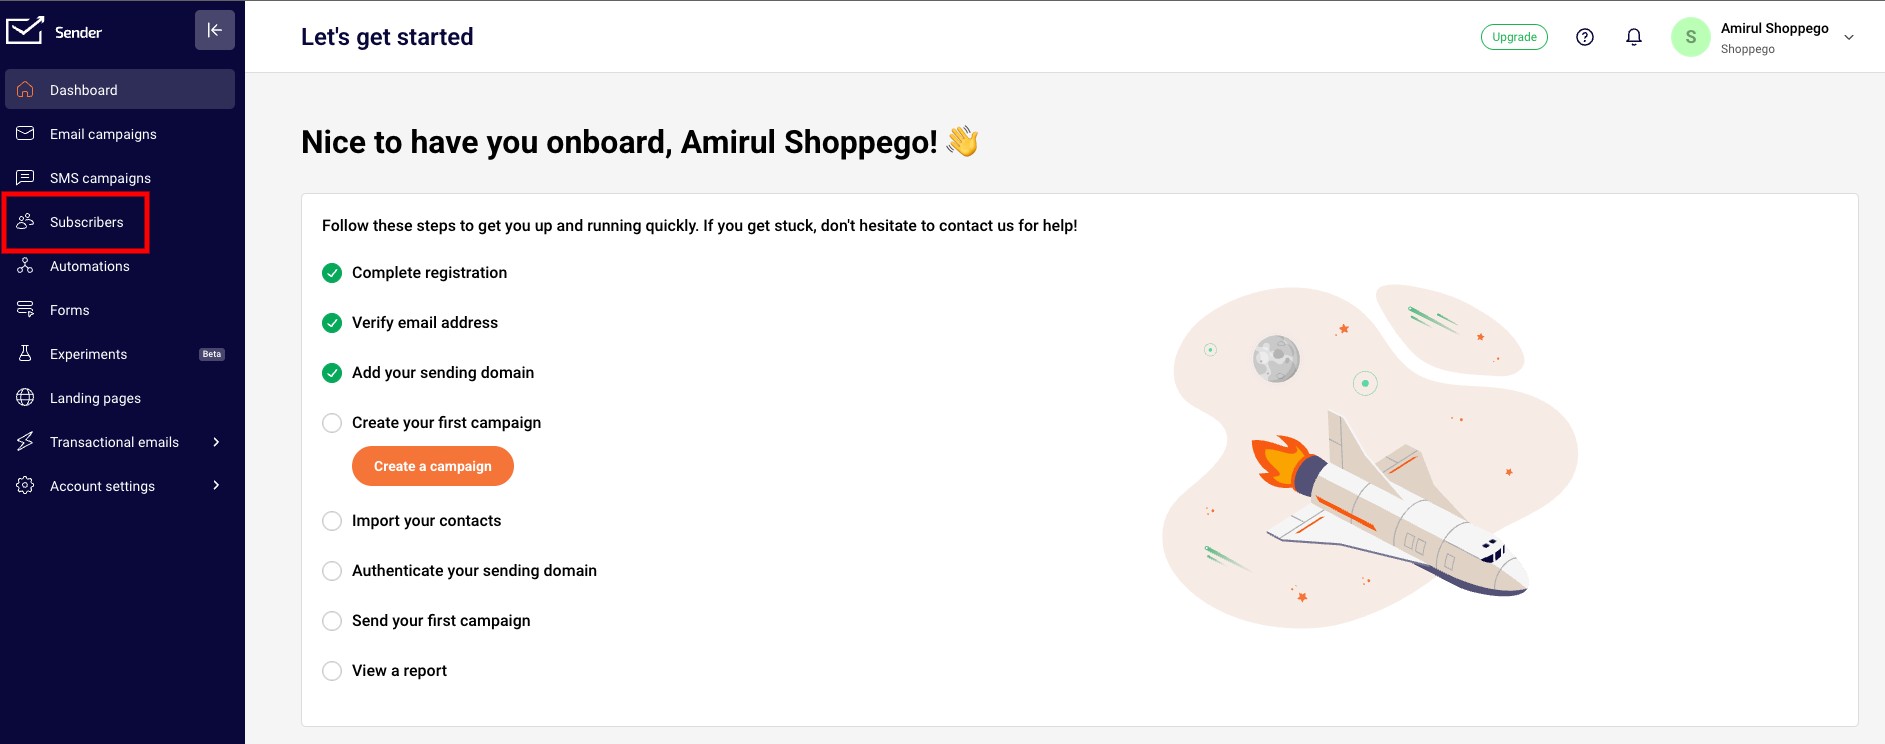
1. Log in to the Sender.net dashboard

<figure><img src="https://3359028955-files.gitbook.io/~/files/v0/b/gitbook-x-prod.appspot.com/o/spaces%2F-Lh09fNwqqta5Vj6Wr8p%2Fuploads%2Fgit-blob-5e90858dc396e1d86851e21ac09e805adc04a928%2FLJ4BMZqNVGjR3aspmbgB.jpg?alt=media" alt=""><figcaption></figcaption></figure>

2. Click on **Subscribers**

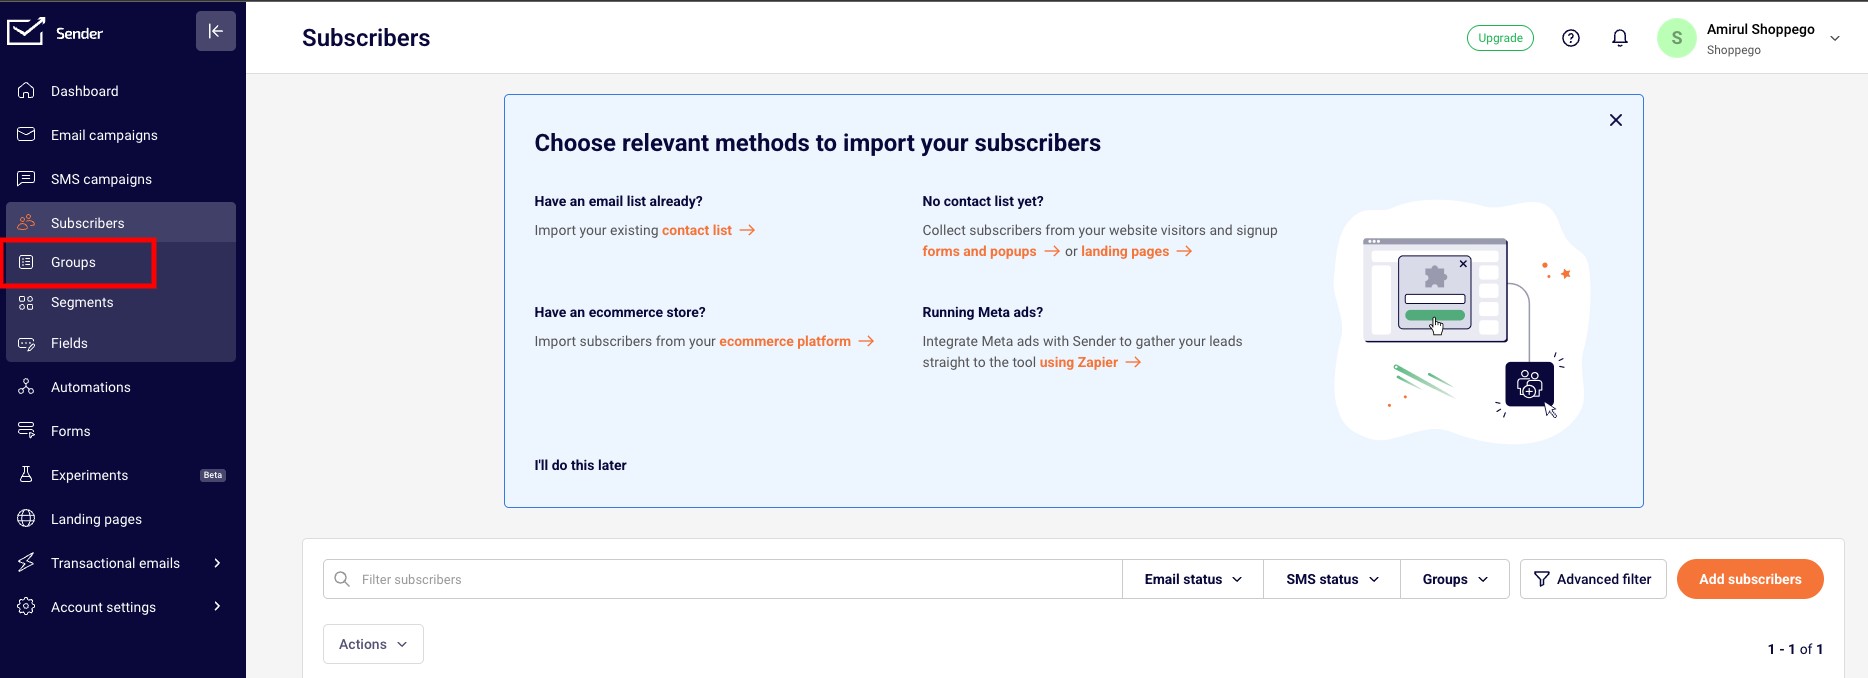
<figure><img src="https://3359028955-files.gitbook.io/~/files/v0/b/gitbook-x-prod.appspot.com/o/spaces%2F-Lh09fNwqqta5Vj6Wr8p%2Fuploads%2Fgit-blob-73a809fe0fe917b4f53e50e881d0fd7903fd7696%2F05qnrRI01D2f1d6SNaVq.jpg?alt=media" alt=""><figcaption></figcaption></figure>

3. Click on **Groups**

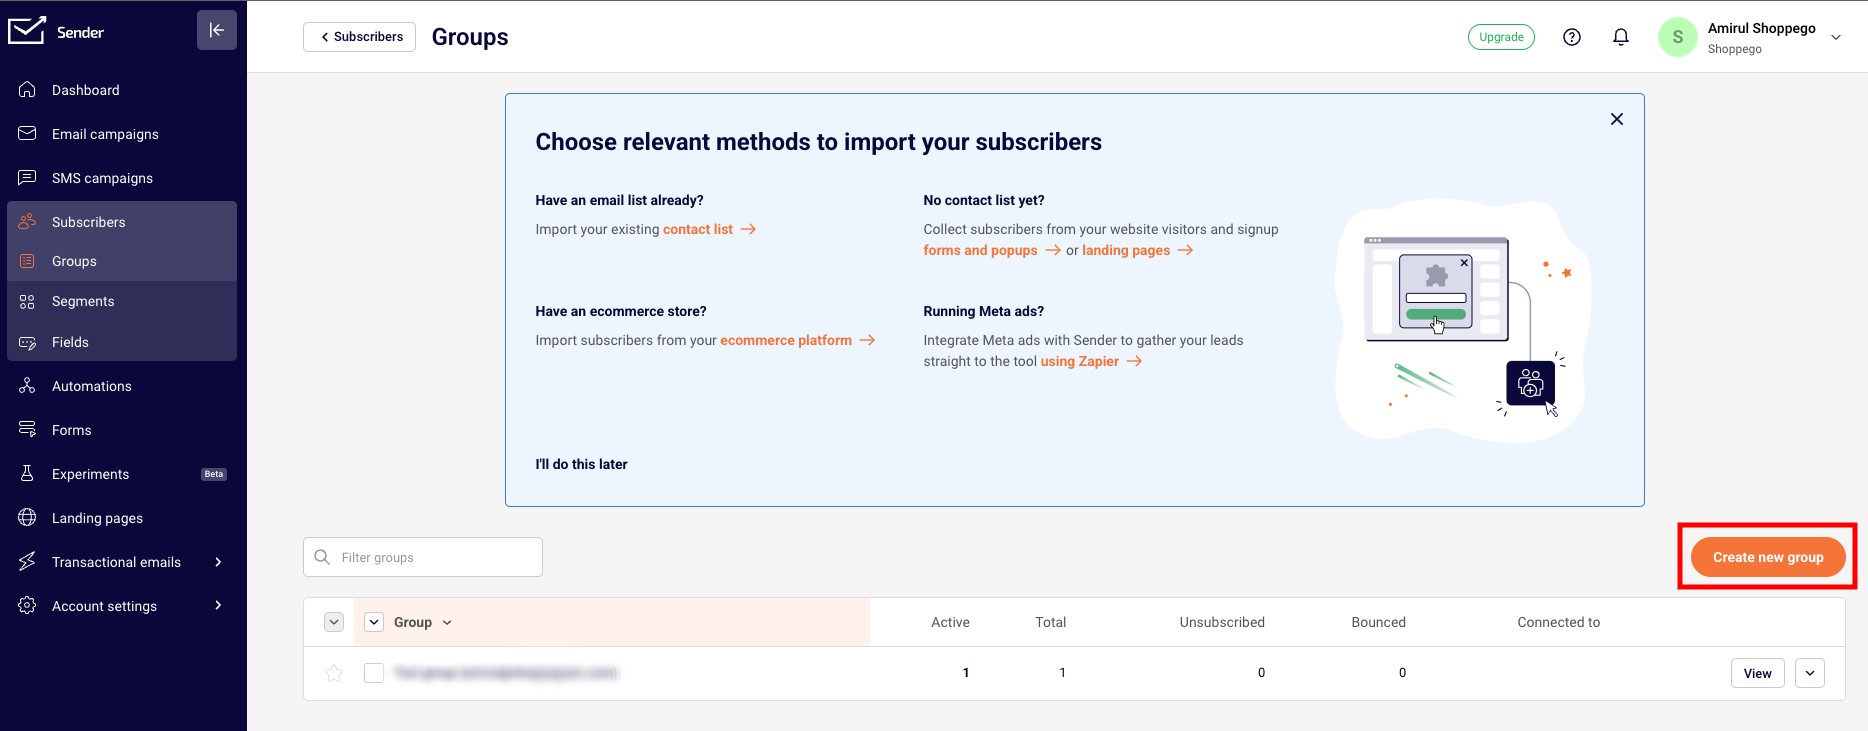
<figure><img src="https://3359028955-files.gitbook.io/~/files/v0/b/gitbook-x-prod.appspot.com/o/spaces%2F-Lh09fNwqqta5Vj6Wr8p%2Fuploads%2Fgit-blob-fde3571df19bf7dbac597252a0eb38011ab45c12%2FvaX1kL3xeBlTK46PYfGM.jpg?alt=media" alt=""><figcaption></figcaption></figure>

4. Click on **Create new group**

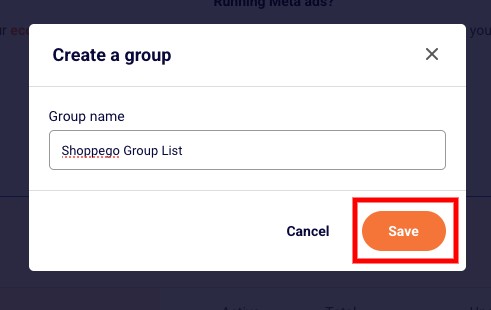
<figure><img src="https://3359028955-files.gitbook.io/~/files/v0/b/gitbook-x-prod.appspot.com/o/spaces%2F-Lh09fNwqqta5Vj6Wr8p%2Fuploads%2Fgit-blob-13245fc2426006b569fc0bd336dd2b4b6be00fdc%2FhBGFpb1dV6lN26qKTNEz.jpg?alt=media" alt=""><figcaption></figcaption></figure>

5. Next, you can enter the group name as your reference and click **Save**

<figure><img src="https://3359028955-files.gitbook.io/~/files/v0/b/gitbook-x-prod.appspot.com/o/spaces%2F-Lh09fNwqqta5Vj6Wr8p%2Fuploads%2Fgit-blob-e6650dd69fd25c2eb2586fe5dc31ba675ca9fb5b%2FcICXWudb1cZ5d64ELw5V.jpg?alt=media" alt=""><figcaption></figcaption></figure>

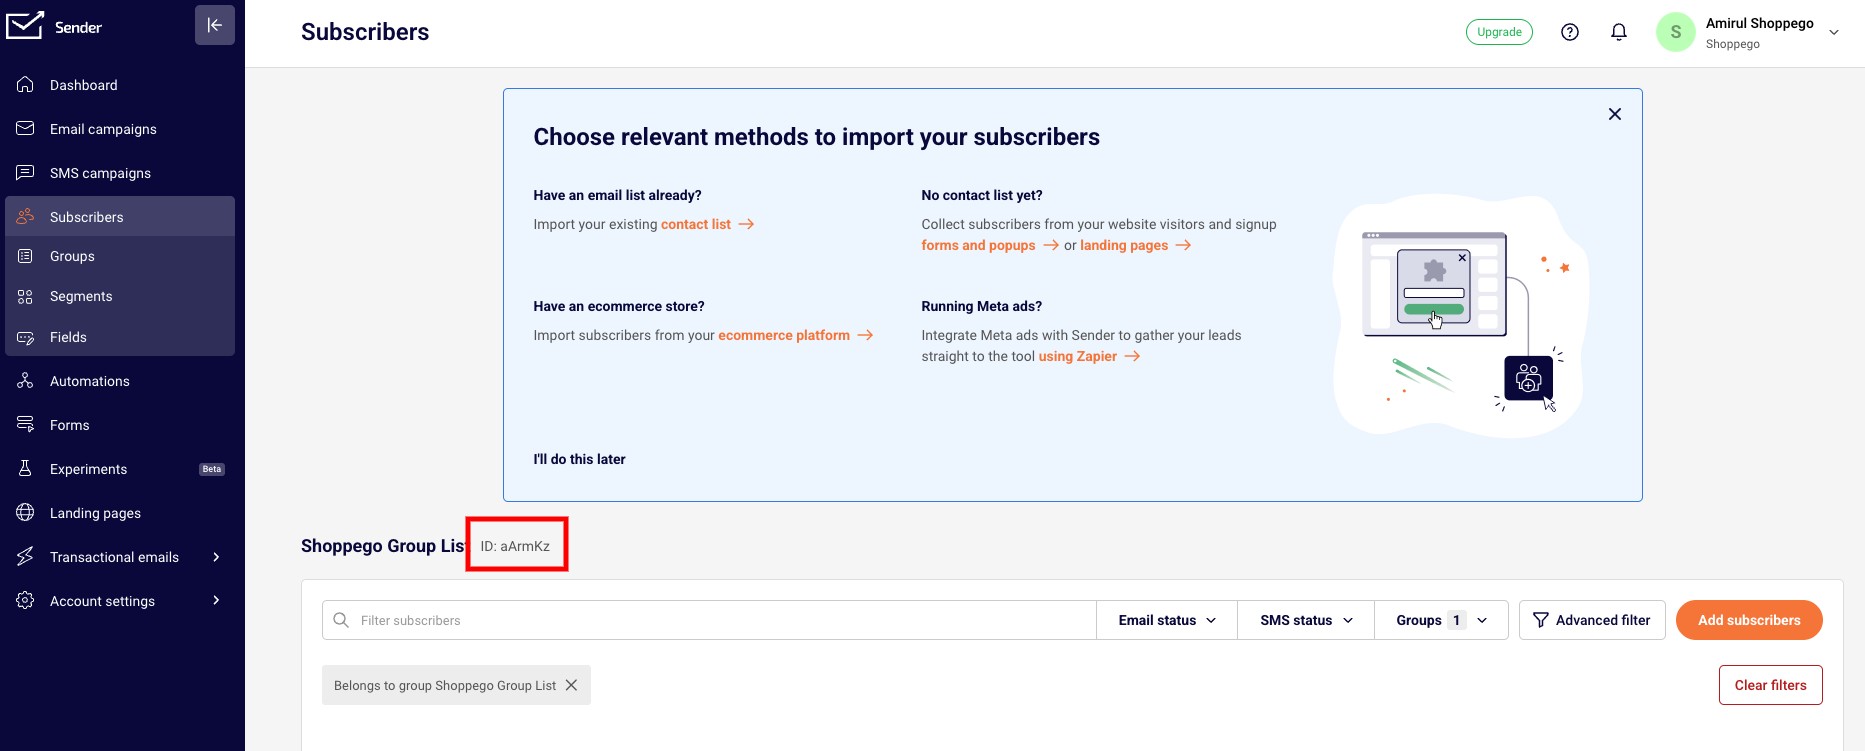
6. Then, you will be taken to the group page itself and you will be able to see the Group ID. You can **copy the Group ID** to use for integration with the Shoppego platform.

<figure><img src="https://3359028955-files.gitbook.io/~/files/v0/b/gitbook-x-prod.appspot.com/o/spaces%2F-Lh09fNwqqta5Vj6Wr8p%2Fuploads%2Fgit-blob-cf435fafc409a0083aa3e0fac192ee94ecf9d2cc%2FeubJJyAjJzviaetCQdw9.jpg?alt=media" alt=""><figcaption></figcaption></figure>

## Setting up in Shoppego

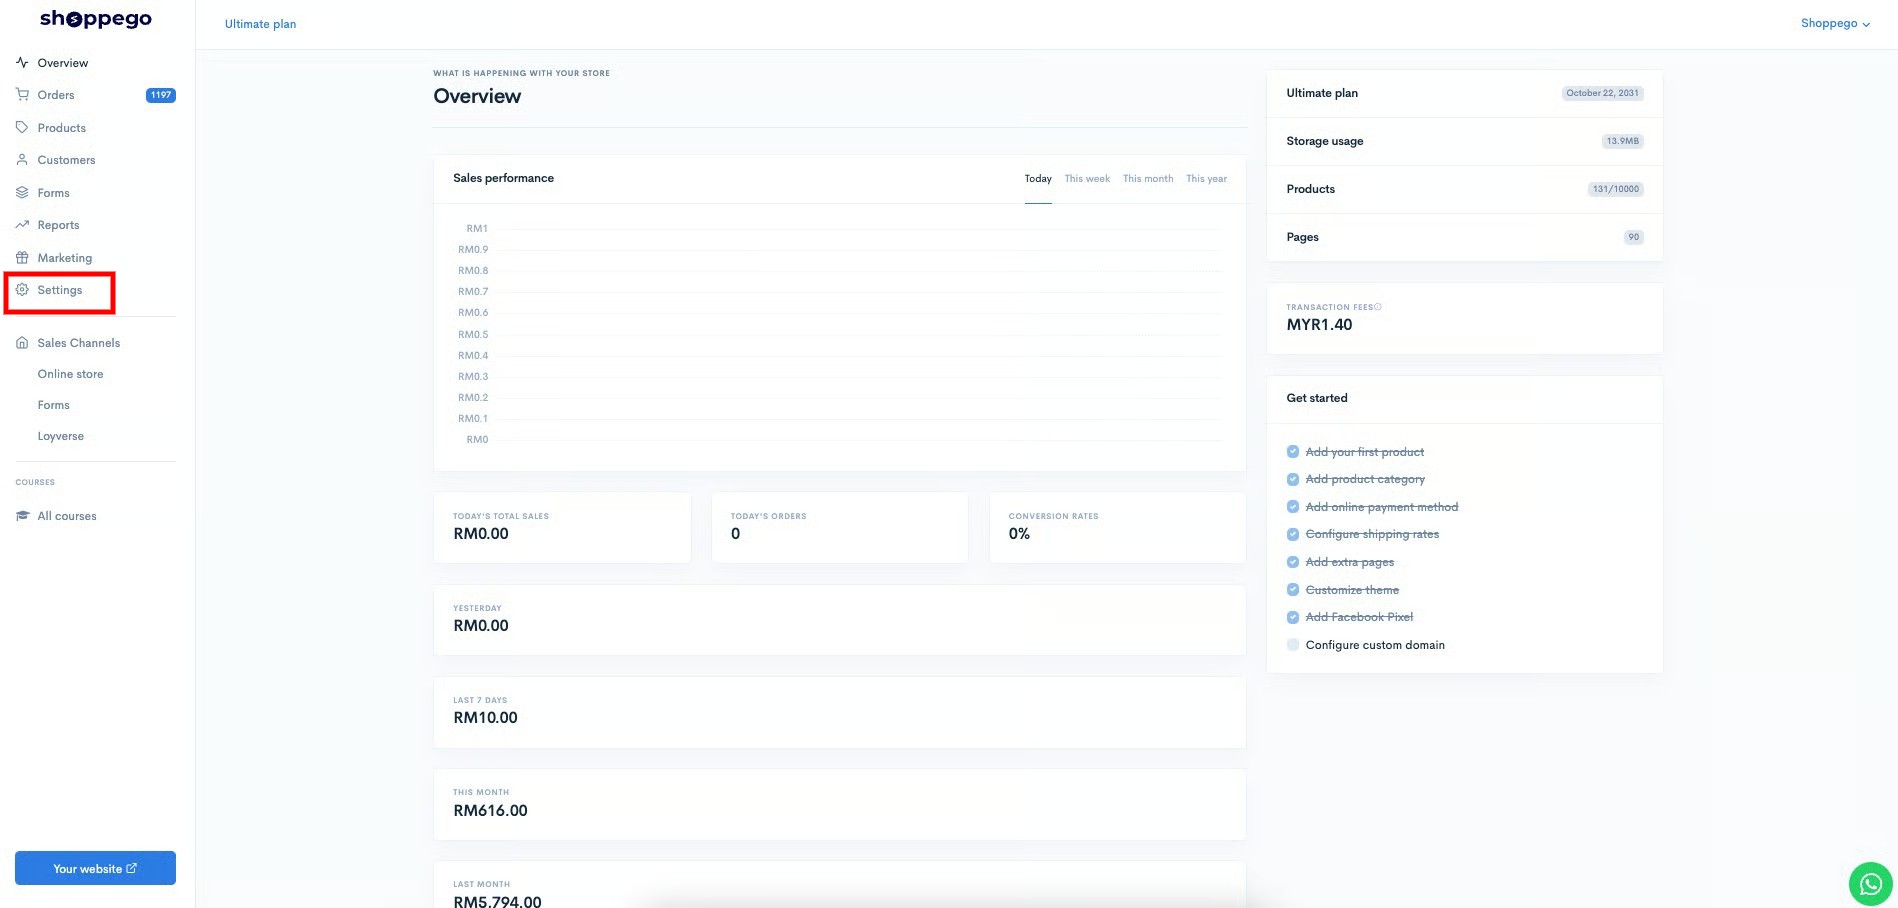
1. On the **Dashboard Overview**, you can go to **Settings**

<figure><img src="https://3359028955-files.gitbook.io/~/files/v0/b/gitbook-x-prod.appspot.com/o/spaces%2F-Lh09fNwqqta5Vj6Wr8p%2Fuploads%2Fgit-blob-9ae8b66b366958146673b78216b78ff0e8f12b90%2FVsK9zs6aZtUfKK1hcCiM.jpg?alt=media" alt=""><figcaption></figcaption></figure>

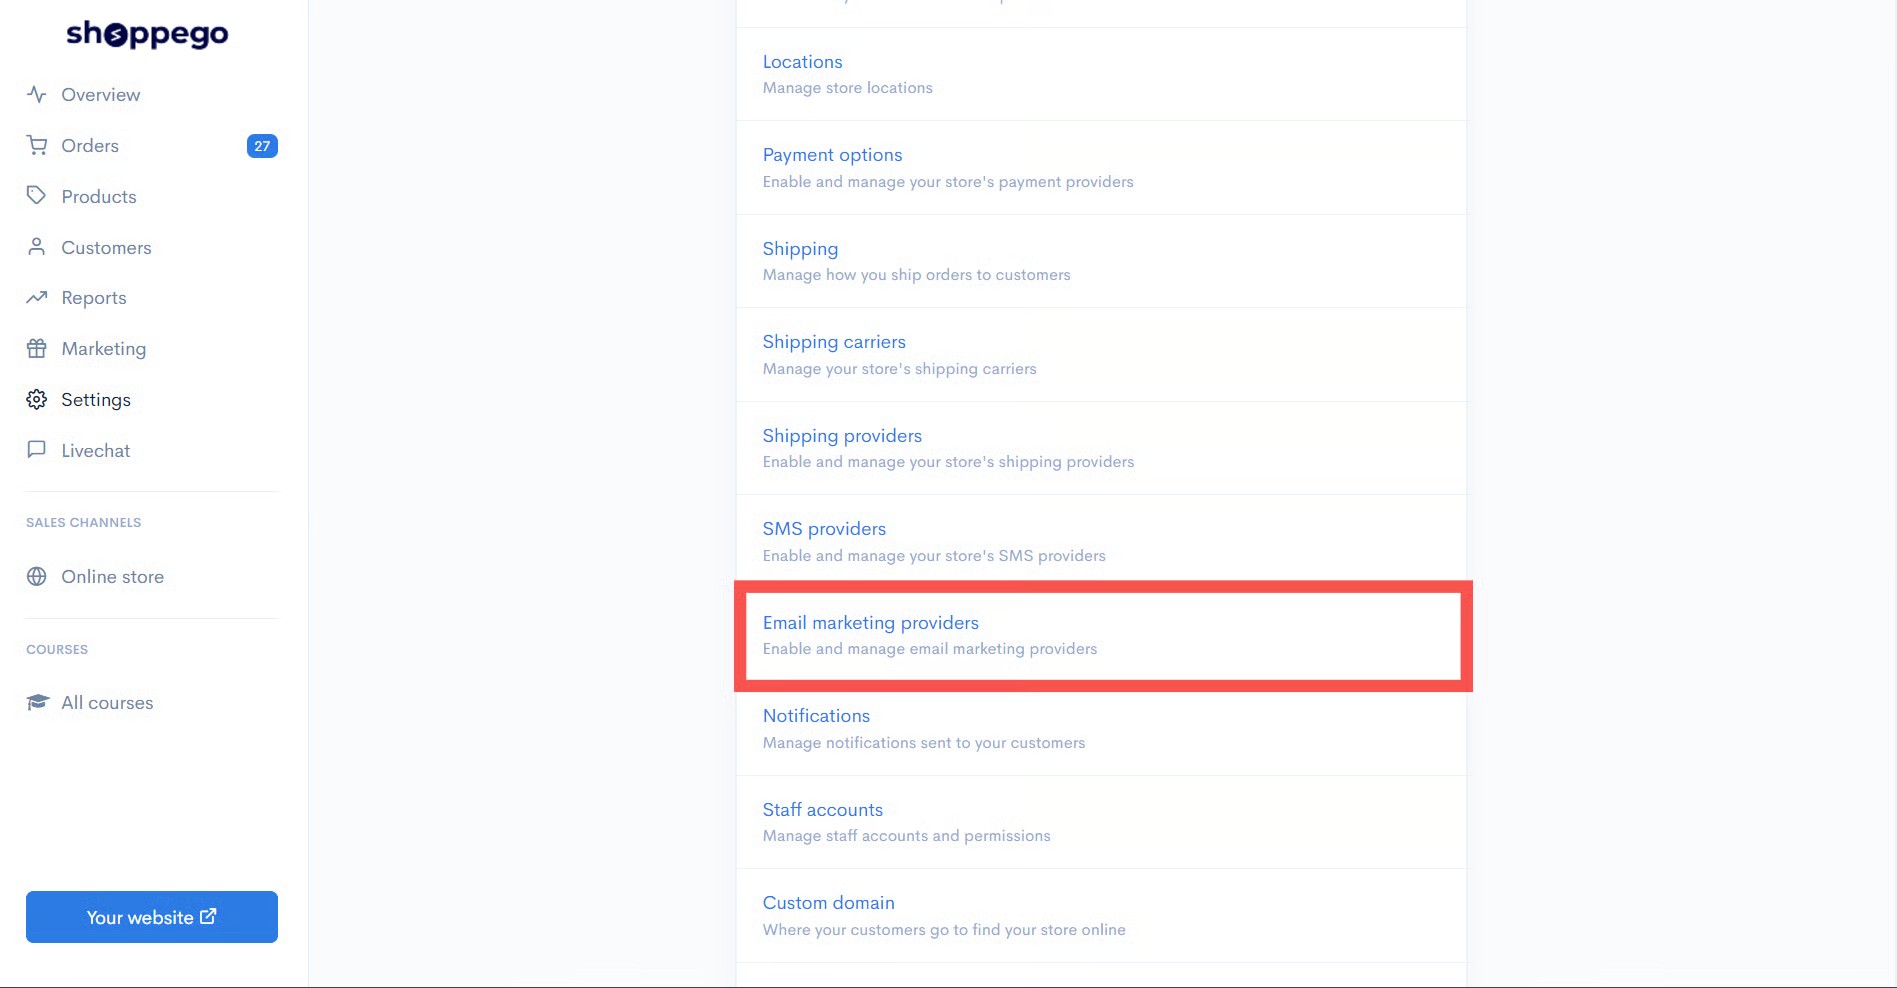
2. After that, you can click on **Email Marketing Provider**

<figure><img src="https://3359028955-files.gitbook.io/~/files/v0/b/gitbook-x-prod.appspot.com/o/spaces%2F-Lh09fNwqqta5Vj6Wr8p%2Fuploads%2Fgit-blob-6e16175afc3558859b77f27ba8d6807bac275bcf%2FG7jjXYelY1uP9ZamRoMj.jpg?alt=media" alt=""><figcaption></figcaption></figure>

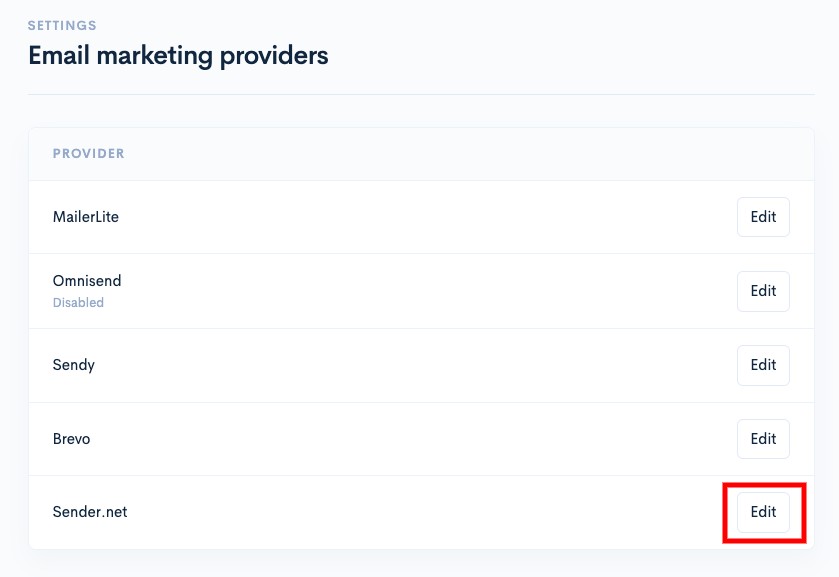
3. On this page, you will need to press the **Activate/Edit** button to **activate Sender.net**.

<figure><img src="https://3359028955-files.gitbook.io/~/files/v0/b/gitbook-x-prod.appspot.com/o/spaces%2F-Lh09fNwqqta5Vj6Wr8p%2Fuploads%2Fgit-blob-bf172796c767aedfa4c2094fef493a7de52403b6%2FqaurcCBgZH0Yi4dF8GMZ.jpg?alt=media" alt=""><figcaption></figcaption></figure>

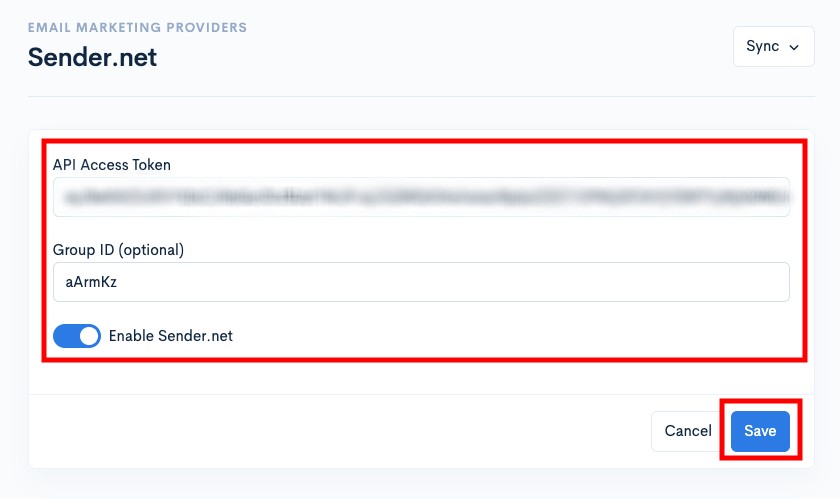
4. You need to enter the **API access token** you got from **Sender.net** into the space provided. You can also put the **Group ID**.

{% hint style="info" %}
\*\*<mark style="color:red;">**Attention**</mark> :

* **Group ID** - Used to place registered customers into the group you want.
  {% endhint %}

5. Make sure you turn on the **Enable toggle to use Sender.net**

<figure><img src="https://3359028955-files.gitbook.io/~/files/v0/b/gitbook-x-prod.appspot.com/o/spaces%2F-Lh09fNwqqta5Vj6Wr8p%2Fuploads%2Fgit-blob-415ab909bd448941c3c0f5fe51167e1cc5efcc05%2FL7GkehXoLYMIlFBrdV8m.jpg?alt=media" alt=""><figcaption></figcaption></figure>

<mark style="color:blue;">**Congratulations**</mark>! Your **Sender.net** setup has been successful.

### Sync Shoppego Customer Information With Sender Group List

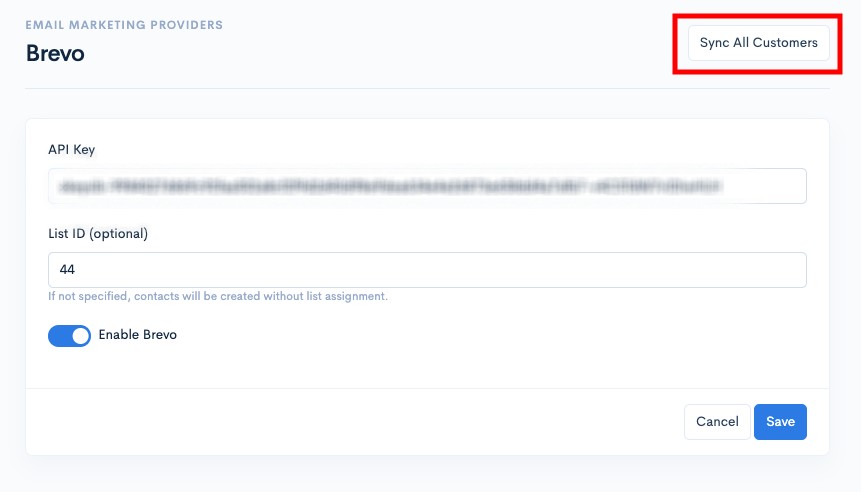
To sync information, you just need to click on the **Sync All Customers/Sync** button.
<figure><img src="https://3359028955-files.gitbook.io/~/files/v0/b/gitbook-x-prod.appspot.com/o/spaces%2F-Lh09fNwqqta5Vj6Wr8p%2Fuploads%2Fgit-blob-ef1e3d3024207d2ca27aed61446fa475b9d89ab4%2FAtrJQEHnOcl8dZK8lmOv.jpg?alt=media" alt=""><figcaption></figcaption></figure>