> For the complete documentation index, see [llms.txt](https://docs.shoppego.my/tutorials/llms.txt). Markdown versions of documentation pages are available by appending `.md` to page URLs; this page is available as [Markdown](https://docs.shoppego.my/tutorials/en/settings/transactional-email-providers/smtp.md).

# SMTP

SMTP (Simple Mail Transfer Protocol) is a standard internet protocol used to send and deliver outgoing emails between mail servers.

For integration, you can refer to the tutorial provided.

## Before You Begin:

* Make sure you have set up your transactional email account such as setting up a domain/API key.
* Make sure your transactional email account has SMTP integration information.

## Get SMTP information

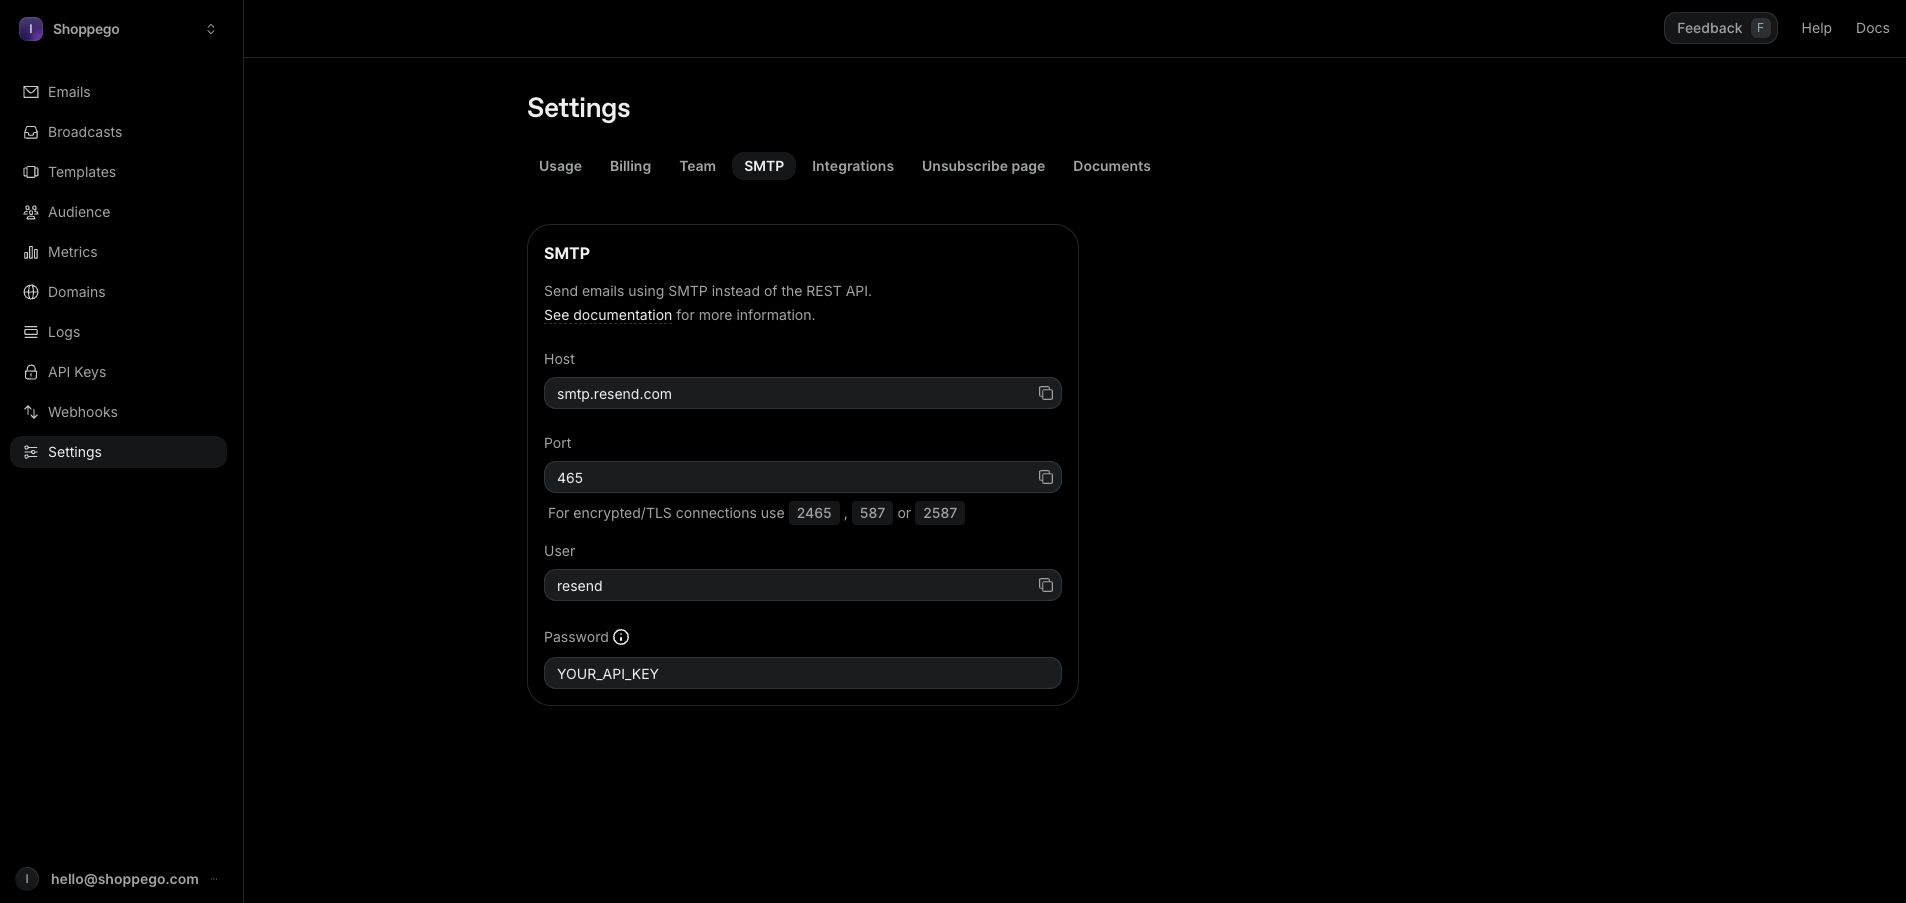
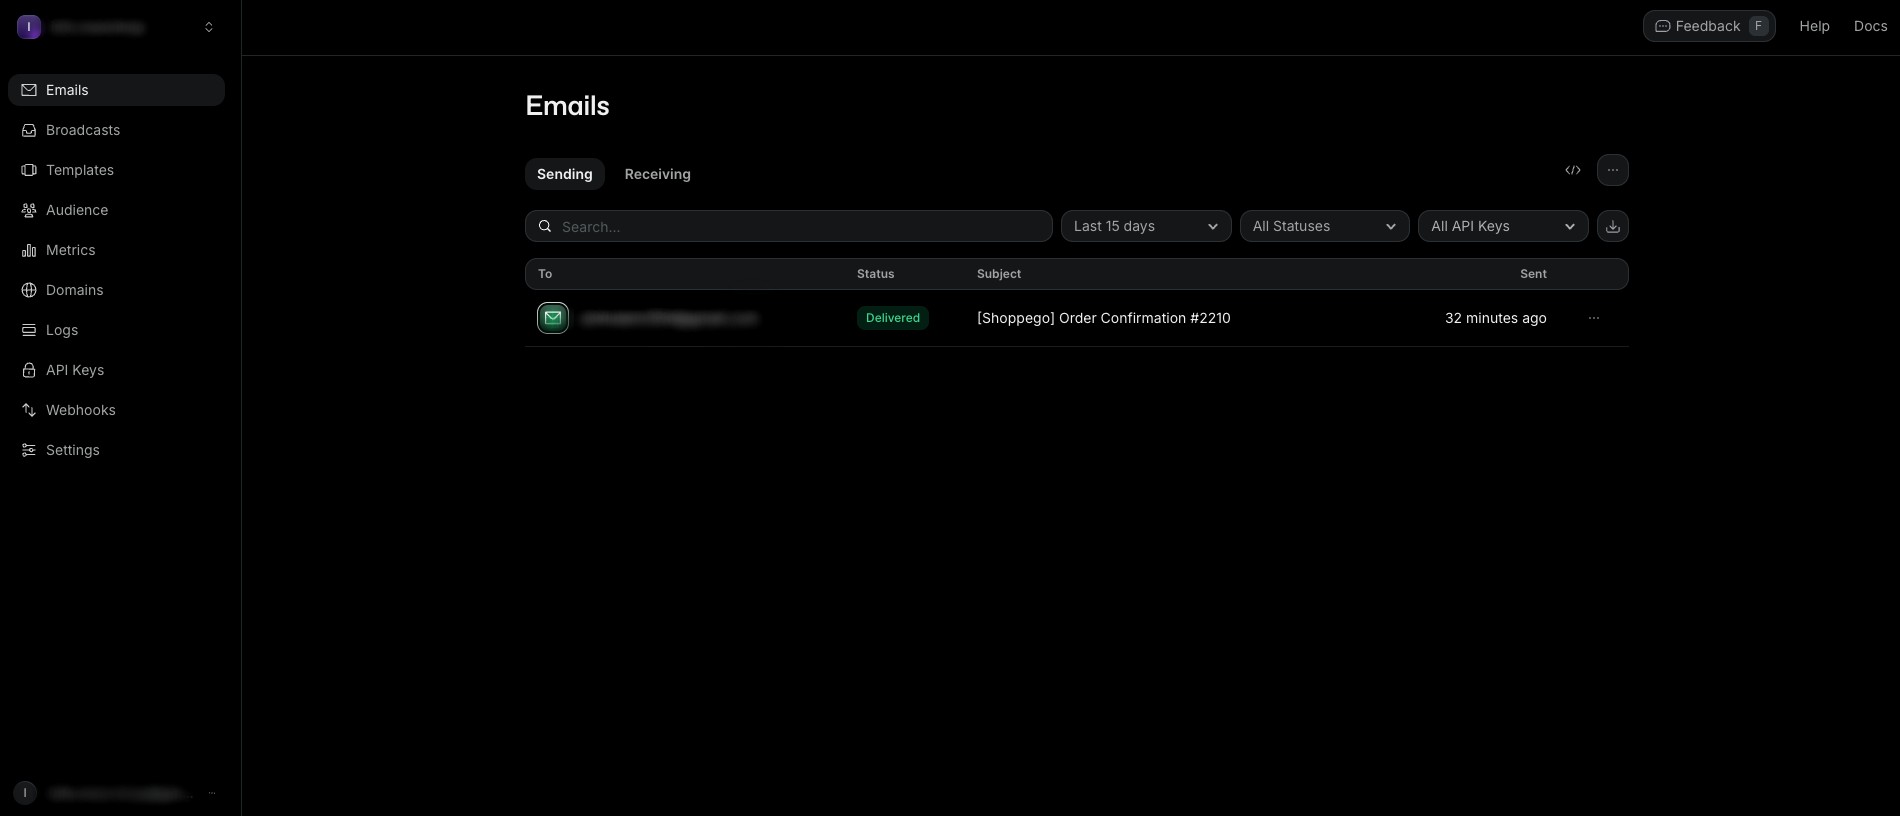
1. Log in to your transactional email account.

<figure><img src="https://3359028955-files.gitbook.io/~/files/v0/b/gitbook-x-prod.appspot.com/o/spaces%2F-Lh09fNwqqta5Vj6Wr8p%2Fuploads%2Fgit-blob-51a4d88f9edbd86ecd9fe1488eff10028bf8aa7c%2FMYgLJqe0w7u9auVgI2R4.jpg?alt=media" alt=""><figcaption></figcaption></figure>

2. Access to SMTP settings\
   \
   Then, you can use all that information to enter into the settings in Shoppego later. Make sure you have also done all the necessary settings such as verify domain/API key

<figure><img src="https://3359028955-files.gitbook.io/~/files/v0/b/gitbook-x-prod.appspot.com/o/spaces%2F-Lh09fNwqqta5Vj6Wr8p%2Fuploads%2Fgit-blob-230b5d91c316d10bf072c9de09bb2e78c9eee55a%2FHLI7mLeVIZ911PmNLZ4E.png?alt=media" alt=""><figcaption></figcaption></figure>

## Setting up in Shoppego

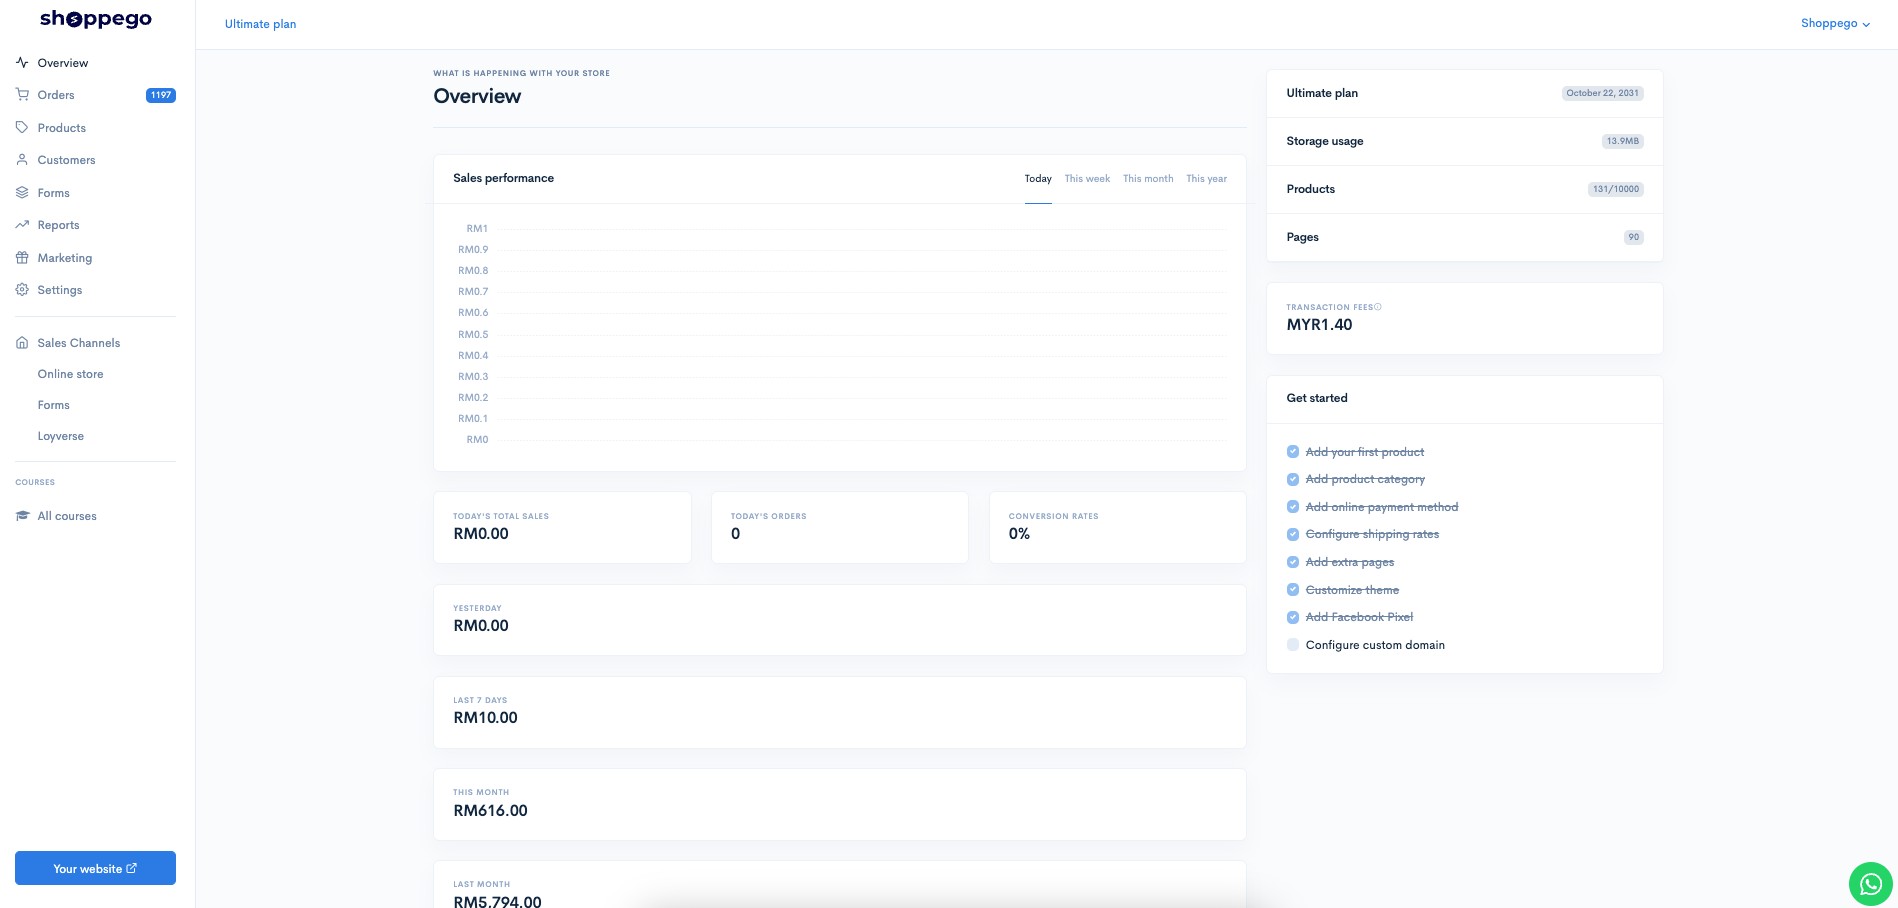
1. Log in to your Shoppego account

<figure><img src="https://3359028955-files.gitbook.io/~/files/v0/b/gitbook-x-prod.appspot.com/o/spaces%2F-Lh09fNwqqta5Vj6Wr8p%2Fuploads%2Fgit-blob-b853fc0189b34fb1d3990f5b1f53fa71deb9d384%2FlCN7aw3FznaFFoOAyya2.jpg?alt=media" alt=""><figcaption></figcaption></figure>

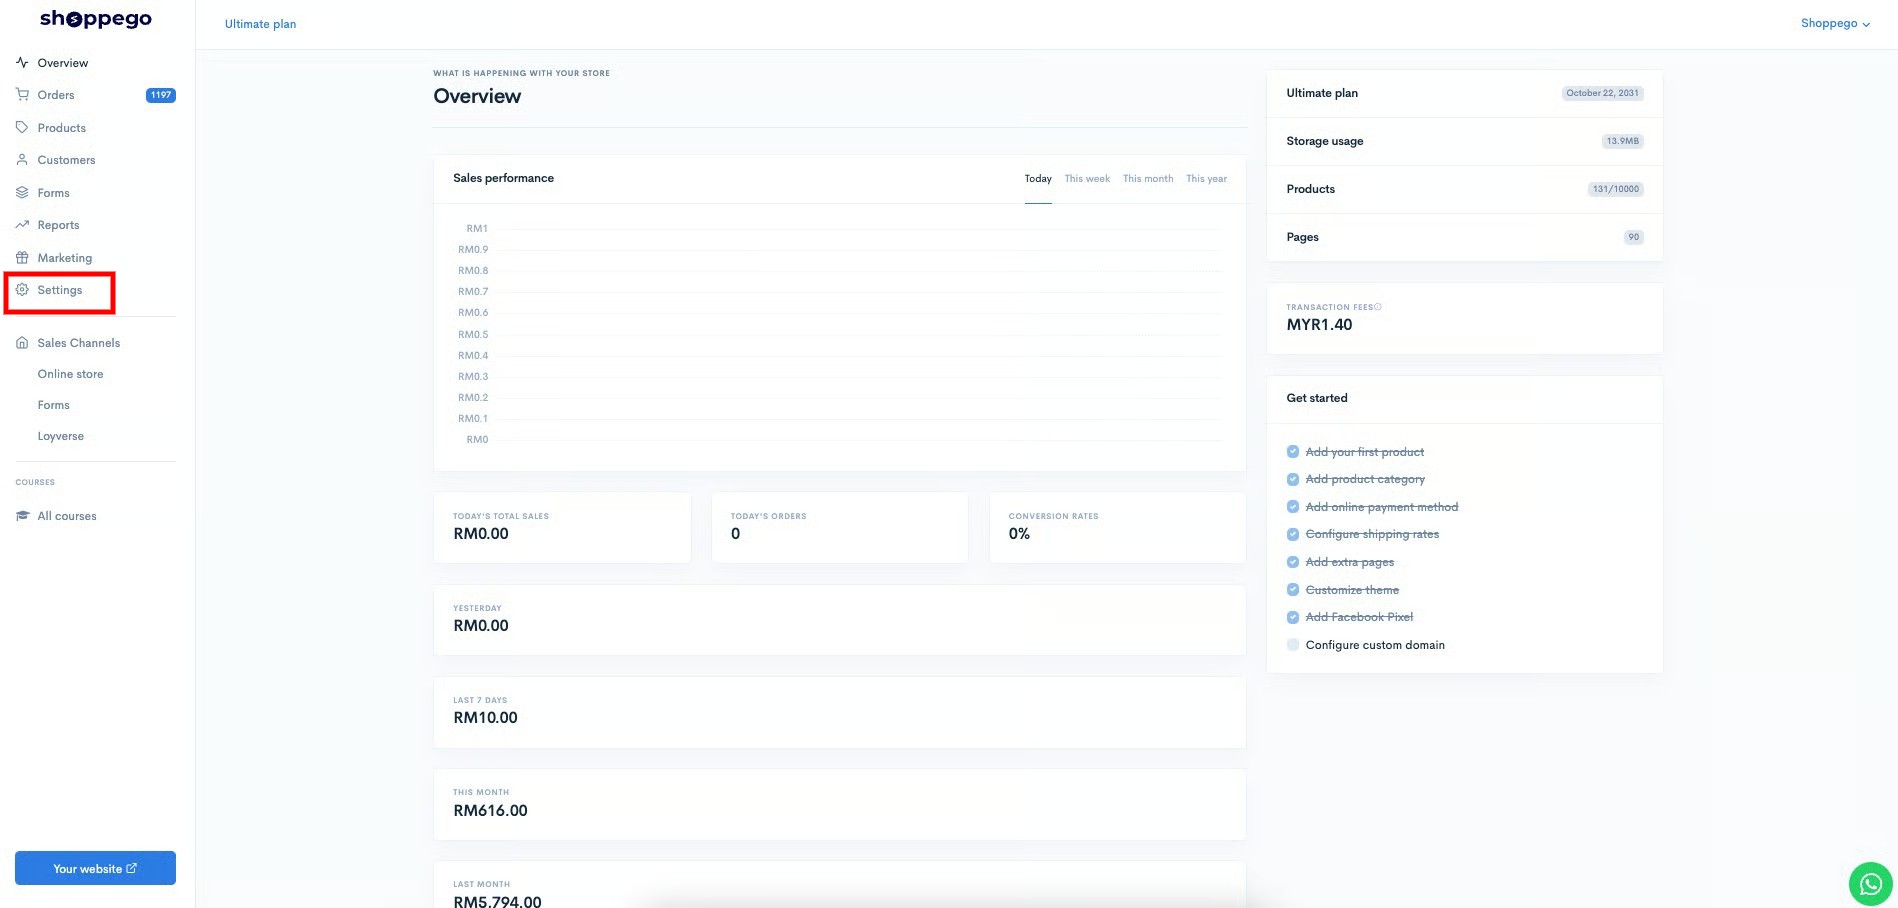
2. Click on **Settings**

<figure><img src="https://3359028955-files.gitbook.io/~/files/v0/b/gitbook-x-prod.appspot.com/o/spaces%2F-Lh09fNwqqta5Vj6Wr8p%2Fuploads%2Fgit-blob-9ae8b66b366958146673b78216b78ff0e8f12b90%2FVsK9zs6aZtUfKK1hcCiM.jpg?alt=media" alt=""><figcaption></figcaption></figure>

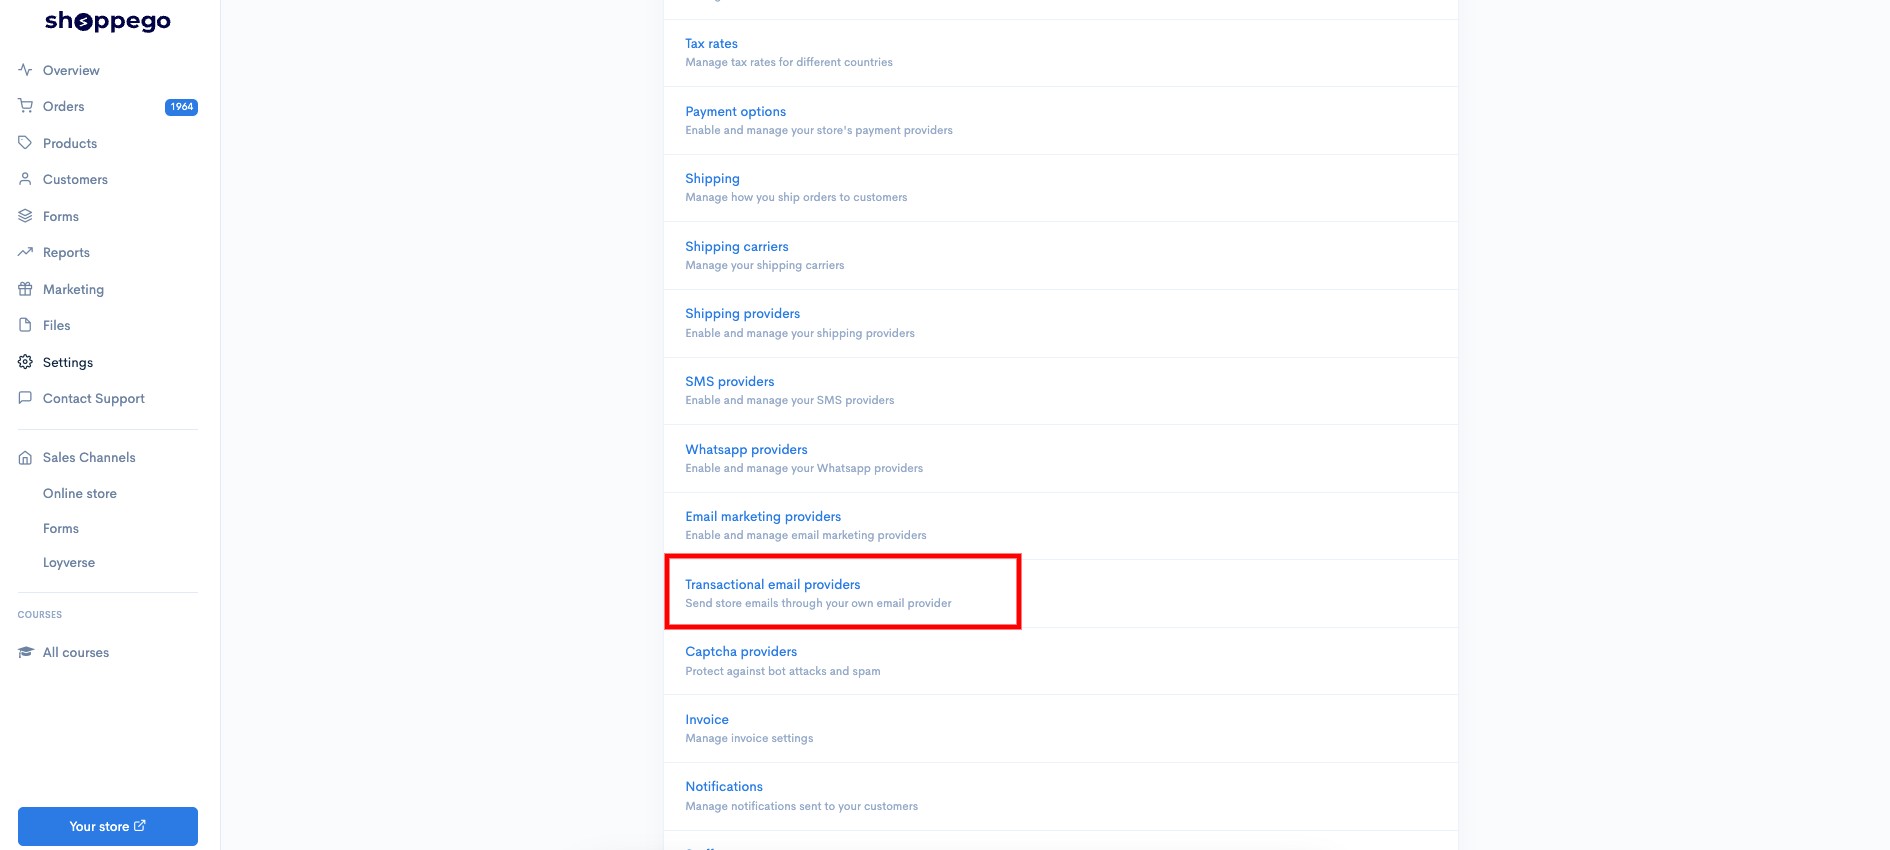
3. Click on **Transactional email providers**

<figure><img src="https://3359028955-files.gitbook.io/~/files/v0/b/gitbook-x-prod.appspot.com/o/spaces%2F-Lh09fNwqqta5Vj6Wr8p%2Fuploads%2Fgit-blob-2b143cf06794f236e9779055148395e0da95bc0d%2FqPlS7UVCv05zHOfQ0wXy.jpg?alt=media" alt=""><figcaption></figcaption></figure>

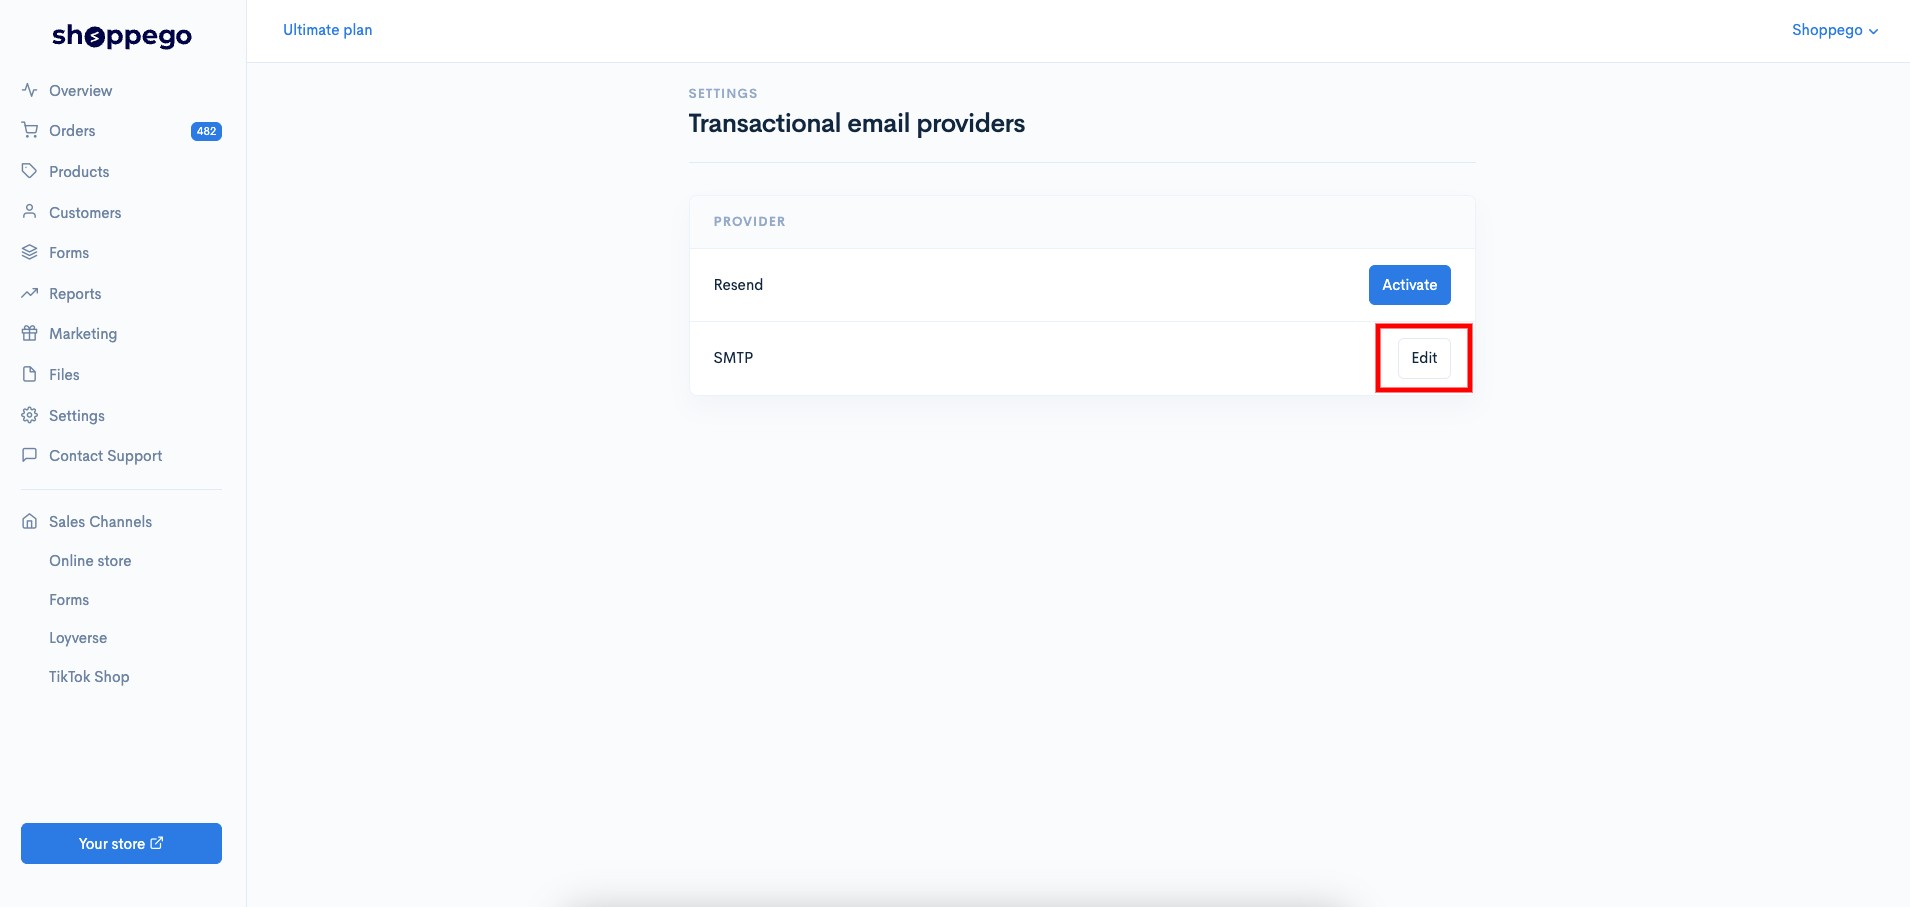
4. Click **Activate/Edit** on the **SMTP** tab.

<figure><img src="https://3359028955-files.gitbook.io/~/files/v0/b/gitbook-x-prod.appspot.com/o/spaces%2F-Lh09fNwqqta5Vj6Wr8p%2Fuploads%2Fgit-blob-f23496a93fabc96b0818b52468052672c293e53c%2F2pu1Fv27g4eUM2bPwOji.jpg?alt=media" alt=""><figcaption></figcaption></figure>

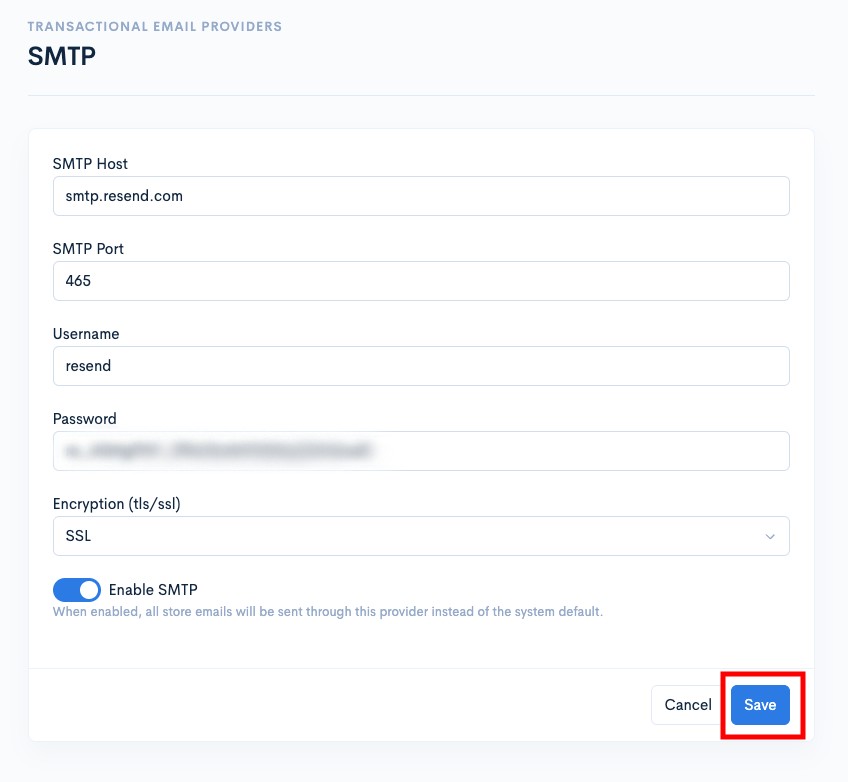
5. **Enter all your information** and **tick the Enable toggle**. Then, you can **Save** the settings.

<figure><img src="https://3359028955-files.gitbook.io/~/files/v0/b/gitbook-x-prod.appspot.com/o/spaces%2F-Lh09fNwqqta5Vj6Wr8p%2Fuploads%2Fgit-blob-b44d2c36d036c2c448e346a4c3583683b419a61c%2FeiQgFQNZ5OzvC409OGt2.jpg?alt=media" alt=""><figcaption></figcaption></figure>

Now your integration setting is complete.

## Additional Information

Make sure you have entered the correct notification email for sending your email notifications later.

You can check the setting in the section:

1. Log in to your Shoppego account

<figure><img src="https://3359028955-files.gitbook.io/~/files/v0/b/gitbook-x-prod.appspot.com/o/spaces%2F-Lh09fNwqqta5Vj6Wr8p%2Fuploads%2Fgit-blob-b853fc0189b34fb1d3990f5b1f53fa71deb9d384%2FlCN7aw3FznaFFoOAyya2.jpg?alt=media" alt=""><figcaption></figcaption></figure>

2. Click on **Settings**

<figure><img src="https://3359028955-files.gitbook.io/~/files/v0/b/gitbook-x-prod.appspot.com/o/spaces%2F-Lh09fNwqqta5Vj6Wr8p%2Fuploads%2Fgit-blob-9ae8b66b366958146673b78216b78ff0e8f12b90%2FVsK9zs6aZtUfKK1hcCiM.jpg?alt=media" alt=""><figcaption></figcaption></figure>

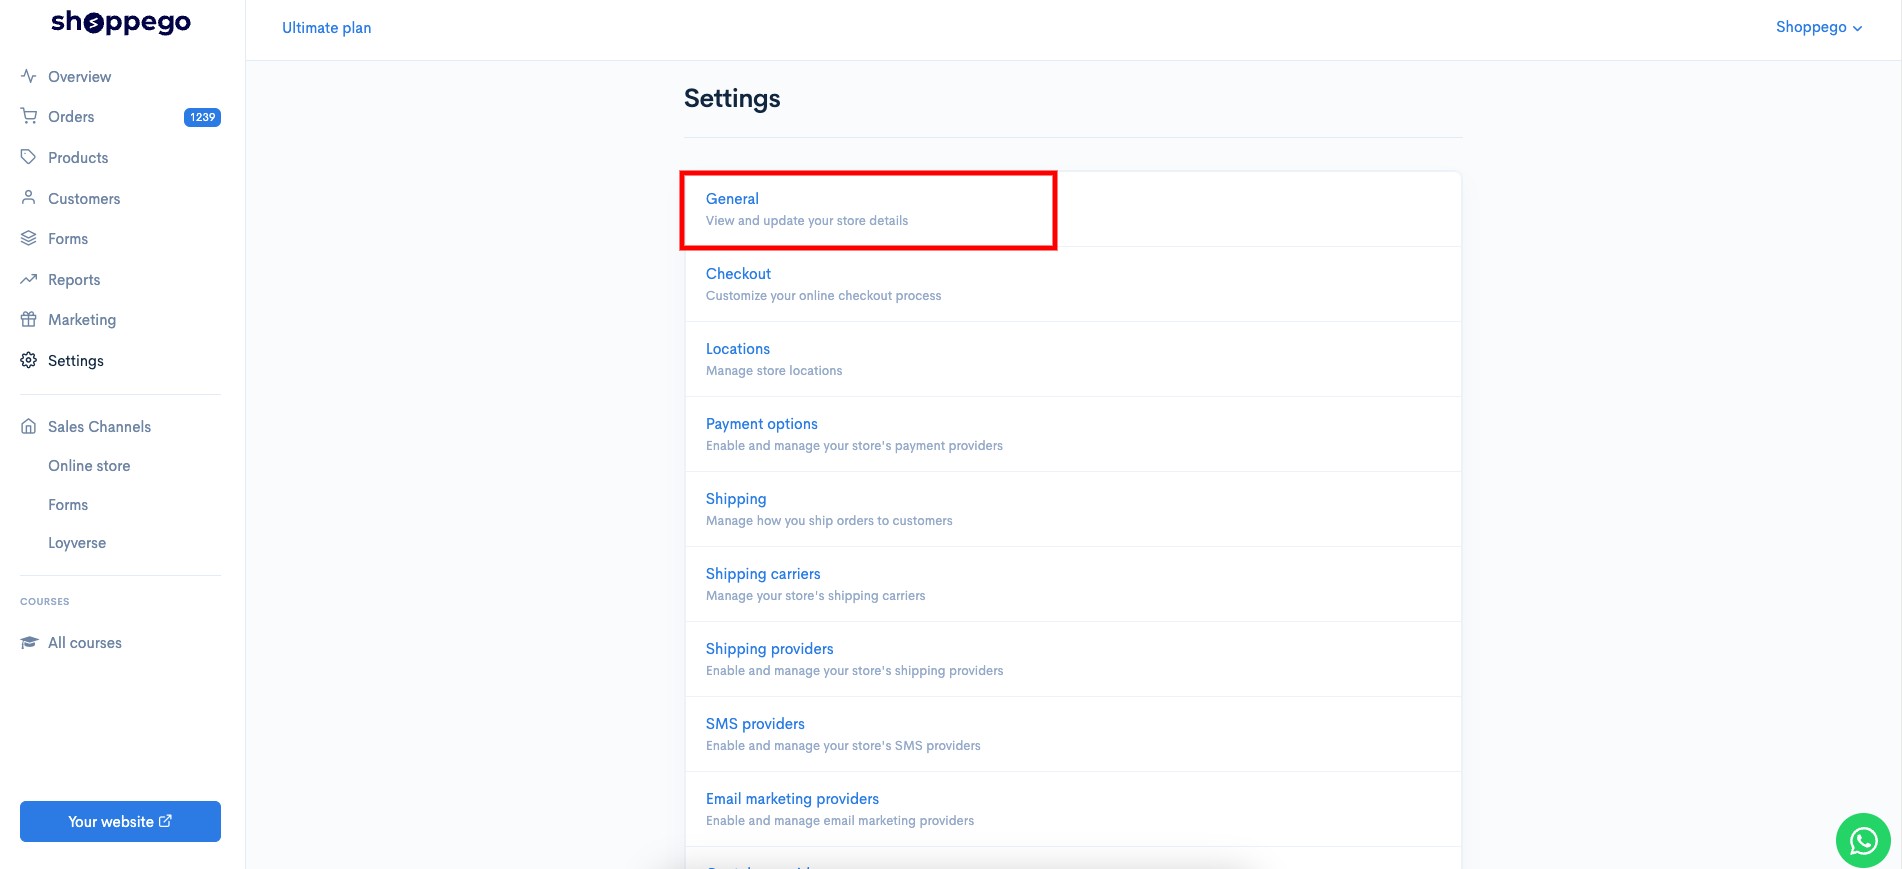
3. Click on **General**

<figure><img src="https://3359028955-files.gitbook.io/~/files/v0/b/gitbook-x-prod.appspot.com/o/spaces%2F-Lh09fNwqqta5Vj6Wr8p%2Fuploads%2Fgit-blob-996b1339523fecd9bcf84b27a26606e2b0c99aa7%2FanealodqyXwHTuzr4AHU.jpg?alt=media" alt=""><figcaption></figcaption></figure>

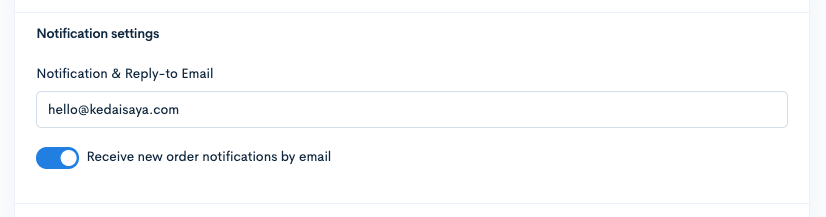
4. Make sure the "**Notification & Reply-to Email**" setting is set to the email that **uses the domain in your transactional email account**.\
   \
   For example, in transaction email account you use the domain kedaisaya.com, so in that setting, you need to enter an email like this: <hello@kedaisaya.com>
<figure><img src="https://3359028955-files.gitbook.io/~/files/v0/b/gitbook-x-prod.appspot.com/o/spaces%2F-Lh09fNwqqta5Vj6Wr8p%2Fuploads%2Fgit-blob-2ef9deb9076be5440a15d209bae811a65fb6c845%2FGKrjaWn3Tig16nShP4oj.png?alt=media" alt=""><figcaption></figcaption></figure>