> For the complete documentation index, see [llms.txt](https://docs.shoppego.my/tutorials/llms.txt). Markdown versions of documentation pages are available by appending `.md` to page URLs; this page is available as [Markdown](https://docs.shoppego.my/tutorials/en/settings/whatsapp-providers/wabot.md).

# Wabot

To set WhatsApp Notifications using the Wabot system, you can follow the steps provided.

Before starting this setup, you need to make sure you have registered a Wabot account first.

## **Settings at Wabot**

1. Log in to your Wabot account

<figure><img src="https://3359028955-files.gitbook.io/~/files/v0/b/gitbook-x-prod.appspot.com/o/spaces%2F-Lh09fNwqqta5Vj6Wr8p%2Fuploads%2Fgit-blob-d6fbd7b91ef946cfb2536432ff8ac695f0cce8cc%2FTSmFhpjsTvag8Z91piMJ.jpg?alt=media" alt=""><figcaption></figcaption></figure>

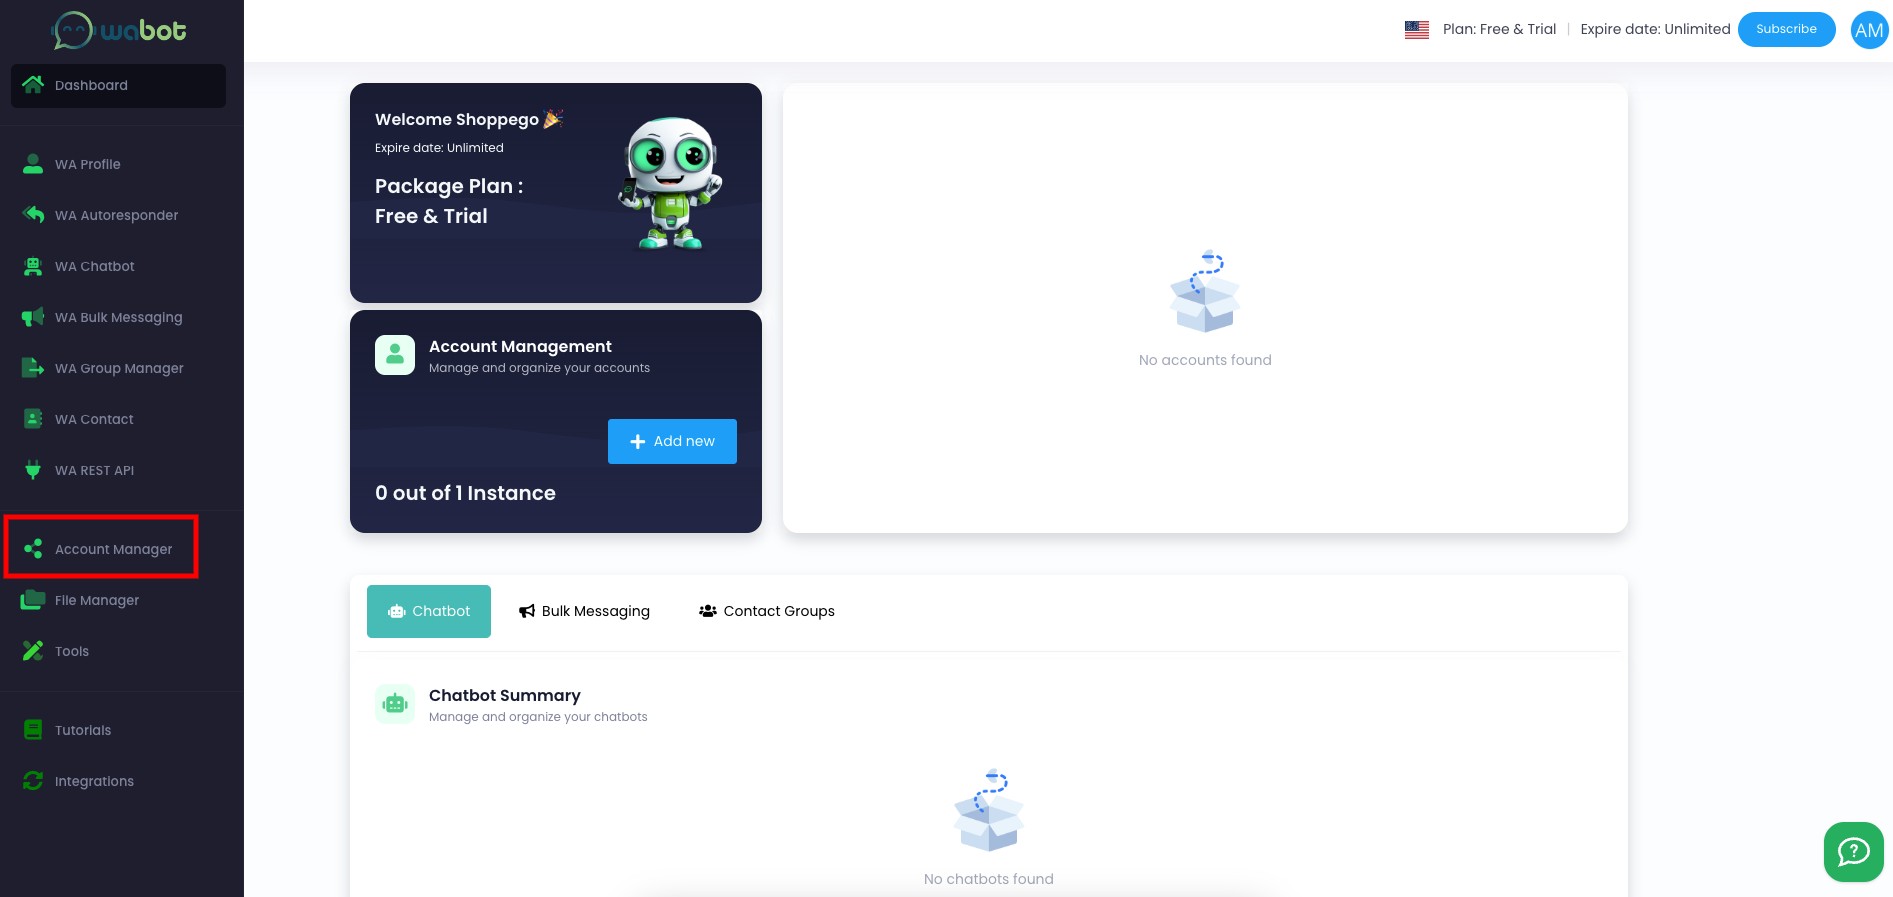
2. If you have not yet added a Whatsapp number to your Wabot account, you can click on **Account Manager.**

<figure><img src="https://3359028955-files.gitbook.io/~/files/v0/b/gitbook-x-prod.appspot.com/o/spaces%2F-Lh09fNwqqta5Vj6Wr8p%2Fuploads%2Fgit-blob-057c30c5d1047790179b18f79feb7b4339de9dc0%2FWsfRMnIlfi6CmbzP24As.jpg?alt=media" alt=""><figcaption></figcaption></figure>

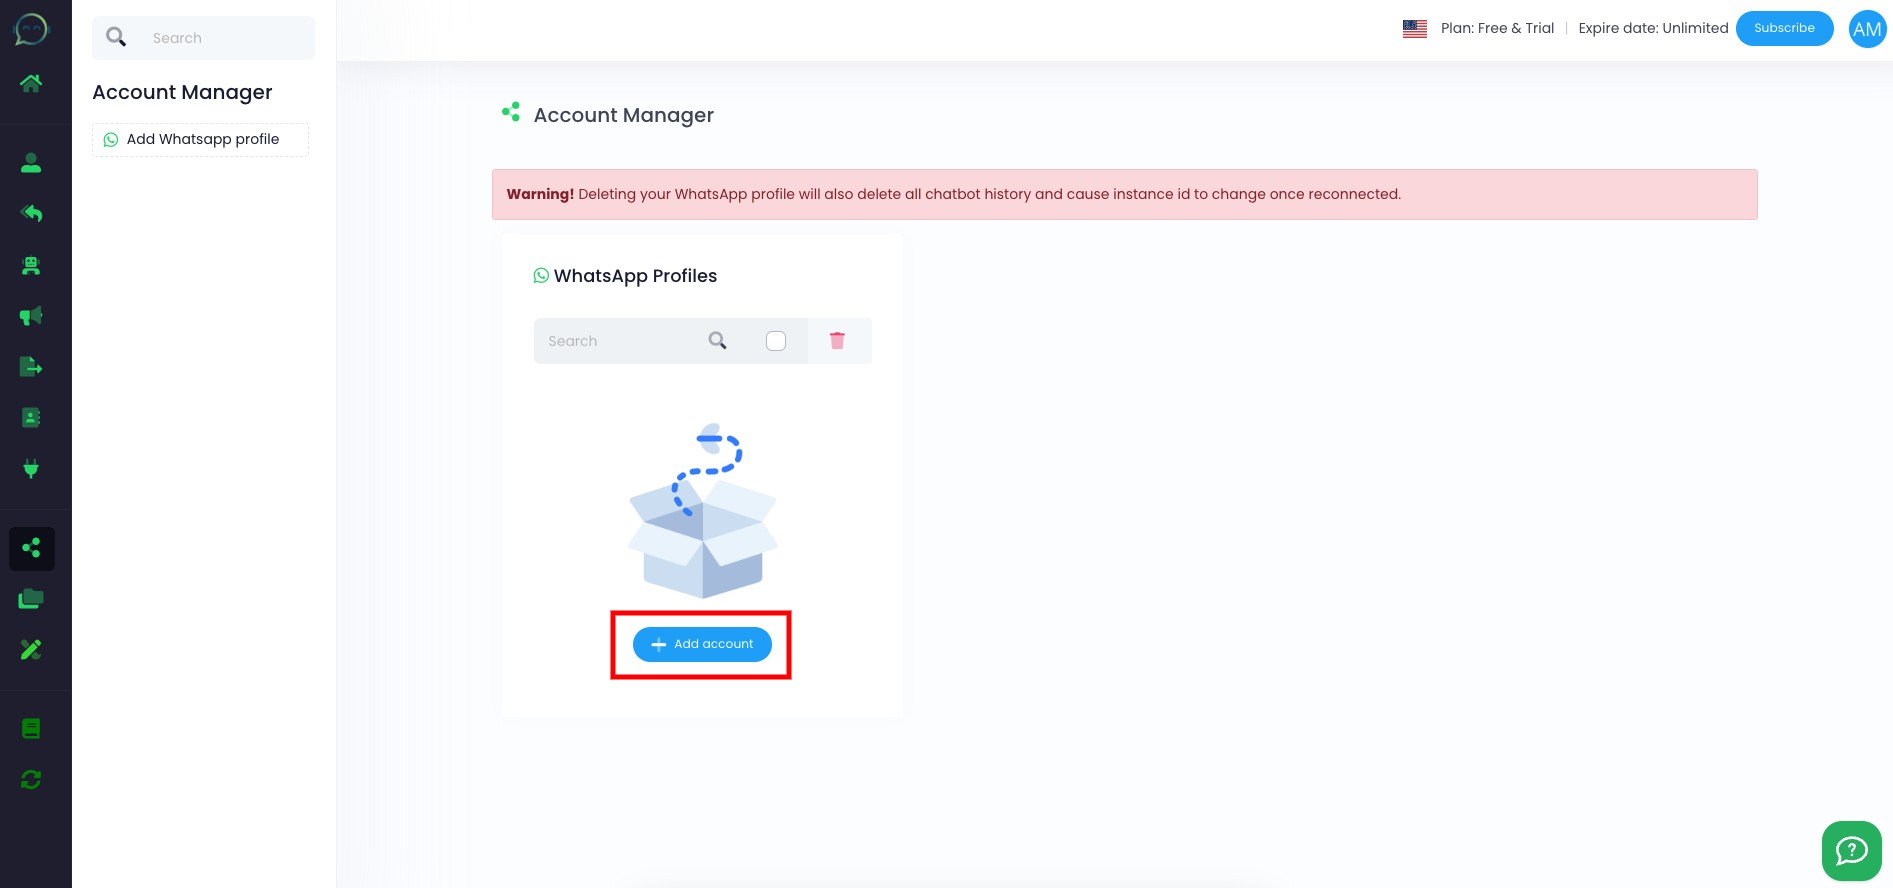
3. Click **Add account**

<figure><img src="https://3359028955-files.gitbook.io/~/files/v0/b/gitbook-x-prod.appspot.com/o/spaces%2F-Lh09fNwqqta5Vj6Wr8p%2Fuploads%2Fgit-blob-ddc8edded9e6734108772baca51295fe9612e221%2FAfxtztbwoYGBcB0yWfgN.jpg?alt=media" alt=""><figcaption></figcaption></figure>

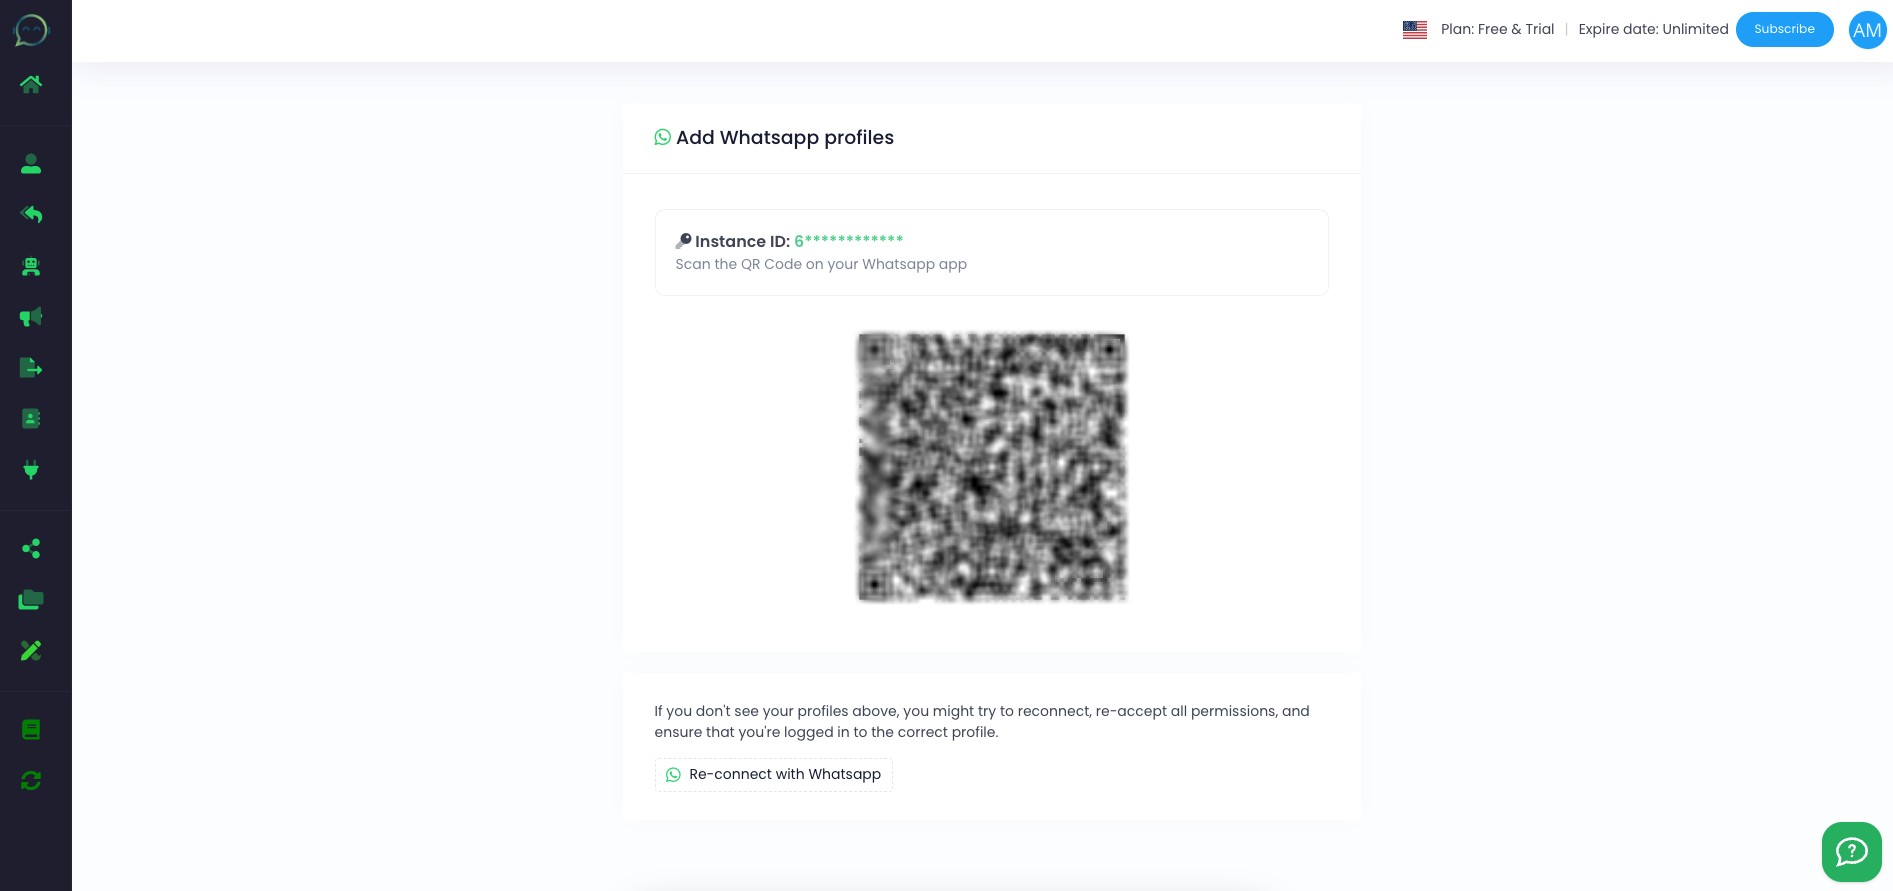
4. Then, you need to **scan the QR code** of your Whatsapp account.

<figure><img src="https://3359028955-files.gitbook.io/~/files/v0/b/gitbook-x-prod.appspot.com/o/spaces%2F-Lh09fNwqqta5Vj6Wr8p%2Fuploads%2Fgit-blob-c3a4dcc6a5ba2e2ac7fe6f57051da5e586f2fa7a%2F6rGcLO4ama69MpjuU6Yv.jpg?alt=media" alt=""><figcaption></figcaption></figure>

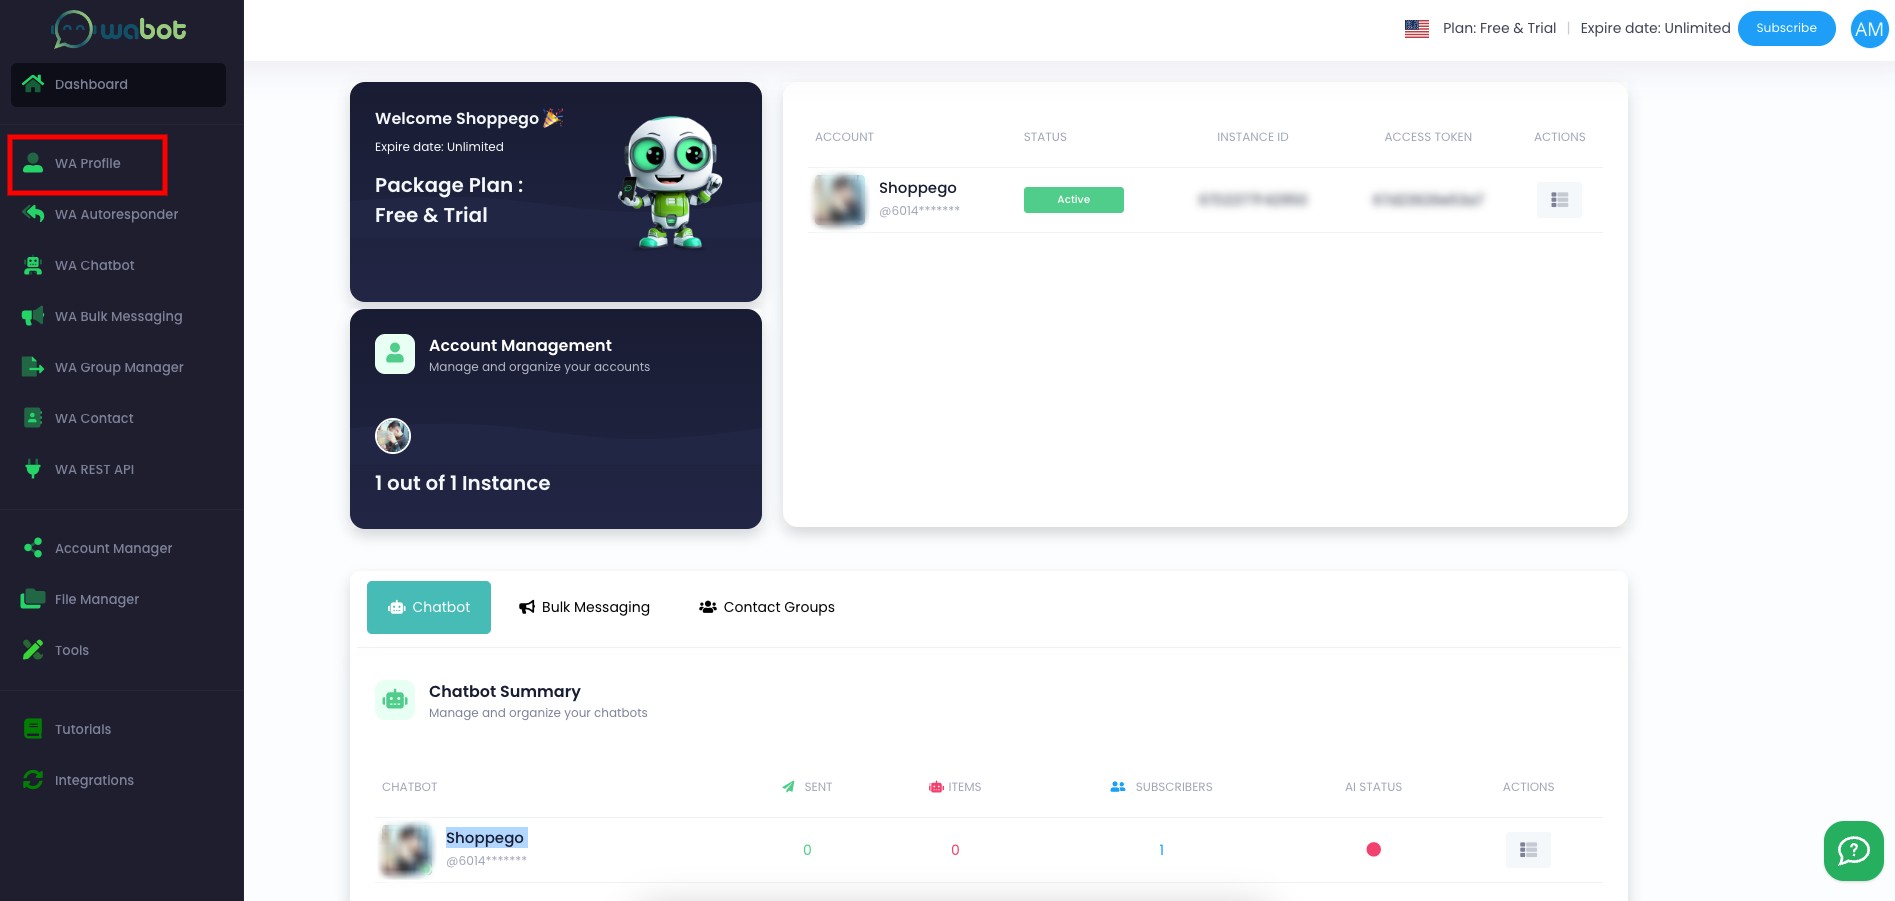
5. Once done, you can click on **WA Profile**

<figure><img src="https://3359028955-files.gitbook.io/~/files/v0/b/gitbook-x-prod.appspot.com/o/spaces%2F-Lh09fNwqqta5Vj6Wr8p%2Fuploads%2Fgit-blob-2e8ee1e74fee69e9686effc950e6a6d1daacd754%2FcJTcNkDNMqlMjS0gtNL8.jpg?alt=media" alt=""><figcaption></figcaption></figure>

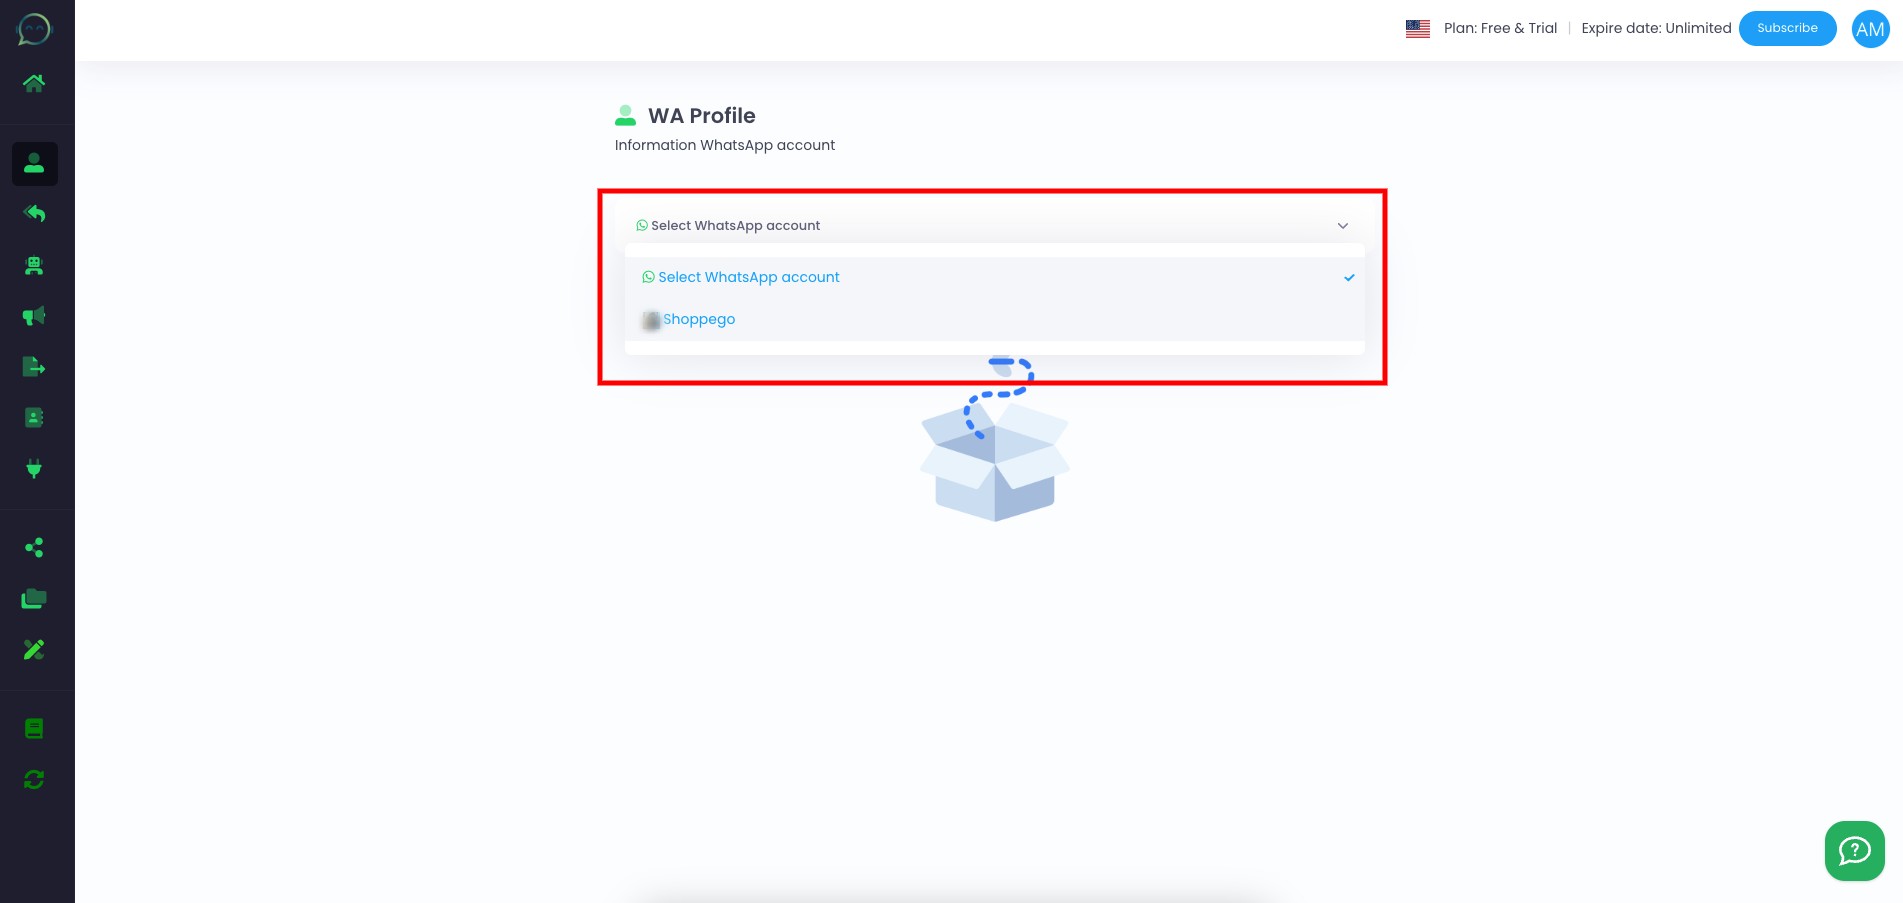
6. Then, **select the Whatsapp account you just added**.

<figure><img src="https://3359028955-files.gitbook.io/~/files/v0/b/gitbook-x-prod.appspot.com/o/spaces%2F-Lh09fNwqqta5Vj6Wr8p%2Fuploads%2Fgit-blob-6fdb432c9bc6333a8d15b6d31b1557b28906eb12%2F0N7WgIYwj7j8i2cbDFQq.jpg?alt=media" alt=""><figcaption></figcaption></figure>

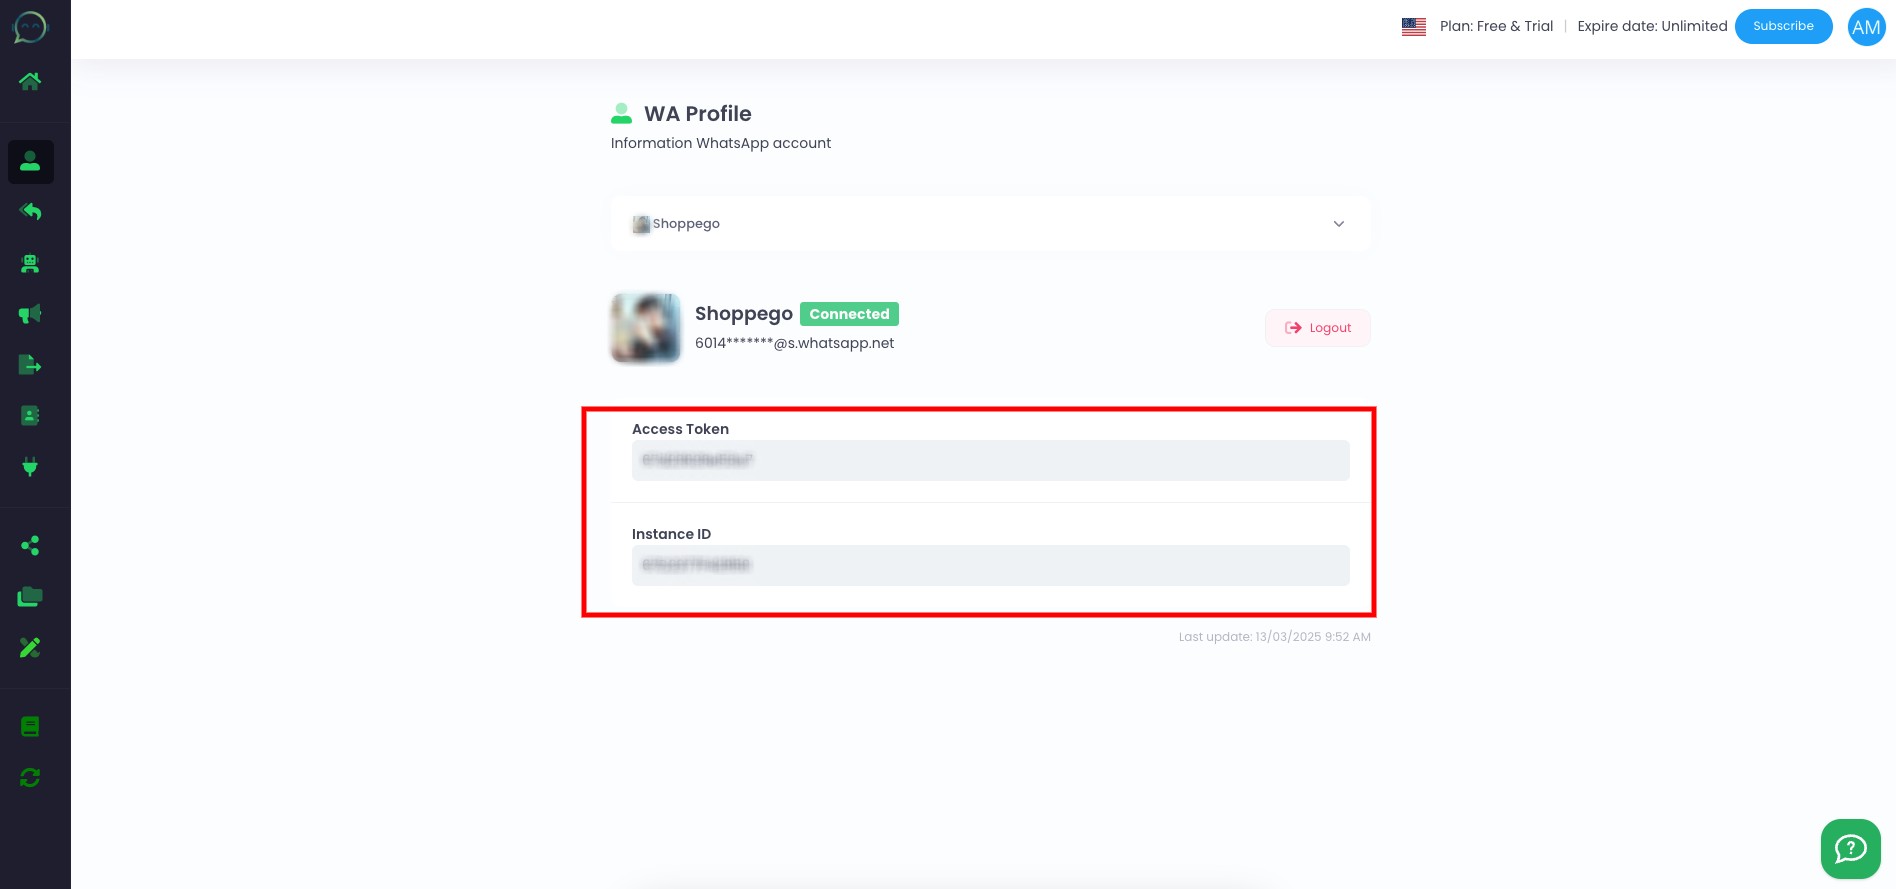
7. On the page you will be taken to, you can **get the** "**Access token**" and "**Instance Id**" **information** that you can **use to connect to your Shoppego store** later.

<figure><img src="https://3359028955-files.gitbook.io/~/files/v0/b/gitbook-x-prod.appspot.com/o/spaces%2F-Lh09fNwqqta5Vj6Wr8p%2Fuploads%2Fgit-blob-3d54b0f54b9c69e95d2904f482bd9409ae1e32fe%2FHz5WQzKh7CQKZqBKTx6m.jpg?alt=media" alt=""><figcaption></figcaption></figure>

## Settings at Shoppego

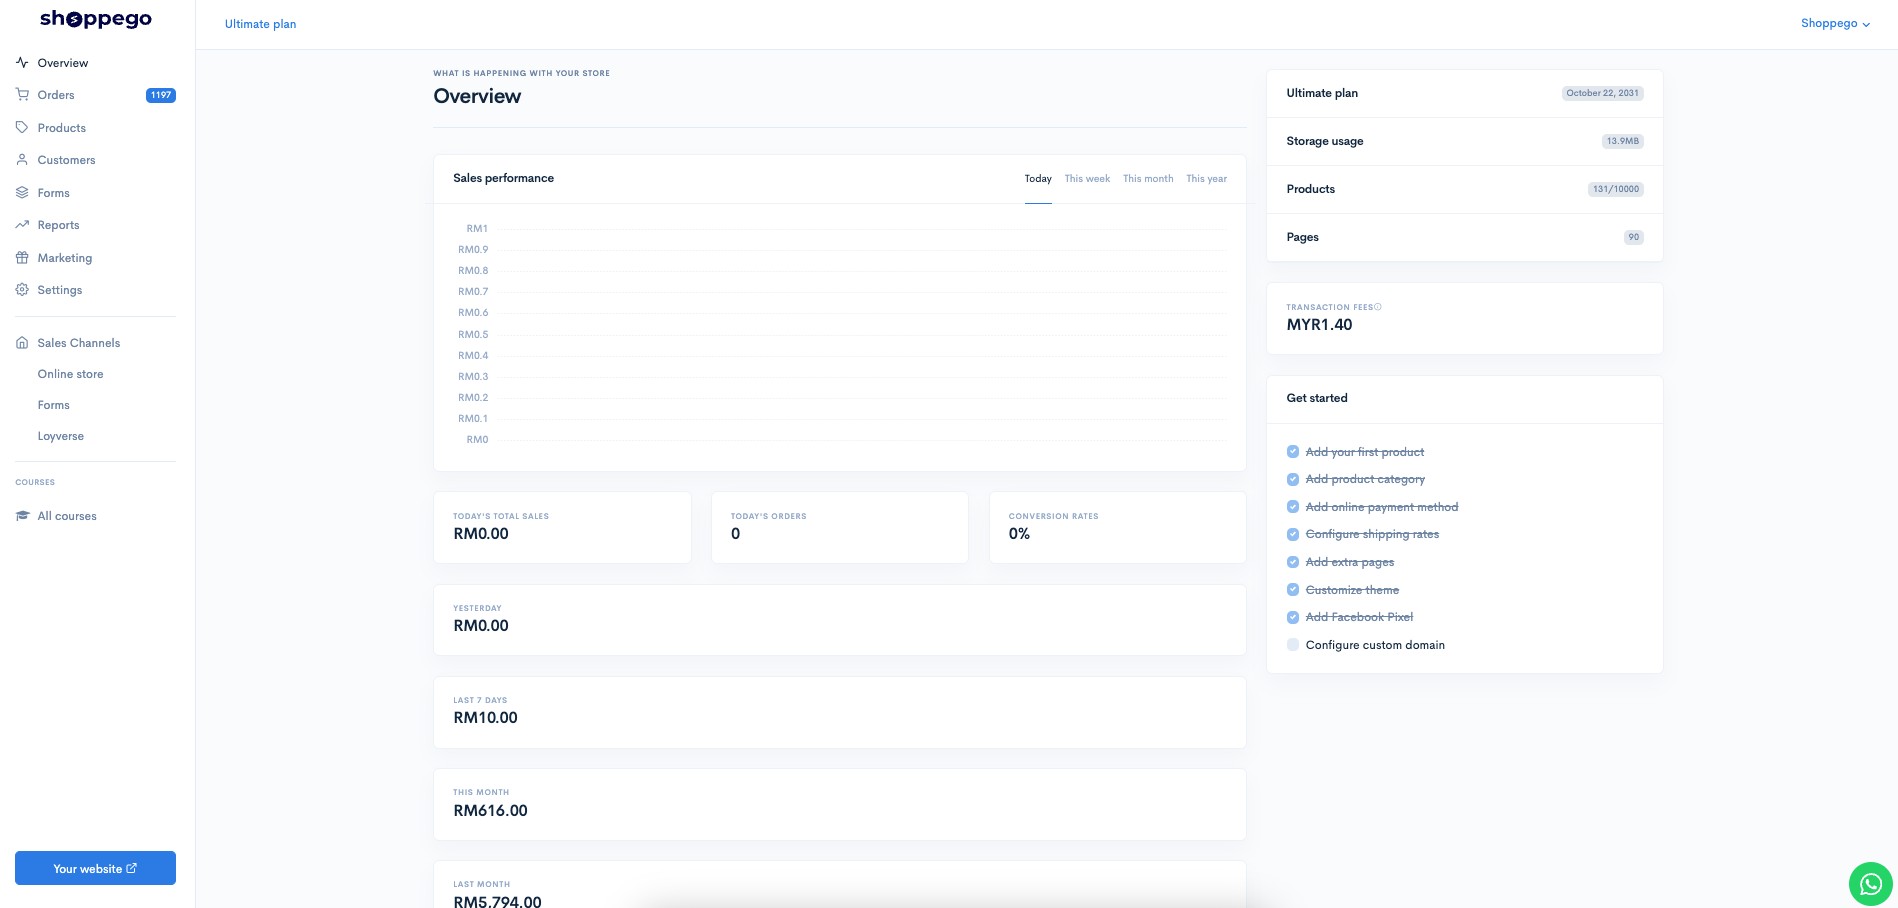
1. Log in to your Shoppego account

<figure><img src="https://3359028955-files.gitbook.io/~/files/v0/b/gitbook-x-prod.appspot.com/o/spaces%2F-Lh09fNwqqta5Vj6Wr8p%2Fuploads%2Fgit-blob-b853fc0189b34fb1d3990f5b1f53fa71deb9d384%2FlCN7aw3FznaFFoOAyya2.jpg?alt=media" alt=""><figcaption></figcaption></figure>

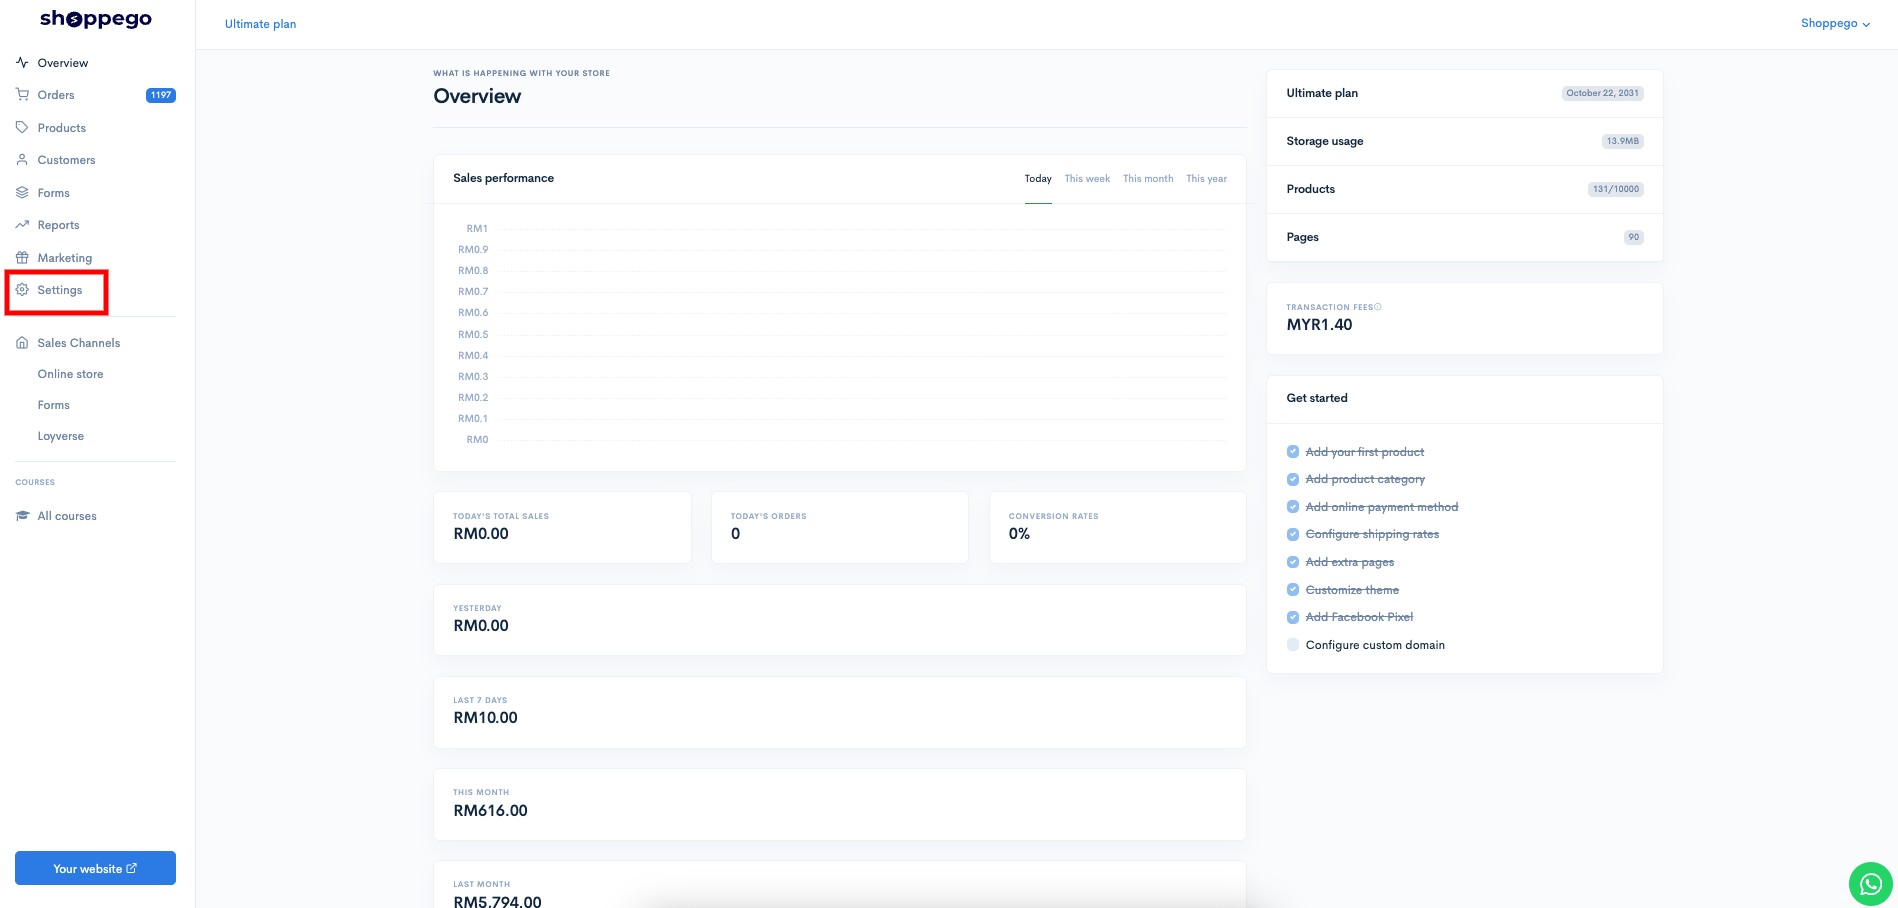
2. Click on **Settings**

<figure><img src="https://3359028955-files.gitbook.io/~/files/v0/b/gitbook-x-prod.appspot.com/o/spaces%2F-Lh09fNwqqta5Vj6Wr8p%2Fuploads%2Fgit-blob-a44ae495b7735c82651672d959f21276398fe992%2FkpzKJV4N5OQiCaTGUeRo.jpg?alt=media" alt=""><figcaption></figcaption></figure>

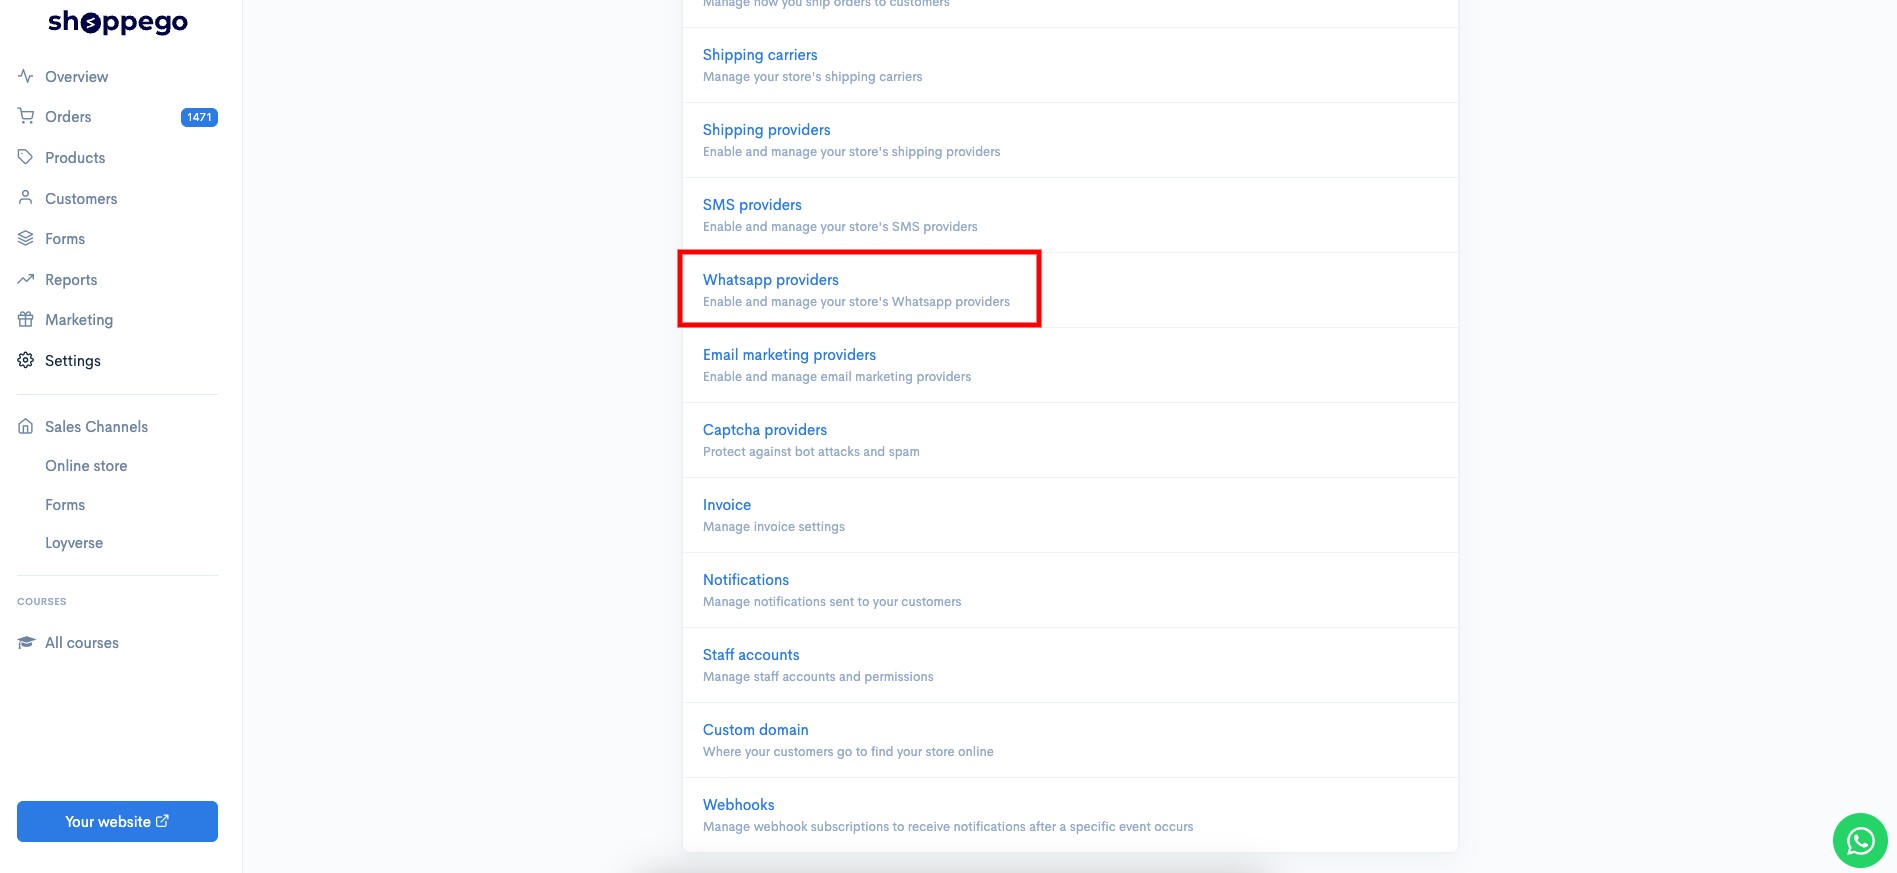
3. Click on **Whatsapp providers**

<figure><img src="https://3359028955-files.gitbook.io/~/files/v0/b/gitbook-x-prod.appspot.com/o/spaces%2F-Lh09fNwqqta5Vj6Wr8p%2Fuploads%2Fgit-blob-ecd0fb8bab8c624f33f1604a60c927efae195094%2FtMkOXH7KvLiE6iQ1XdOJ.jpg?alt=media" alt=""><figcaption></figcaption></figure>

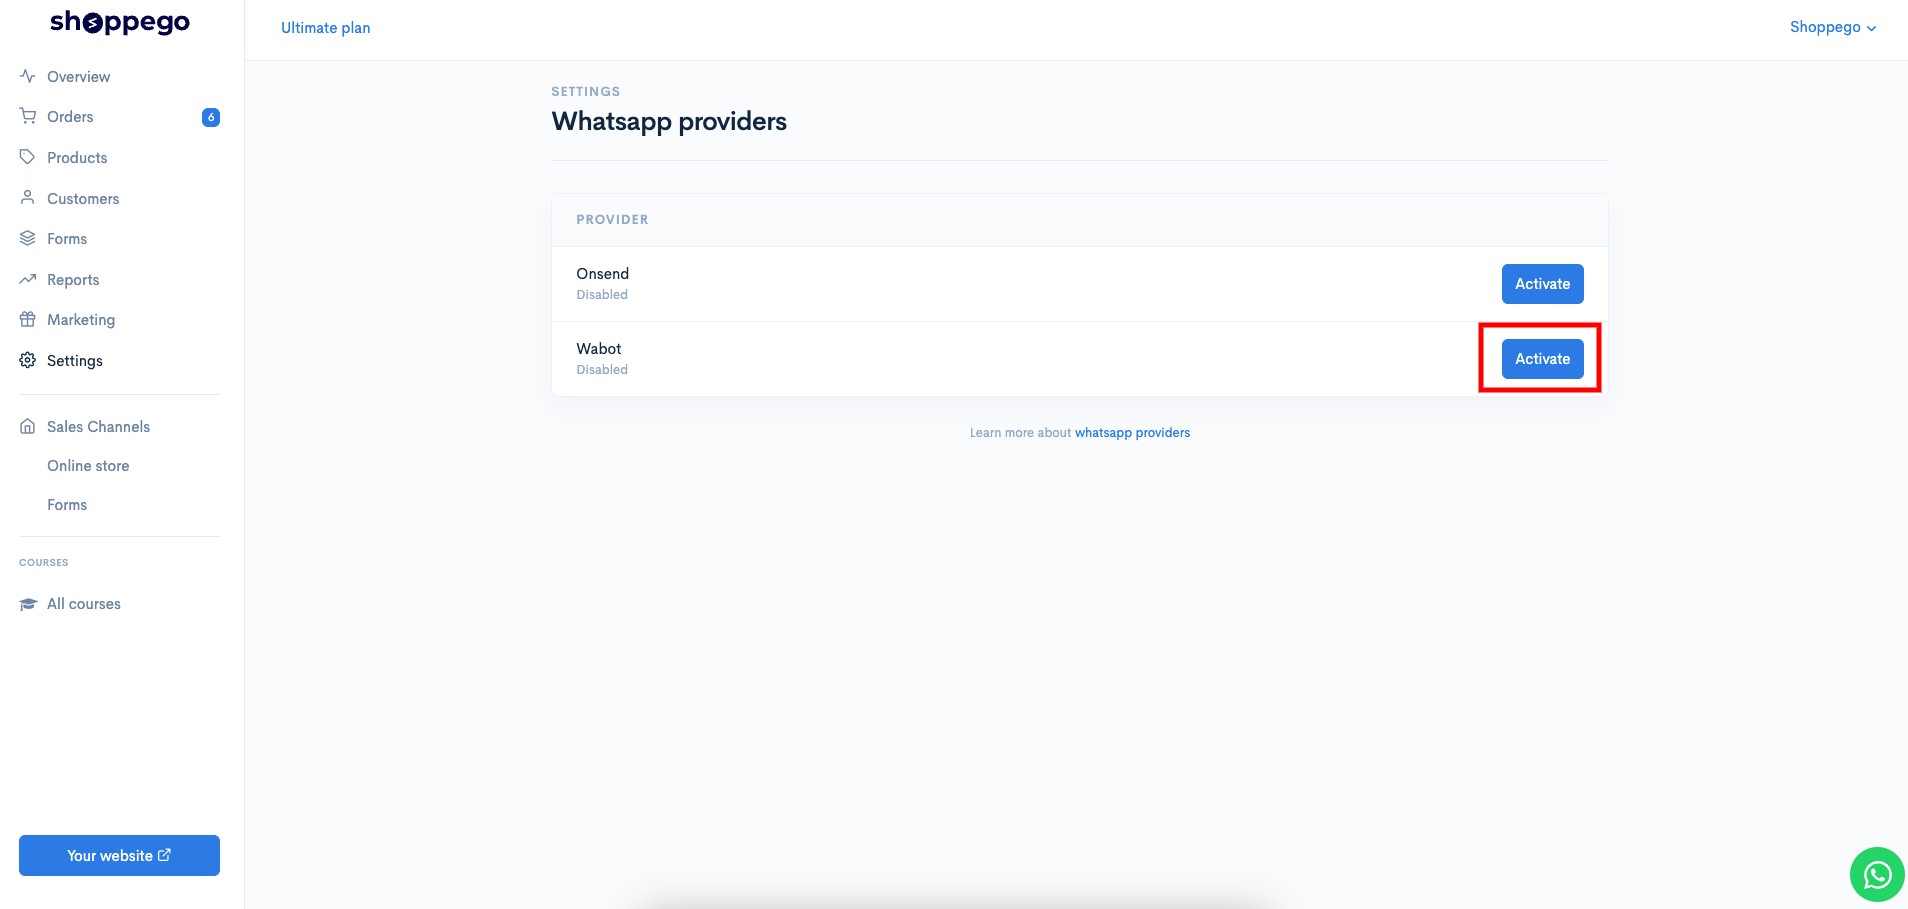
4. Click **Edit/Activate on the Wabot tab**

<figure><img src="https://3359028955-files.gitbook.io/~/files/v0/b/gitbook-x-prod.appspot.com/o/spaces%2F-Lh09fNwqqta5Vj6Wr8p%2Fuploads%2Fgit-blob-0d39986d7e0a49f41703f00d300d065c2368301f%2FSw6kzed0WQHrUyBpC0gM.jpg?alt=media" alt=""><figcaption></figcaption></figure>

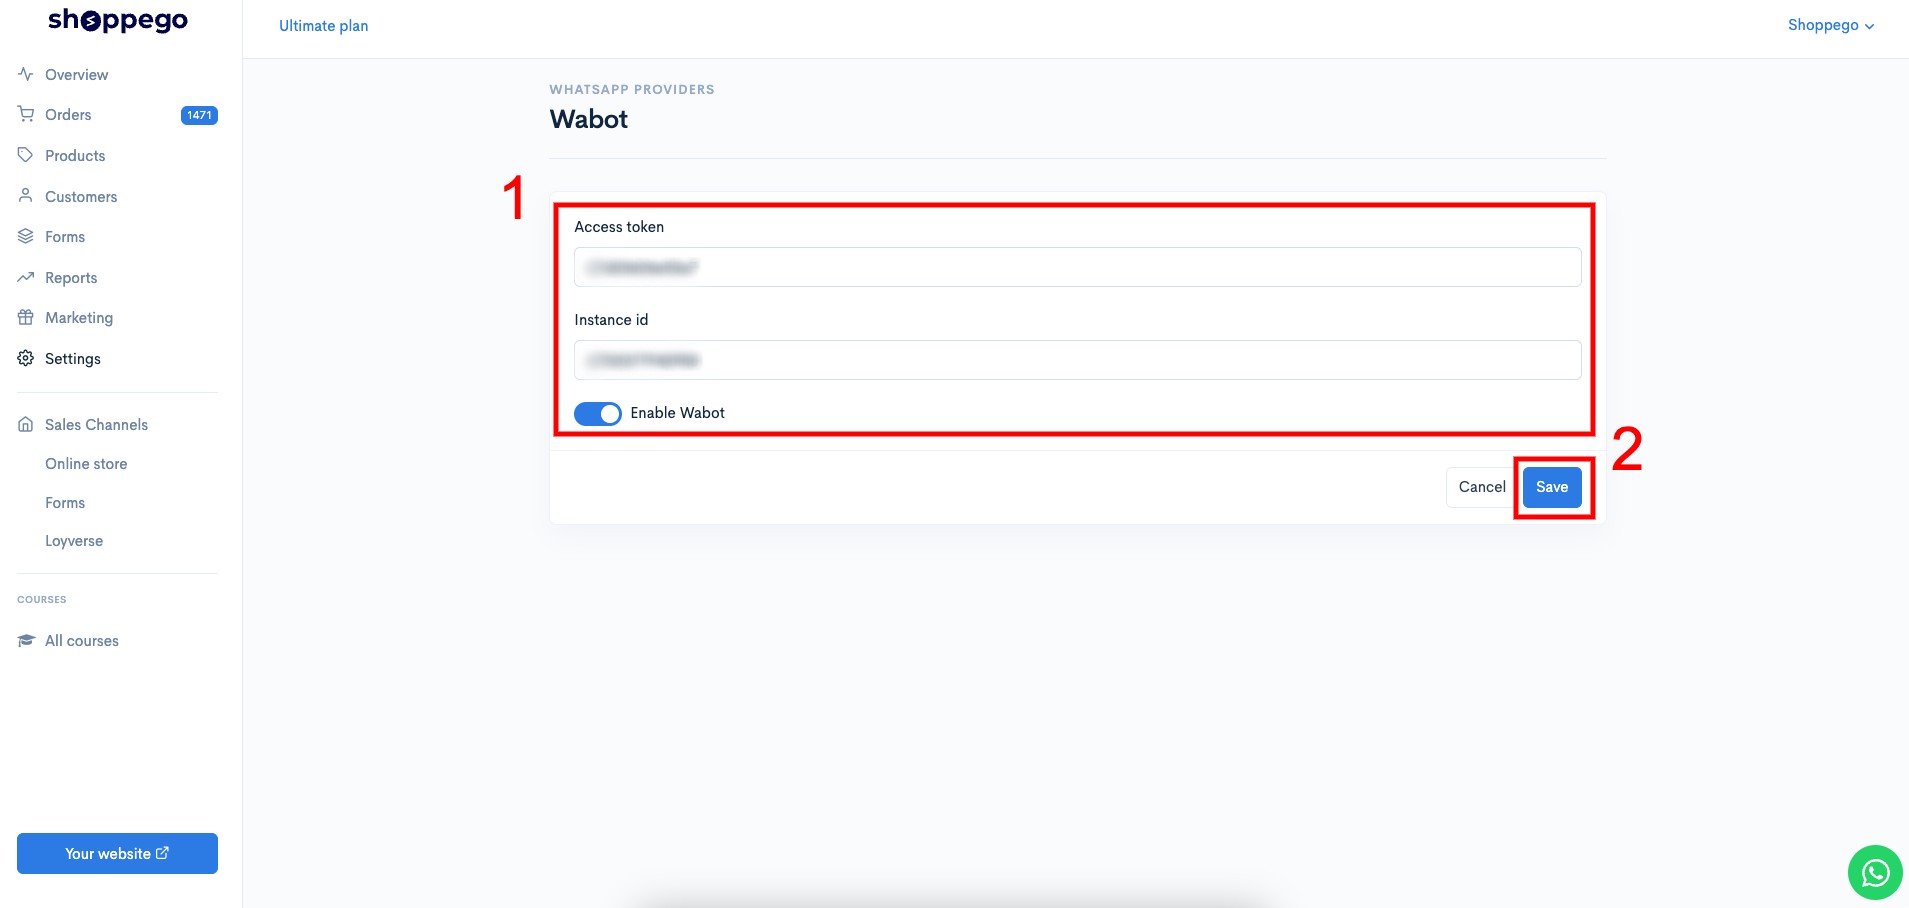
5. **Enter the** "**Access token**" and "**Instance Id**" information **that you have obtained** in the spaces provided and click **Save**.

<figure><img src="https://3359028955-files.gitbook.io/~/files/v0/b/gitbook-x-prod.appspot.com/o/spaces%2F-Lh09fNwqqta5Vj6Wr8p%2Fuploads%2Fgit-blob-4493e77ad0b84d807750334891d0b2d3a8807633%2FXbb1AmsA87Gz5Tsxwivq.jpg?alt=media" alt=""><figcaption></figcaption></figure>

Now your setting is complete.